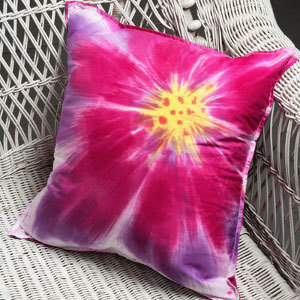
Sunburst Blossom Pillow
A Sunburst Blossom Pillow from I Love to Create is a vibrant example of tie dye projects that make wonderful home decorations and accent pieces. Add a bright throw pillow to a drab sofa for some refreshing pizzazz when you learn the tie dye techniques requires to sew this throw pillow pattern.

Materials:
- Tulip® One-Step Tie-Dye Kit™ - Ultimate Colors
- (3) small condiment cups or equivalent
- Plastic (shoebox size) container
- Sewing machine
- Plastic sheet or trash bags
- Iron
- Thread
- Paintbrushes – No. 4 liner, No. 6 round and a wide 1” brush
- Pencil
- (2) 100% cotton napkins – white – or – white cotton fabric if larger pillow is desired
- Paper towels
- Scissors
- Fiberfill
- Yardstick
Find this project and many more in our free eBook, How to Make Tie Dye Shirts, Decor, and More: 18 Tie Dye Patterns!
Instructions:
-
Wearing rubber gloves, mix dyes as directed on package.
-
Press one of the napkins and set aside for dry-brush dye technique. Dampen the remaining napkin and place in plastic container.
-
Cover table with plastic sheet or trash bags, followed by a layer of paper towels where napkin will be laid out smoothly.
-
Pour a small amount of Fuchsia, Yellow and Purple dyes into the condiment containers.
-
Using the No. 6 brush, dip into Yellow dye and brush in the Yellow center of flower, brushing outward. Refer to photo for placement. Apply dye a little heavier in center of Yellow portion.
-
Using same brush, brush Fuchsia dye around Yellow center, making sure Fuchsia extends up to the yellow. Switch to 1” wide brush and brush Fuchsia outward for the remaining petals. Brush strokes should be “loose” and not confined to a strict petal shape.
-
Dip the No. 6 brush into the Purple dye and make strokes of Purple around outer edges of petals. Refer to photo.
-
With liner brush, make Fuchsia-colored dots in center of Yellow. Let colors set 4 to 5 hours.
-
Scrunch remaining fabric in container and soak with Fuchsia and dabs of purple. Let set.
-
Machine wash, dry and press dyed napkins.
-
Stitch along seams, leaving a 4” to 5” opening at bottom.
-
Fill with fiberfill and stitch together opening.
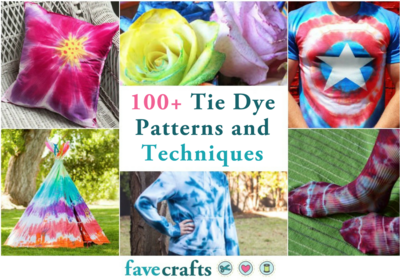
Read Next100+ Tie Dye Patterns and Techniques
Your Recently Viewed Projects
Thanks for your comment. Don't forget to share!
Marilyn B
Mar 27, 2017
Using napkins is a great idea for this little pillow because they are already squared off and no cutting or measuring is needed! Of course, you could use fabric in the same dimensions, or even any dimensions that would work best for the size pillow you desire. The instructions are great, love the flower design and especially the deep colors which would add a lovely pop to any room! Great project!
Mistress of All Ev il
May 20, 2016
This is the cutest little pillow. It would look great in my little sister's apartment. Definitely putting this on the list! FaveCraftsTieDye
Report Inappropriate Comment
Are you sure you would like to report this comment? It will be flagged for our moderators to take action.
Thank you for taking the time to improve the content on our site.