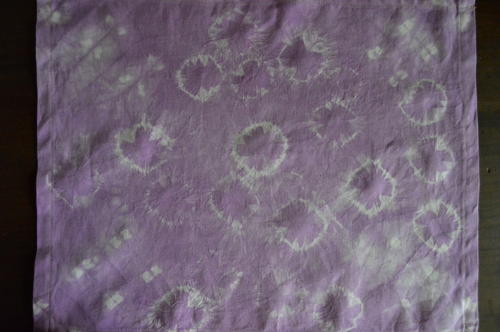
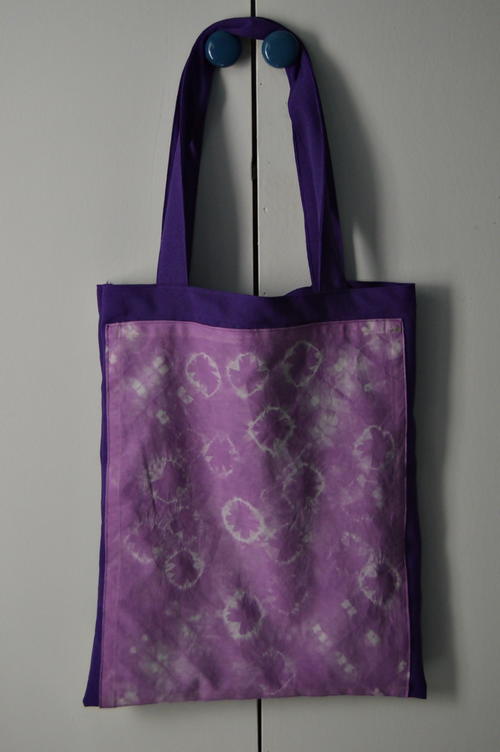
Royal Purple Tie Dye Tote Bag
Learn how to tie dye a tote bag with this summer craft.

From the Designer: "Take your tie dye skills to the next level. Make a tie dye panel that you incorporate into a lovely tote bag for the summer. The bag in the example was done in royal purple, but with this project, the sky is the limit! You can make it in any color you please, or even better, make one in every color and celebrate the warm weather with bright and bold tote bags."
MaterialsFabric
SeasonSummer
Project TypeMake a Project
Materials List
- For the Tie Dye Panel:
- 18.6” x 15.3” unbleached linen
- Packet of lilac t-shirt dye
- Roll of 1mm wide cotton twine
- 1 cup of salt
- Pair of rubber gloves
- 8 plastic clothing pegs
- 20 toy glass marbles
- Standard scissors
- Sewing machine and matching thread
- Stainless steel pot
- Iron and ironing board
- For the Tote Bag:
- Printout of the pattern sheets for the tote bag
- Pattern Sheet 1
- Pattern Sheet 2
- Pattern Sheet 3
- Pattern Sheet 4
- 40” x 40” royal purple linen
- Completed tie dye panel
- Standard scissors
- Sewing pins
- Sewing machine and matching thread
Tie Dye Tote Instructions
Instructions for Making the Tie Dye Panel:
-
Wash the linen and rinse it thoroughly in cold water to remove any sizing agent from the material.
Note: Do not add fabric softener when rinsing the linen. Allow the linen to dry and iron it thoroughly before continuing with the next step. -
Fold the linen 0.2” from the edge and iron it down neatly to keep the fold in place. Repeat on the other three sides. Then, fold the linen a second time on each side, folding it 0.6” from the edge and sew a double fold hem all around the linen. This will prevent the piece of linen from fraying.
Prepare the Piece of Linen for the Tie Dying:
-
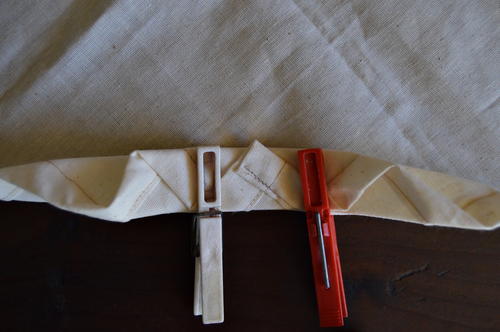
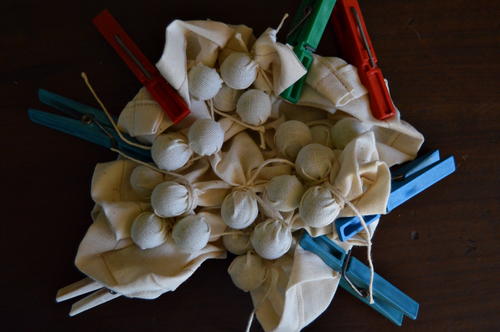
At the first corner, fold the material towards the centre in a zigzag manner ~ fold three 1” wide zigzags and use two clothing pegs to keep the zigzags in place.
-
Repeat the above step at the other three corners.
-
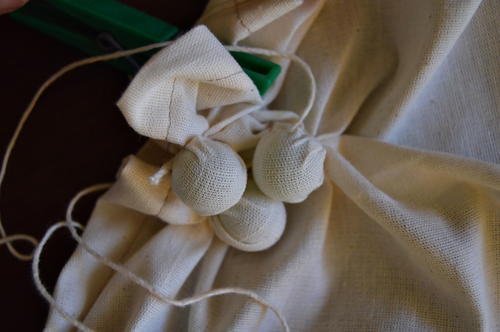
Put a marble under the piece of linen. Wrap the linen around the marble and tie around the linen with 1mm twine to keep the marble in place. Repeat with the other 19 marbles, adding the marbles at random places.
-
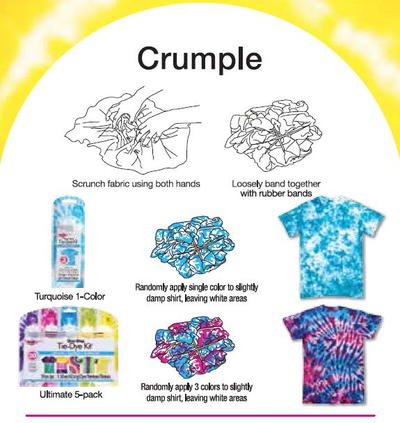
Crumple the whole piece of linen together and tie it with 1mm twine to keep it in position. Now you are ready to color!

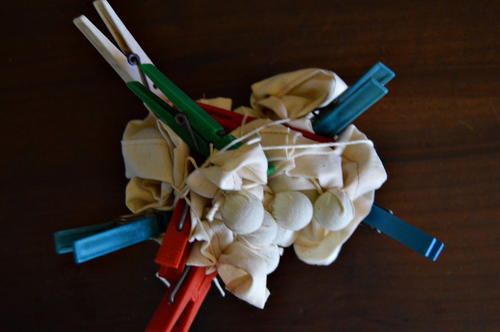
Now you are ready to color!
-
Dissolve the lilac dye powder and 1 cup of salt in a liter of boiling water.
-
Once the powder and salt have dissolved, add more water to the pot. The pot should have enough water to completely cover the piece of linen.
-
Bring the colored water to a boil.
-
Wet the piece of linen in cold water, and then add it to the pot with the boiling dye solution.
-
Keep boiling the pot on the stove for 15-20 minutes. Stir the pot regularly to make sure that the piece of linen gets dyed on all sides.
-
Note: Wear rubber gloves when following this step. Take the piece of linen out of the pot and rinse it in your sink with cold water to remove any excess dye. Keep rinsing until the water is clean and then gently cut off all the twine.
-
Hang the piece of linen in a shady area to dry.
-
Iron the piece of linen thoroughly.
Instructions for Making the Tote Bag:
-
Cut out the parts for the tote bag as indicated on pattern sheets 1 and 2.
-
Keeping the fold on your right, place the tie dye panel on the front of the bag as indicated on pattern sheet 3, i.e. 1” from the fold and 1.4” from the bottom. Use sewing pins to pin it in place and then stitch the panel to the bag.
-
Take one of the straps and lay it out on your ironing board. Make a fold of 0.4” along each long side and iron it to keep it in place. Now fold the strap in half and sew the opening shut. Do the same with the second strap.
-
Fold the top side of the bag 0.6” from the edge and iron it down neatly to keep the fold in place. Then, fold it a second time, folding it 1.2” from the edge and sew to keep in place. See on pattern sheet 4 where the stitch lines should be added.
Use a French Seam to Stitch the Left Sides and Bottom Together:
-
Put the wrong sides of bag together and stitch the sides and bottom together, using a seam allowance of 0.4”.
-
Trim the seam allowance to 0.2”.
-
Turn the bag over so that the right sides of the bag are together. Use a scissor to gently poke out the corners, and flatten the seam with the iron.
-
Stitch again using a seam allowance of 0.4”.
-
Turn the bag over again.
Attach the Straps:
-
Now you need to attach the straps. On the top of the bag, along the inside, measure where the straps should be placed. Use sewing pins to pin them in place and then sew them to the bag.
Read NextAmong Us Tie Dyed Hat