Modern Turquoise Tie Dye Design

In the Designer’s Words: “Fashion trends come and go, and in recent times, tie and dye has made a comeback. Make a statement with this modern twist on an old technique. The turquoise color is bold, and the short can be used as is, or you can spice it up with the use of fabric pens. You can add roses to the front of the shirt, or use any other design to individualize your style.”
Learn how to tie dye a t-shirt in a totally trendy turquoise color with this free tie dye technique tutorial. This easy-to-follow list of tie dye instructions shows you how to make tie dye t-shirts in a deep turquoise color that will add a splash of brightness to any wardrobe. If you are looking to add even more flair to your tie dye t-shirt design, follow the additional instructions on how to add a rose to your DIY t-shirt.
This fantastic tutorial shows you exactly how to tie dye a t-shirt that you will actually want to wear. From washing your tee beforehand to tying 3 different designs onto one tie dye t-shirt, this tie dye technique is sure to be your new favorite. Follow along with this tutorial step-by-step or simply use one of the techniques listed in the Creating Your Tie Dye Design section to tye up your own design.
Time to CompleteWeekend project

Project TypeMake a Project
Materials List
- White ladies crew neck long sleeve t-shirt
- Tingecor Guarany turquoise fabric dye powder
- String
- 1 cup of salt
- Pair of rubber gloves
- Standard scissors
- Stainless steel pot
- Optional: Acrilex Acrilpen fabric pens in black (520 Preto); dark blue (501 Azul Turquesa); dark green (513 Verde Musgo); purple (516 Violeta); pink (537 Rosa); maroon (565 Vinho); yellow (505 Amarelo Ouro) and brown (531 Marrom)
How to Tie Dye a T-Shirt
Washing Your Tie Dye T-Shirt
-
Wash the t-shirt and rinse it thoroughly in cold water to remove any sizing agent from the material.
Note: Do not add fabric softener when rinsing the shirt. -
Allow the T-shirt to dry thoroughly and iron it lightly to remove any wrinkles from the material.
Creating Your Tie Dye Design
-
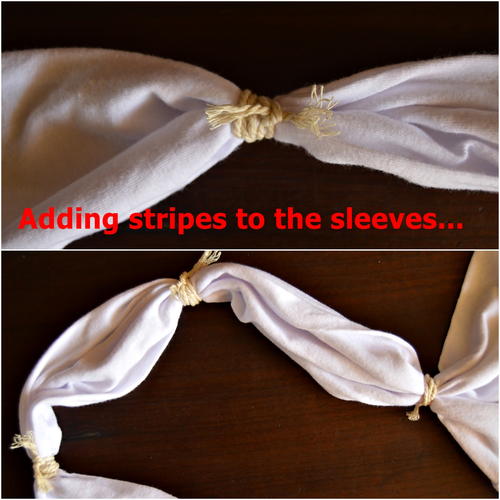
Lay the shirt out flat on a surface. Gather the bottom of the left sleeve in a zig-zag manner and tie a string around the gathered material. Repeat two more times so that you will have three stripes on the left sleeve. Do the same on the right sleeve.
-
Create three polka dots on the left shoulder, and three on the bottom right of the shirt. To create a polka dot, pinch a section of the shirt between your fingers. Keep the pinched section in your left hand, while using the right hand to pinch another section near the first. Again, transfer the second pinched second to your left hand. Pinch a third section with your right hand and tie a string around all three pinched sections together.
-
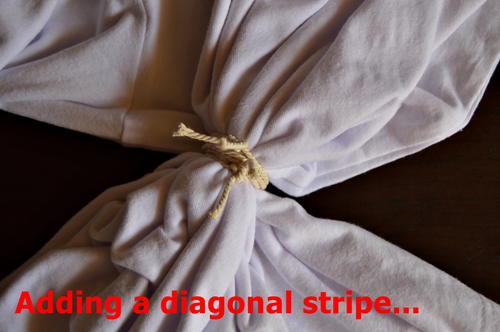
Add a diagonal line to the middle of the shirt. Gather the middle of the shirt diagonally in a zig-zag manner and tie a string around the gathered material.
-
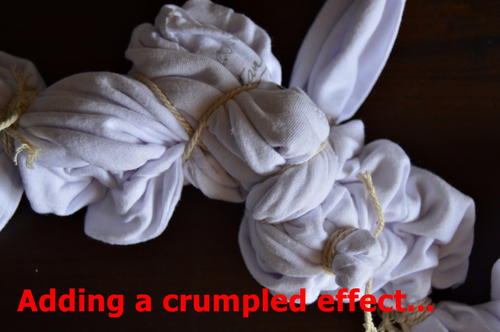
Crumple the shirt above the diagonal line and and tie it with a few strings to keep it in place. Now you are ready to color the shirt!

Easy Tie Dye Instructions
-
Dissolve the dye powder in a litre of boiling water.
-
Once the powder has dissolved, add more water to the pot. The pot should have enough water to completely cover the shirt.
-
Add a cup of salt and bring to a boil.
-
Wet the shirt in cold water, and then add it to the pot with the boiling dye solution.
-
Keep boiling the pot on the stove for 30 minutes. Stir the pot regularly to make sure that the shirt gets dyed on all sides.
Note: Make sure that you wear rubber gloves when following this step. Take the shirt out of the pot and rinse it in your sink with cold water to remove any excess dye. Keep rinsing until the water is clean and then gently cut off the strings. -
Hang the shirt in a shady area, or toss it into the tumble dryer.
Adding a Rose (Optional)
-
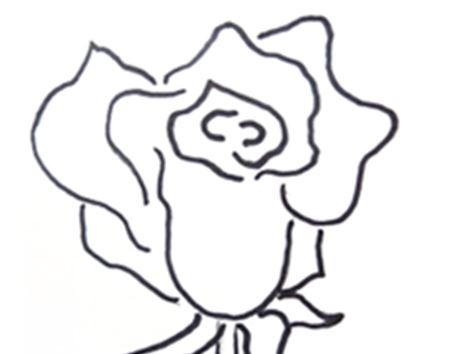
Use the fabric pens to draw random roses onto the top left shoulder of the shirt. Below is an example of how to draw a simple rose:
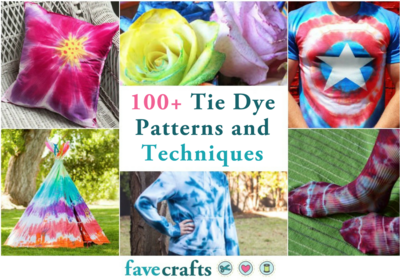
Read Next100+ Tie Dye Patterns and Techniques
Your Recently Viewed Projects
Thanks for your comment. Don't forget to share!
flowergirl
Jul 17, 2018
Tie dye designs are the best ways to upcycled any plain t-shirts you have and rock them during summer. I love orange and yellow projects but this turquoise is popping. I love how easy it is to follow through with this project, there's photos showing you how to do it the entire way.
Heidi Lorene
Mar 21, 2016
What a well written pattern. I have been wanting to try tie dying and this looks like a perfect easy first project with everything written out so well. Now to wait till it is warm enough to do it outside. Does any body have any tips or suggestions for me? Thanks
Kaylee
Apr 04, 2016
Hi Heidi! Check out our new, big collection of tie dye step by steps and more for some tips: http://www.favecrafts.com/Tie-Dye/How-to-Tie-Dye-Step-by-Step-Instructions Hope that helps! -Kaylee, Editor of FaveCrafts.com
Report Inappropriate Comment
Are you sure you would like to report this comment? It will be flagged for our moderators to take action.
Thank you for taking the time to improve the content on our site.