Pink Butterfly DIY Tie-Dye Shirt
Make this sweet DIY craft for your sweet little girl.

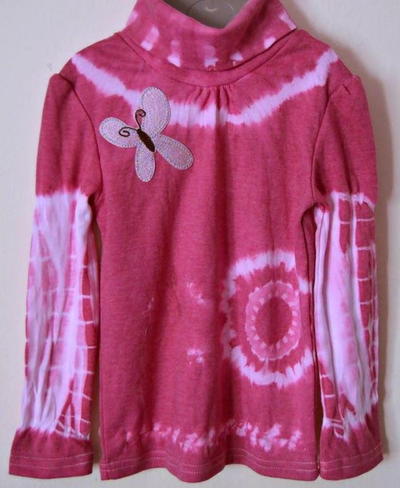
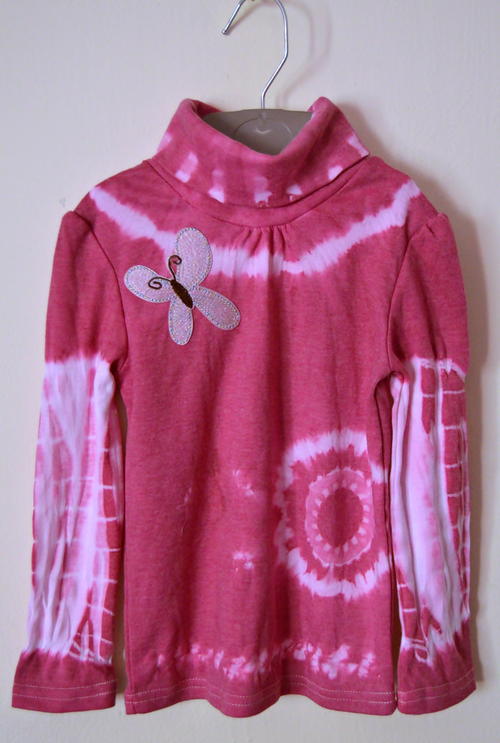
Who wants a boring white t-shirt? Turn that plain shirt in your little girl's closet into a colorful work of art with some unique tie-dye patterns in this Pink Butterfly DIY Tie-Dye Shirt. Add a butterfly appliqué to this perfect pullover and your princess will be ready to leave her school friends green with envy. And what little girl doesn't love wearing pink every so often?
This is one of many fun tie-dye projects that is easy to follow. Your daughters, granddaughters, nieces, or other little friends could even craft with you and learn how to tie-dye a shirt for themselves. They may enjoy it so much that they'd want to create other tie-dye projects. Your sweet little girl will absolutely love wearing this adorable and one-of-a-kind shirt to school, to church, to the playground ... and everywhere else she goes!
Estimated Cost$11-$20
Time to CompleteWeekend project
Primary TechniqueDIY Craft

Project TypeMake a Project
Materials List
- White girls' polo neck long sleeve T-shirt (the one used was for a girl aged 4-5 years)
- 3” high pink fabric butterfly applique
- Tingecor Guarany marvelous pink fabric dye powder
- No-sew fabric glue (such as Bostik Sew Simple)
- 2” wide round plastic cookie cutter with a scallop edge
- Three plastic washing pegs
- One elastic rubber band
- A5-sized cardstock
- String
- Needle and crochet thread
- One cup of salt
- Pair of rubber gloves
- Standard scissors
- Stainless steel pot
Instructions
Wash the Shirt
-
Wash the t-shirt and rinse it thoroughly in cold water to remove any sizing agent from the material.
Note: Do not add fabric softener when rinsing the shirt. -
Allow the shirt to dry thoroughly and iron it lightly to remove any wrinkles from the material.
Prepare the Shirt
-
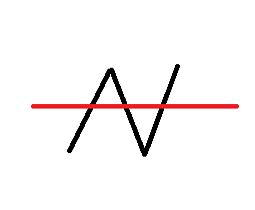
Start with the top of the polo neck. Make a fold at the top of the neck as indicated in black in the diagram below, and use a peg to keep the folds together (see red in diagram). Repeat two more times at top of neck.
-
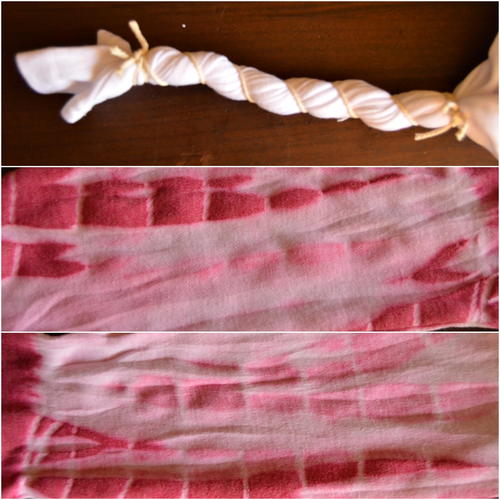
Half-way down the polo neck, gather the material together and tie it with a string to keep it in place.
-
Just below the polo neck, gather the material of the shirt’s body together and tie it with a string to keep it in place.
-
Put the two sleeves on top of each other and twist the sleeves together. Tie with string, wrapping the string around the sleeves in the opposite direction used when twisting them.
-
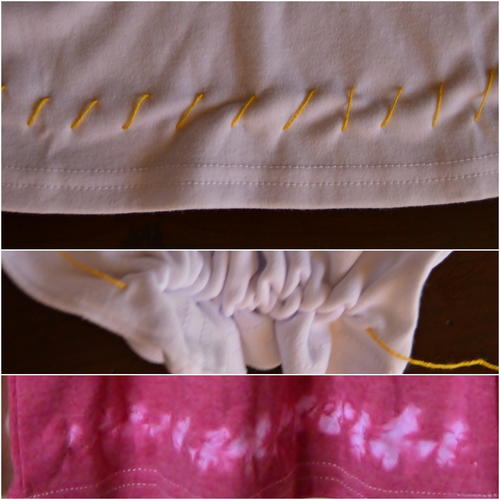
At the bottom of the shirt, use the needle and crochet thread. Using a running stitch, thread the shirt in a zig-zag pattern and pull the running stitches together. Secure the thread with a knot.
-
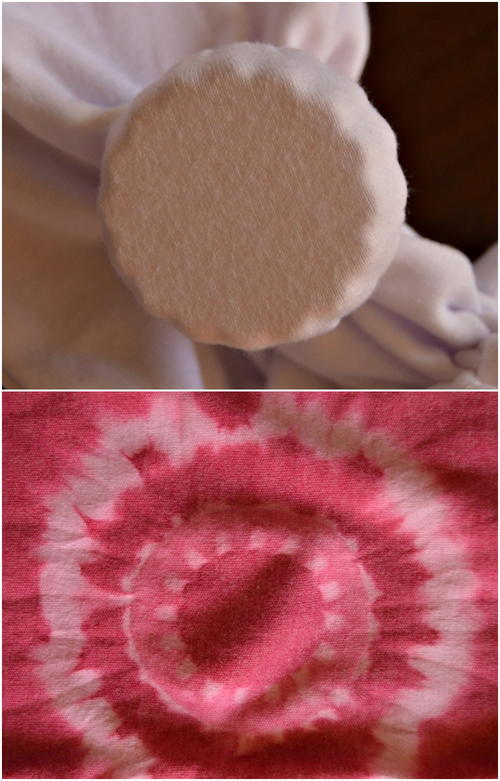
Put the cookie cutter behind the shirt and wrap the material tightly around the cookie cutter. Secure with the elastic band.
-
Now you are ready to make your DIY tie-dye shirt!
Prepare the Dye
-
Dissolve the pink dye powder and a cup of salt in a liter of boiling water.
Note: You can also make your own natural dye for this tie-dye project. -
Once the powder and salt have dissolved, add more water to the pot. The pot should have enough water to completely cover the shirt.
-
Bring the colored water to a boil.
Tie-Dye the Shirt
-
Wet the shirt in cold water, and then add it to the pot with the boiling dye solution.
-
Keep the pot boiling on the stove for 30 minutes. Stir the pot regularly to make sure that the shirt gets dyed on all sides.
-
Take the shirt out of the pot and rinse it in your sink with cold water to remove any excess dye. Keep rinsing until the water is clean and then gently cut off the strings.
Note: Wear rubber gloves when doing this step. -
Hang the shirt in a shady area or toss it into the tumble dryer. Read more about how to set tie-dye in fabric.
Add the Appliqué
-
Put the t-shirt flat on the working surface. Slide the piece of cardstock inside the shirt between the front and back sides where your fabric appliqué will go. (This will prevent the glue from staining the back.) Keep this cardstock in place until you have finished the design and the shirt has dried for 24 hours.
-
Affix the butterfly appliqué with the fabric glue.
-
Allow the shirt to dry flat for 24 hours.
Please comment and let us know:
What other pieces of clothing would you like to tie-dye?
Read Next100+ Tie Dye Patterns and Techniques