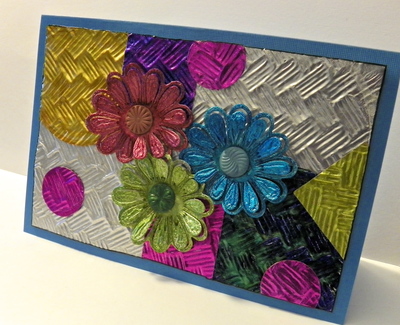
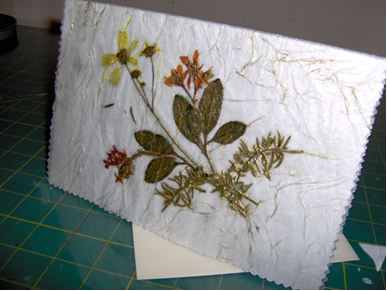
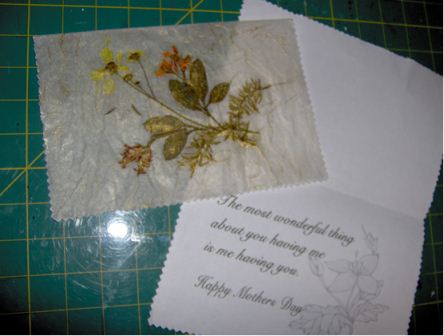
Antique Any Occasion Pressed Flower Card
This is an old card craft I have improved on over the years that was handed down from a friend’s mother. A good family craft. You can leave the inside of the card blank for hand written notes or print a verse with pictures etc. on the inside paper from your computer. You can make these in any size you wish and buy envelopes to fit. Learn more about me, Berta Gilholm, by reading my designer profile.
Materials:
- Pressed flowers and leaves
- 2 tbsp. white glue plus 1 tsp. water, Glue stick
- Wax Paper cut in 8 ½ “x 11” sheets
- White or Beige Tissue paper like Kleenex (the non lotion kind)
- Soft paint brushes
- Gold dust or glitter (colors of your choice) found in craft stores, toothpick
- Watercolor or permanent ink markers
- White office paper, 8 ½” x 11”
- Envelopes 5 ¾” x 8 ¾”
- Pinking shears
- Large flat cookie pan or covered area to work with glue
Instructions:
- First take the kids for an outing and pick small weed flowers and leaves. Press them flat in a large book between 2 pieces of wax paper in a dry place at least 3 or 4 days. They look really good semi-colorful.
- Lay down one sheet of office paper, tear off a piece of wax paper about 14 inches long to and center to overlap and cover the paper. Fold the two pieces in half together and crease the fold line.
- Open up the wax paper and the white paper so that the fold line is in the middle laying vertically in front of you,the bottom part of this will be the front of the card. Lay dried flowers and leaves in a design on top of the wax paper in the area for the front half of the card.
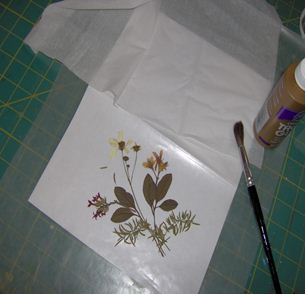
- Take one tissue and divide the double sheets so you have two. Lay one sheet horizontally, gently over the dried weeds (try not to move your design). Mix white glue and water in a cup, to form watery glue. Hold edge of tissue and dab with glue gently and generously onto tissue, covering weeds and blank areas, pouncing around weeds gently with the soft brush to give them definition, the wrinkles are normal and give the card character, eliminate some using gentle strokes towards the outside of the tissue. Lay the other tissue on the uncovered wax paper overlapping tissues slightly and stroke on glue until completely covered in that area.
- Let the wax paper weeds dry for about an hour and highlight very lightly the weeds, flowers and stems with colored markers.
- Dip the tooth pick into the gold dust, holding at an angle; blow the dust off the toothpick across the card in a pattern of your choice. Dusting over the areas of the highest parts of the weeds and wrinkles makes for a beautiful effect. For Holidays you can apply glitter in holiday colors after or before the dust or leave the card as is.
- If making a printed verse for a holiday, print out the verse making sure you position it on the white paper as if making a card (centered and on the bottom inside half). Let the card dry at least 24 hours. Lay the wax paper weed side out, and line up over the white paper verse side in and re-crease the fold. Open up both and rub the glue stick over the blank side of the white paper. Place the wax paper over the white (blank side to blank side) and press gently with your hands, so they stick. Let this dry about an hour or two.
- Trim all the way around card with pinking shears of fancy edged scissors.
Read Next64 Handmade Cards for Every Occasion
Your Recently Viewed Projects


Thanks for your comment. Don't forget to share!
ROMASREDESIGNS
Jul 22, 2010
In my opinion this is a wonderful craft. It can be done with the kids, nature, recycables can be used and what better way to say "I CARE" than with something homemade.
Crafter 6895349
Jun 13, 2010
Since I need to make multiples of cards for donating I used dried flowers laid out on plain paper and then made copies of it using white of off-white cardstock. I made these copies in a variety of sizes to accommodate different size cards, and because of the variety of colors in the layout I can use different colored cardstock as my base.
Report Inappropriate Comment
Are you sure you would like to report this comment? It will be flagged for our moderators to take action.
Thank you for taking the time to improve the content on our site.