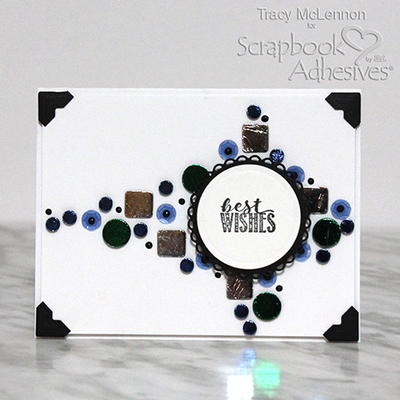
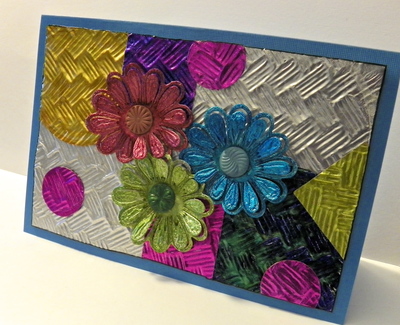
Mosaic Best Wishes Card

Make a simply beautiful best wishes card featuring a mosaic look! This gorgeous card making idea from Scrapbook Adhesives by 3L features fun adhesives that create a dimensional effect.
You don't need to weigh down your card with heavy embellishments to create the appearance of mosaics. All you need are your favorite foils paired with these lovely 3D shapes to get the effect you're looking for.
The finished results are so wonderful. This is a classy card perfect for anyone you want to send a little good luck message to. This works well for graduations or other major life events!
Time to CompleteIn an evening
Primary TechniquePaper Crafts
Project or Page SizeCard

Project TypeMake a Project
Materials List
- Scrapbook Adhesives by 3L® Adhesive Dots Micro
- Scrapbook Adhesives by 3L® 3D Foam Circles Black Mix
- Scrapbook Adhesives by 3L® 3D Foam Squares Black Small
- Scrapbook Adhesives by 3L® Thin 3D Foam Squares Black Mix
- Scrapbook Adhesives by 3L® Crafty Foam Tape White
- Scrapbook Adhesives by 3L® E-Z Runner® Permanent Fine Adhesive Dispenser
- Scrapbook Adhesives by 3L® Creative Photo Corners Black
- Scrapbook Adhesives by 3L® 3D Foam Creative Embellishment Kit with Foil
- Heartfelt Creations: Stamp and Etched Dies
- Nuvo: Crystal Drops in Ebony
- White and Black Cardstock
- Sequins
- Black Dye Ink
From Scrapbook Adhesives by 3L: Making a mosaic design using 3D Foam Squares and 3D Foam Circles is a fun and trendy way to design a card. The different adhesive shapes and sizes along with the sparkle of foil create a stunning background pattern. This is an easy way to Wear Your Adhesives on the Outside.
Instructions:
-
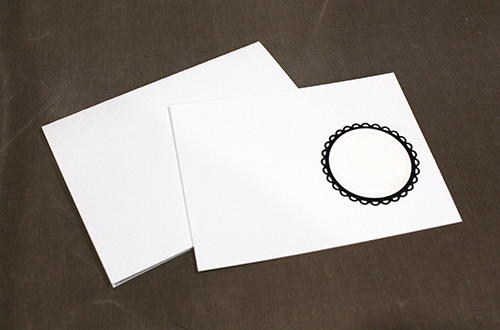
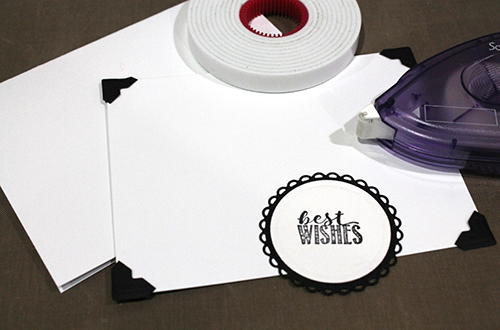
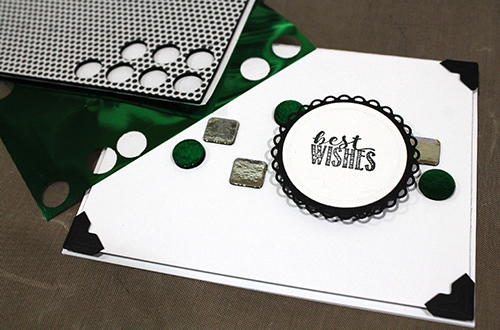
Fold in half a piece of 8.5 x 5.5-inch white cardstock for your card base. The card panel is a piece of 4 x 5.25-inch white cardstock. Die-cut a circle with white cardstock and a scalloped circle in black cardstock.
-
Stamp the sentiment onto circle with black ink. Use the E-Z Runner® Permanent Fine Adhesive Dispenser to adhere the two circles together.
-
Add Creative Photo Corners Black to the white card panel and adhere to the card base using Crafty Foam Tape.
-
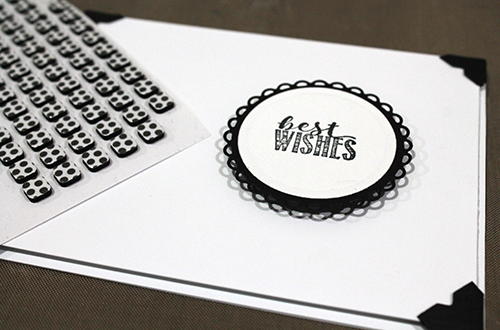
Add the layered circle to the card using 3D Foam Squares Black Small Size.
-
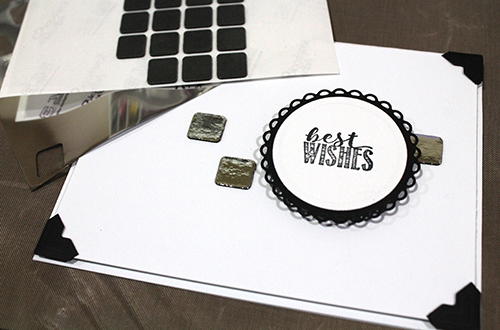
Be start the card design with Thin 3D Foam Squares Black. Place them around the circle die cut on the card panel. Add silver foil to them by simply removing the top liner, place the foil with the colored side UP, gently rub and peel off. No machine or heat needed.
-
Using the 3D Foam Circles Black in regular size and green foil, repeat the same foiling process as step 5.
-
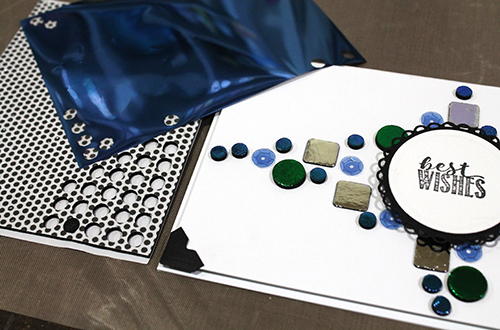
Next add the 3D Foam Circles Black in small size and blue foil, repeat the foiling process.
-
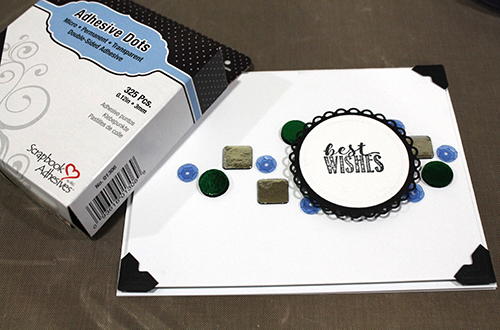
Add sequins to the card front with Adhesive Dots Micro.
-
Lastly, accent with enamel dots. Make sure to place them in and around the foiled 3D Foam shapes and sequins.
For what occasion did you make your last handmade card?
Read Next64 Handmade Cards for Every Occasion