Awesome DIY Crochet Pumpkins
This amigurumi pumpkin pattern is so simple, and it's the perfect Thanksgiving crochet craft for your centerpieces!

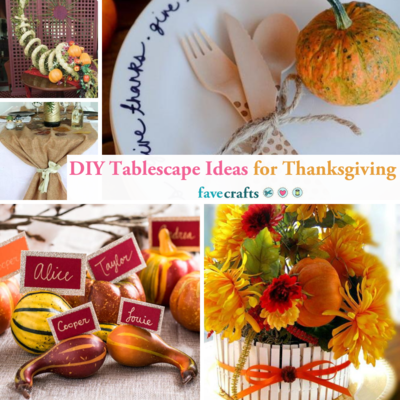
These fall craft ideas making great centerpieces for the Thanksgiving banquet table. No matter where you display these Awesome DIY Crochet Pumpkins, your home will look much more festive. These little pumpkins are so charming, that you will look forward to sharing them with your friends and neighbors. DIY fall decorating ideas have never been so adorable or so easy. Once you create these Awesome DIY Crochet Pumpkins, you will certainly in the spirit for cider and the company of loved ones.

SeasonFall
Crochet HookG/6 or 4 mm hook
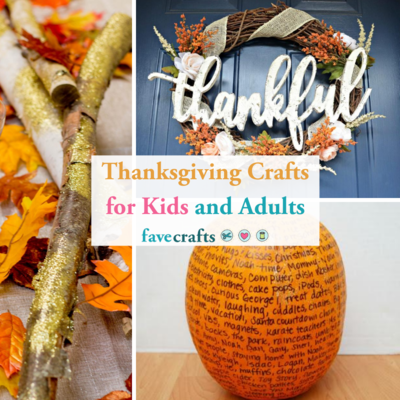
Find even more Thanksgiving project ideas in our collection of 200+ Thanksgiving Crafts for Kids and Adults.
Materials:
- Main Color (MC) Hot Orange (01628) 2
- Contrast B Sage Green (00084) 1
- Contrast A Terra Firma (02013) 1
- Size 4 mm (U.S. G or 6) crochet hook or size needed to obtain gauge.
- Stuffing.
Abbreviations:
- Beg = beginning
- Ch(s) = Chain(s)
- hdc = half double crochet
- rep = repeat
- RS = right side
- sc = single crochet
- Sc2tog = Draw up a loop in next st) twice. Yoh and draw through all loops on hook
- Sl st = Slip stitch
- sp(s) = space(s)
- st(s) = stitch(es)
- Yoh = yarn over the hook
Instructions:
Big Pumpkin
Note: Ch 2 does not count as hdc at beg of rnd.
With MC, ch 4. Join with sl st to first ch to form a ring.
- 1st rnd: Ch 2. 8 hdc in ring. Join with sl st to first hdc.
- 2nd rnd: Ch 2. 2 hdc in first hdc.
- 2 hdc in each hdc around. Join with sl st to first hdc. 16 hdc.
- 3rd rnd: Ch 2. *(Yoh and draw up a loop) 3 times in next hdc. Yoh and draw through all loops on hook. Ch 1 to close st – puff st made. 1 hdc in next hdc. Rep from * around. Join with sl st to top of first puff st. 8 puff sts.
- 4th rnd: Ch 2. *2 puff sts in next puff st. 1 hdc in next hdc. Rep from * around. Join with sl st to top of first puff st. 16 puff sts.
- 5th rnd: Ch 2. * 1 puff st in next puff st. 1 puff st between 2 puff sts. 1 puff st in next puff st. 1 hdc in next hdc. Rep from * around. Join with sl st to top of first puff st. 24 puff sts.
- 6th rnd: Ch 2. * 1 puff st in next puff st. 2 puff sts in next puff st. 1 puff st in next puff st. 1 sc in next hdc. Rep from * around. Join with sl st to top of first puff st. 32 puff sts.
- 7th rnd: Ch 2. *(1 puff st in next puff st. 1 puff st between 2 puff sts) 3 times. 1 puff st in next puff st. 1 sc in next sc. Rep from * around. Join with sl st to top of first puff st. 56 puff sts.
- 8th rnd: Ch 2. *1 puff st in each of next 7 puff sts. 1 sc in next sc.
- Rep from * around. Join with sl st to top of first puff st.
- Rep last rnd 10 times more.
- Next rnd: Ch 2. *(Puff st in sp between next 2 puff sts) 6 times.
- Miss next puff st. 1 sc in next sc.
- Rep from * around. Join with sl st to top of first puff st.
- Next rnd: Ch 2. *(Puff st in sp between next 2 puff sts) 5 times. Miss next puff st. 1 sc in next sc. Rep from * around. Join with sl st to top of first puff st.
- Next rnd: Ch 2. *(Puff st in sp between next 2 puff sts) 4 times. Miss next puff st. 1 sc in next sc. Rep from * around. Join with sl st to top of first puff st.
- Next rnd: Ch 2. *(Puff st in sp between next 2 puff sts) 3 times. Miss next puff st. 1 sc in next sc. Rep from * around. Join with sl st to top of first puff st.
- Stuff Pumpkin.
- Next rnd: Ch 2. *(Puff st in spbetween next 2 puff sts) twice. Miss next puff st. 1 sc in next sc. Rep from * around. Join with sl st to top of first puff st.
- Next rnd: Ch 2. 1 hdc in each st around. Join with sl st to first hdc. 24 hdc.
- Next rnd: Ch 2. *1 hdc in next hdc. (Yoh and draw up a loop in next st) twice. Yoh and draw through all loops on hook – hdc2tog made. Rep from * around. Join with sl st to first hdc. 16 sts.
- Next rnd: Ch 2. (Hdc2tog over next 2 sts) 8 times. Join with sl st to first st. Fasten off. Break yarn, leaving a long end. Thread end through rem sts. Pull tighty and fasten securely.
Stem
With A, ch 2.
- 1st rnd: 8 sc 2nd ch from hook. Join with sl st to first sc.
- 2nd rnd: Ch 1. 2 sc in first sc.
- 2 sc in each sc around. Join with sl st to first sc. 16 sc.
- 3rd rnd: Ch 1. Working in back loops only, 1 sc in each sc around.
- Join with sl st to first sc.
- 4th rnd: Working in both loops, Ch 1. 1 sc in each sc around. Join with sl st to first sc.
- Rep last rnd 9 times more.
- Next rnd: Ch 1. *(1 hdc. 1 dc. 1 tr. 1 dc. 1 hdc) in next sc. 1 sc in each of next 3 sc. Rep from * 3 times more. Join with sl st to first sc. Fasten off.
- Stuff Stem. Sew to top of Pumpkin.
Curly-Q
With B, ch 20.
- 1st row: (RS). 3 sc in 2nd ch from hook. *3 sc in next ch. Rep from * to end of ch. Fasten off.
- Twist clockwise to coil into Curly-Q.
- Sew at base of Stem.
Mini Pumpkin 1
Ch 2 does not count as hdc at beg of rnd.
- With MC, ch 4. Join with sl st to first ch to form a ring.
- 1st rnd: Ch 2. 8 hdc in ring. Join with sl st to first hdc.
- 2nd rnd: Ch 2. 2 hdc in first hdc.
- 2 hdc in each hdc around. Join with sl st to first hdc. 16 hdc.
- 3rd rnd: Ch 2. *(Yoh and draw up a loop) 3 times in next hdc.
- Yoh and draw through all loops on hook. Ch 1 to close st – puff st made. 1 sc in next hdc. Rep from * around. Join with sl st to top of first puff st. 8 puff sts.
- 4th rnd: Ch 2. *2 puff sts in next puff st. 1 sc in next sc. Rep from * around. Join with sl st to top of first puff st. 16 puff sts.
- 5th rnd: Ch 2. *1 puff st in each of next 2 puff sts. 1 sc in next sc.
- Rep from * around. Join with sl st to top of first puff st. 16 puff sts.**
- Rep last rnd 4 times more.
- ***Next rnd: Ch 2. *1 puff st between 2 puff sts. 1 sc in next sc.
- Rep from * around. Join with sl st to top of first puff st. 8 puff sts.
- Next rnd: Ch 2. *1 sc in next puff st. 1 sc in next sc. Rep from * around.
- Join with sl st to first sc. 16 sc.
- Stuff Pumpkin.
- Next rnd: Ch 1. *1 sc in each of next 2 sc. Draw up a loop in each of next 2 sc. Yoh and draw through all 3 loops on hook - sc2tog made. Rep from * around. Join with sl st to first sc. 12 sts.
- Next rnd: Ch 1. *1 sc in next sc. Sc2tog over next 2 sts. Rep from * around. Join with sl st to first sc. 8 sts.
- Next rnd: Ch 1. *Sc2tog over next 2 sts. Rep from * around. Join with sl st to first sc. 4 sts. Fasten off, leaving a long end. Thread end through rem sts. Pull tightly and fasten securely.***
Mini Pumpkin 2
- Work from ** to ** as given for Mini Pumpkin 1.
- Rep last rnd 6 times more.
- Work from *** to *** as given for Mini Pumpkin 1.
Stem
With A, ch 2.
- 1st rnd: 9 sc in 2nd ch from hook. Join with sl st to first sc.
- 2nd rnd: Working in back loops only, 1 sc in each sc around. Join with sl st to first sc.
- 4th rnd: Working in both loops, ch 1. 1 sc in each sc around. Join with sl st to first sc.
- Rep last rnd 5 times more.
- Next rnd: Ch 1. *(1 hdc. 1 dc. 1 hdc) in next sc. 1 sc in each of next 2 sc. Rep from * twice more.
- Join with sl st to first sc. Fasten off.
- Stuff Stem. Sew to top of Pumpkin.
Curly-Q
With B, ch 16.
- 1st row: (RS). 3 sc in 2nd ch from hook. *3 sc in next ch. Rep from * to end of ch. Fasten off.
- Twist clockwise to coil into Curly-Q.
- Sew Curly-Q to Mini Pumpkin 1.
- Sew Stem to Mini Pumpkin 2.
More Crochet Pumpkin Patterns to Try

If the above crochet pumpkin pattern is your favorite or you love it so much that you want to make even more, check out the rest of our crochet pumpkin projects!
- Baby Pumpkin Crochet Beanie
- Halloween Crochet Pumpkin
- Orange Pumpkin Crocheted Pincushion
- Mini Crochet Pumpkin
More Crafty Ideas For You
If you enjoyed creating Awesome DIY Crochet Pumpkins, you might want to try your hand at making some adorable crochet fall leaves to complement your pumpkin patch. These can be used as decorations for your home or even as accents for your Thanksgiving table. They are a great way to add a touch of autumnal charm to any space.
For those looking to further hone their crochet skills, we suggest tackling a crochet pumpkin pillow project. This fun and festive craft will not only enhance your home decor for the fall season but also provide a cozy touch to your living space. You can customize the colors and sizes of the pumpkins to suit your personal style, making each pillow truly unique.
If you enjoy creating crochet projects for others, consider making a set of crochet pumpkin coasters. These cute and functional coasters make a great homemade gift for friends and family, or can add a festive touch to your own coffee table. They are a quick and easy project that is perfect for crocheters of all skill levels.
No matter which project you decide to take on next, remember to have fun and enjoy the process of creating something beautiful with your own hands. Happy crafting!
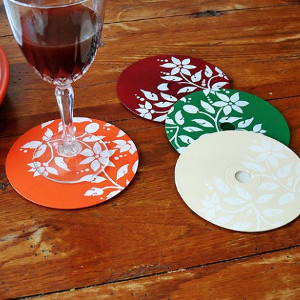
Read NextPretty Stenciled Disc Coasters
Your Recently Viewed Projects
Thanks for your comment. Don't forget to share!
elocin1104 2800379
Jul 07, 2018
These pumpkins are too cute! The best thing about them is that you can make them early in the fall and leave them out as decorations for the whole season. They would make a great table center piece. You could also make a garland, stringing them together. That would be an awesome wall decoration.
Report Inappropriate Comment
Are you sure you would like to report this comment? It will be flagged for our moderators to take action.
Thank you for taking the time to improve the content on our site.