Embroidered Pumpkin
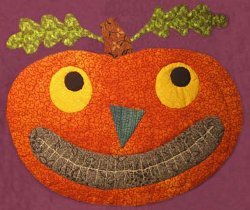
Embroider a fun pumpkin to decorate your home this Halloween. Homemade Halloween decorations can be easy and keep your time occupied while you wait for the holiday.
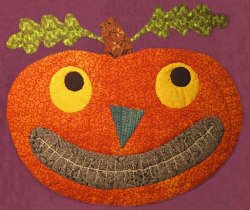
Materials:
- Fabric (included in pattern)
- Cotton thread in colors that match the fabrics (for applique or satin stitching)
- Mechanical or traditional chalk pencils in white and black/gray
- Applique pins and needles (or fusible web, if doing fusible applique)
- Embroidery floss or perle cotton in white and green
Pattern
Instructions:
- I used needleturn applique to stitch my punkinhead, but if Halloween is just around the corner, you could also use fusible web to whip up this guy in a hurry.
- If you choose to do needleturn applique, you can use the patterns to make templates, and then trace around them onto the fabric, OR you can place the pattern face up on a brightly-lit window or lightbox, and trace around the pieces directly onto your fabric, using a chalk pencil.
- Make sure to leave a 3/16” seam allowance around each piece before you cut it out. Then pin the fabric pieces to the background and applique them down.
- For fusible applique, copy the pattern pieces in reverse onto a paper-sided fusible product. Iron them onto the fabric, following the manufacturer’s instructions. Cut them out on the line, peel off the paper, position onto the background fabric, and fuse them down. Then use a blanket stitch or machine satin stitch to secure the applique pieces to the background fabric.
- The dotted lines on the pattern indicate embroidery.
- Embroider the teeth using white embroidery floss or perle cotton, and the veins in the leaves using green. Don’t do hand embroidery?
- You could quilt the lines with a bold contrasting thread, or simply use a Pigma pen and draw the details! Layer, baste and quilt as desired. Enjoy!

![14 Christmas Crafts for Adults [by 365 Days of Crafts]](http://irepo.primecp.com/2018/07/380843/Christmas-Crafts-for-Adults-by-365-Days-of-Crafts_Large400_ID-2840484.png?v=2840484)
