


This project was submitted by one of our readers, just like you.
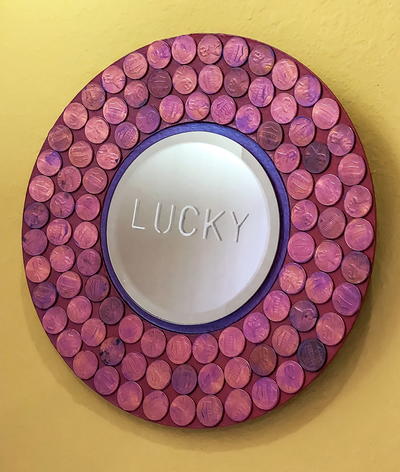
“Lucky” Penny Wall Decor

Lucky Penny Wall Decor
From the Designer: "Find a penny, pick it up... and all the day you'll have good luck! So what does one do with all those pennies? Make some fun and whimsical wall decor of course! LUCKY for me that I happened to have a papier-mâché craft plate in my stash just waiting for it's turn to be transformed. Using a Xyron sticker maker, I have collaged a dollar or two from my LUCKY penny stash onto the plate – all painted with shimmery paints and my favorite color... PURPLE!"
Primary TechniqueGeneral Crafts

Project TypeMake a Project
Materials List
- 10" papier-mâché craft plate
- Xyron 3" Sticker Maker
- Plaid Color Shift Paints: 5126 Red Flash, 5194 Black Flash, 5132 Purple Flash
- 5" Beveled Mirror for candle base
- Marvy White Chalk Bistro Pen
- Lettering Stencil
- Paintbrush and cotton swab
- awl or anywhere punch
- recycled soda can tab and approx. 3" of picture hanging wire
- stash of pennies
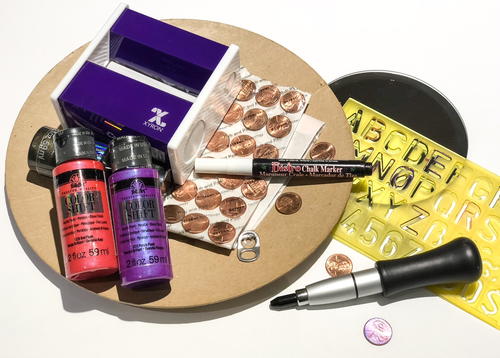
Instructions
-
Gather supplies and prepare items for painting. Before painting plate, I used an anywhere punch to add two holes to the plate where I will affix a recycled soda can tab to serve as a hanger when complete. I gather a couple dollars of pennies and place onto plate until surface of outer rim is full. Center will be covered with a mirror.
-
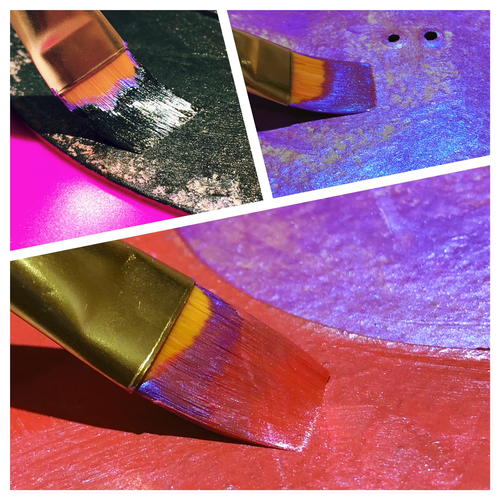
Using a brush, paint center of plate with Plaid Color Shift Purple Flash; then outer ring with Plaid Color Shift Red Flash. When Dry, apply Plaid Color Shift Black Flash to backside of plate. Add second coat of Red and Purple Paint. Paint/touch up edges using a cotton swab. Set aside to dry.
Note: click any of the images for larger version. -
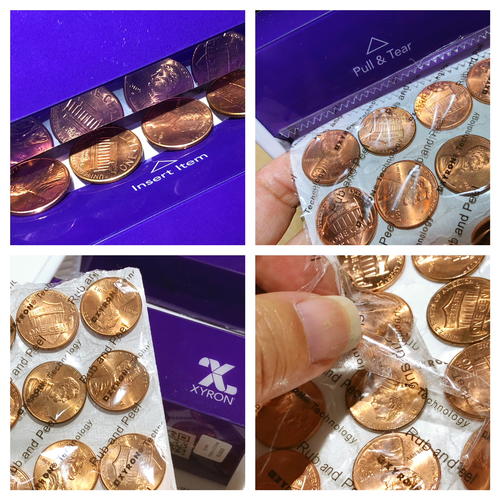
Feed four pennies at a time into Xyron sticker maker and pull through slightly past pennies, which will apply adhesive and backing. Repeat until all pennies are backed with adhesive. Pull a small amount extra and tear sheet from dispenser. Gently rub all pennies securing adhesive, pull back clear backing to remove excess adhesive, and ball up backing and roll around surface to pick up any loose strands. Repeat process of adding adhesive to back of 5" mirror round using larger Xyron 510 sticker maker.
-
Add a patina and a bit of color to pennies with a dry-brushed coating of Plaid Color Shift Purple Flash.
-
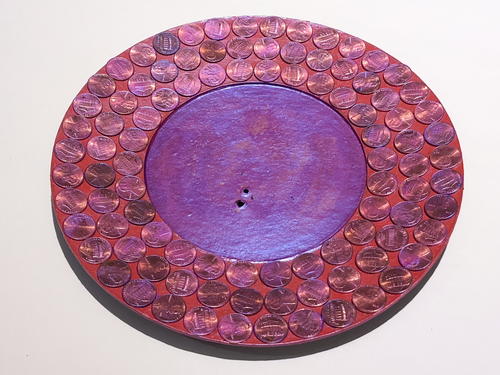
Peel back pennies from sticker backing and place around plate, (I chose to alternate heads up and tails up).
-
Wrap picture hanging wire through punched holes to affix recycled soda can tab to serve as a picture hanger. Cut away excess wire and press flat.
-
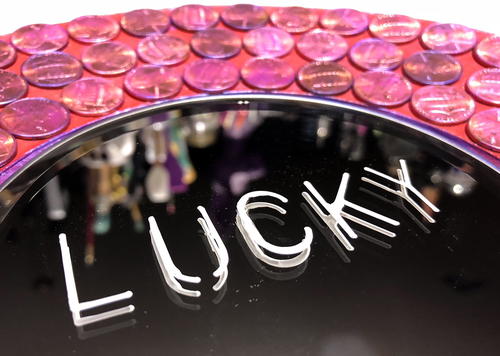
Expose adhesive on back of mirror and place in center of plate, covering the wire holding picture hanger.
-
Add the word "LUCKY" using Marvy White Chalk Bistro Pen and a lettering stencil. I started in center with the letter "c" and worked outward, letting the ink dry before adding next letter.
-
Project is complete and ready to hang!
NotesThis quick and easy project can be completed in an evening and can be customized using a variety of colors and collaged items. How fun would this be with buttons, ribbons, tickets or game pieces? You can use pretty much anything as long as the items are thin enough to be fed into Xyron sticker maker. The possibilities are endless!

Read NextGalvanized Metal Bunting