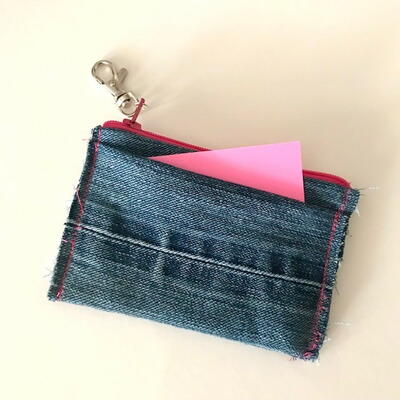
Upcycled Sewn Denim Mini Pouch

From the designer: "If there are old, torn denim jeans sitting around your craft room, why not upcycle them into an adorable mini pouch? This on-trend project is perfect for spring and can be created in about an hour! Even better, it only requires a few inexpensive supplies that you probably already have available. It can be used to hold your small essentials, and even features a pocket on the inside!"
The finished pouch will be about 3” x 5” in size.
Estimated CostUnder $10
Time to CompleteUnder an hour
MaterialsFabric, Recycled Materials
Primary TechniqueSewing

Materials List
- denim fabric (upcycled jeans were used here)
- all-purpose plastic zipper in a bright color (or any color you prefer) - (approx. 7” (inches) long was used but longer can be used and cut down)
- fabric scissors
- sewing clips (or pins)
- all-purpose thread (in colors that match the fabric and zipper)
- hand-sewing needle
- thimble
- sewing machine
- large swivel lobster clasp (optional)
- jump ring (optional)
Instructions:
-
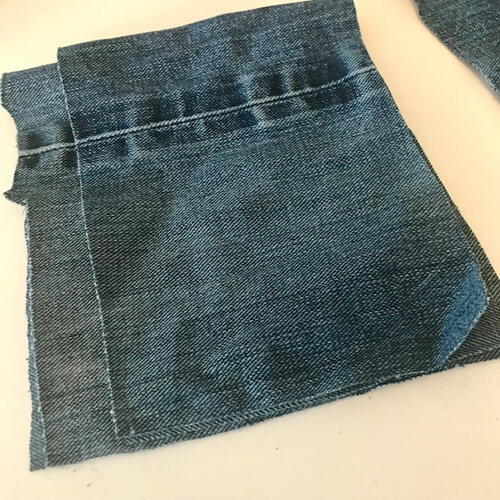
Start with clean denim jeans. Place a cutoff fabric leg of the jeans on your worktable (for this project a pair of men’s jeans were used). The outer seam of the jeans is less bulky than the inner seam, so this side is kept as it’s easier to sew. Starting from this (folded) side of the leg, cut out a (doubled over) panel that is approximately 5” (inches) long along the fold and 6.5” wide into the leg of the jeans. Keep the panel folded.
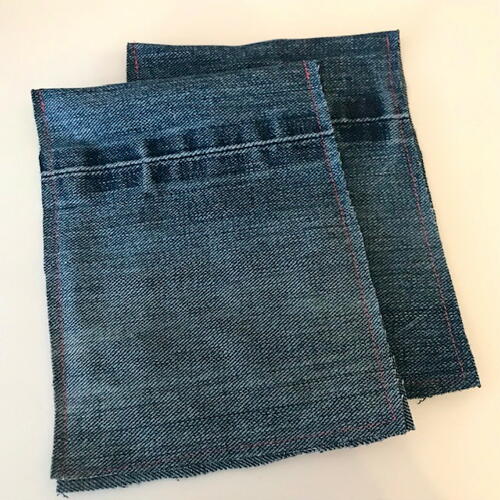
Repeat this to create the second panel, and trim any excess so they are close to the same size. -
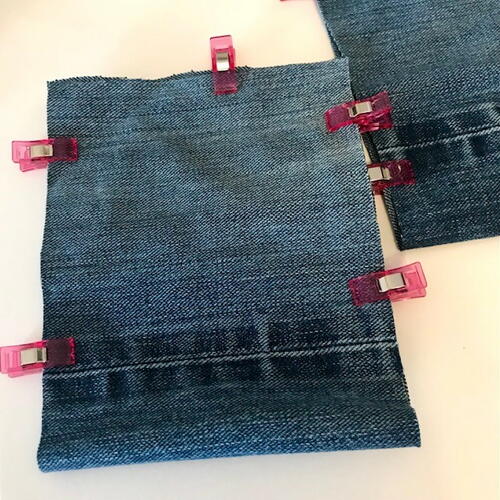
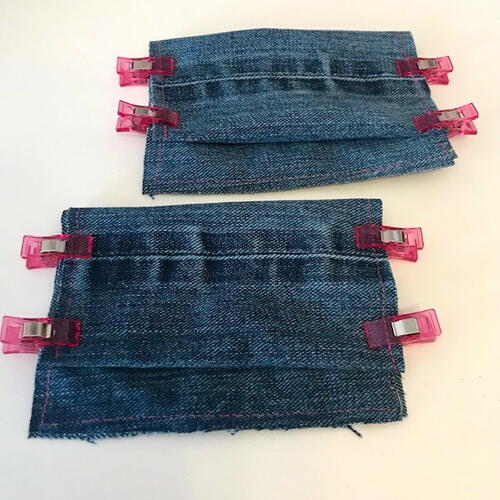
Clip (or pin) around both panels to prepare for sewing.
-
Machine-sew around each panel’s edges except the folded sides. This should be done in the contrasting thread that matches the zipper. A straight stitch length of 3 was used and the needle was in the right position.
-
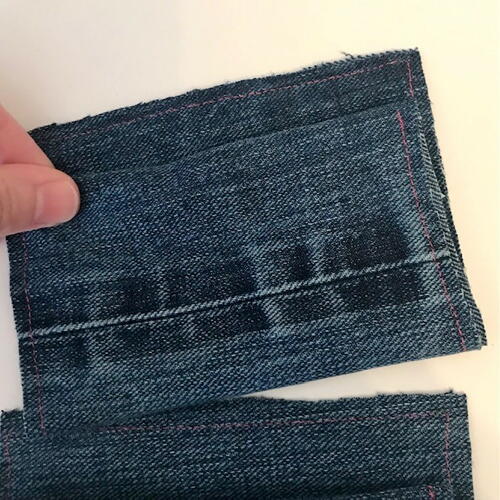
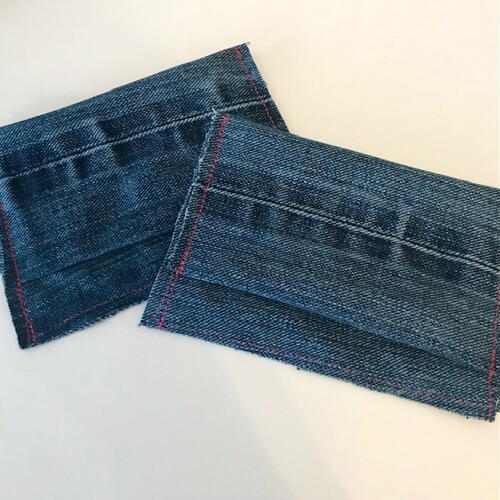
Place each panel on the work surface with the side with the visible leg seam facing down. The pieces should be vertical and have the folded edge at the bottom. Fold over this bottom edge so that it overlaps with about .75” - 1” remaining from the top. Clip (or pin) to hold in place.
-
Using the sewing machine again, stitch both the right and left side of each panel so the fold-over is secure. The same machine settings still apply.
-
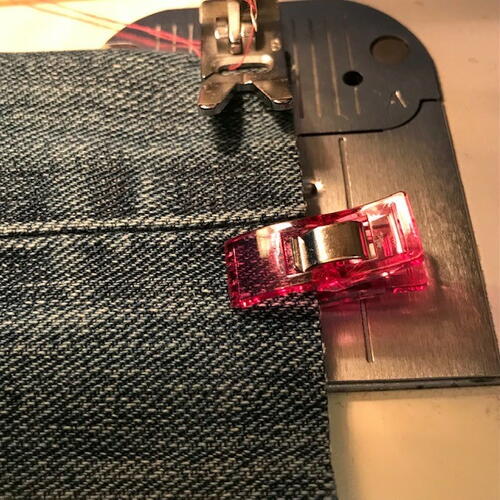
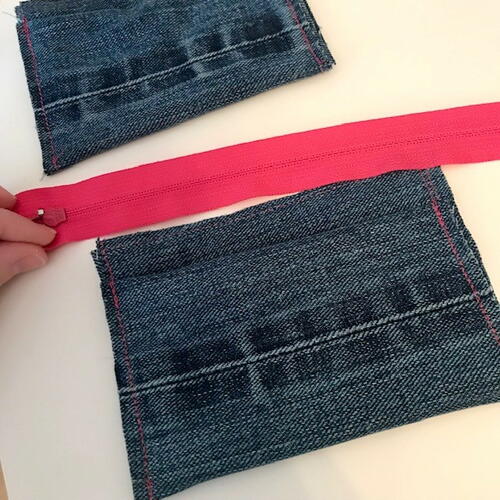
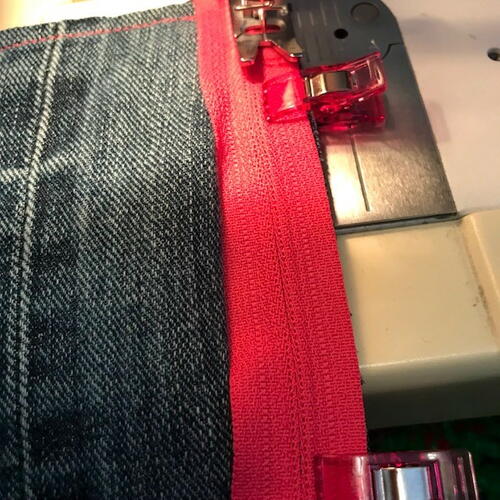
Now to add the zipper! Lay the zipper face down with an edge along the top of one of the denim panels. The panel should have what will eventually be the outside of the pouch facing upwards. Clip (or pin) so it is secure, and machine-sew along the zipper. The stitch length is still 3 here but the needle is in the center position.
-
Take the second panel and place it with the non-folded side facing the inside. Clip the other side of the zipper to the top edge of the second panel. Make sure the two panels are lined up together on the sides. Machine-sew this other part of the zipper just like the first.
-
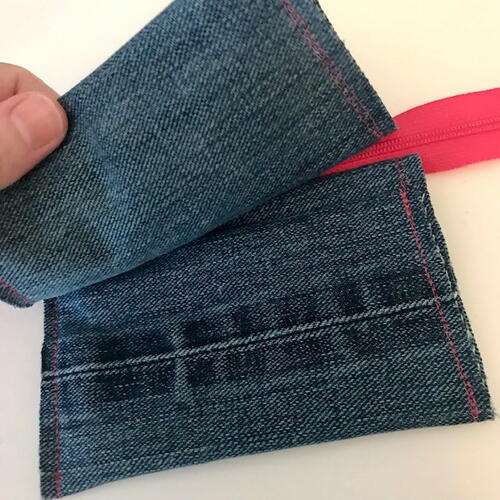
Next, lay everything on the table with the finished side facing upwards. Unzip the zipper about halfway.
-
Fold the pouch with the finished sides on the outside and the zipper on top. It should look almost “finished.” One side will have a pocket, and the other will not (that pocket will be inside the completed pouch). Line up the denim panels so they are flush with each other, and the zipper sits naturally.
-
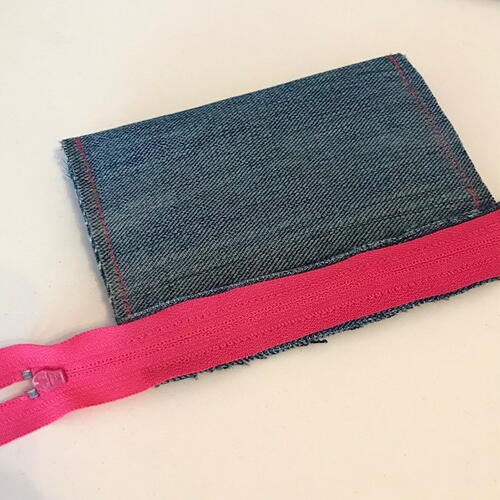
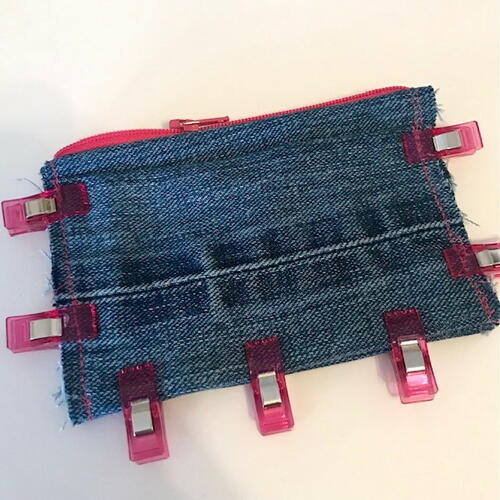
Tuck each of the zipper’s ends into the side of the denim panels. Clip (or pin) so they won’t come loose.
-
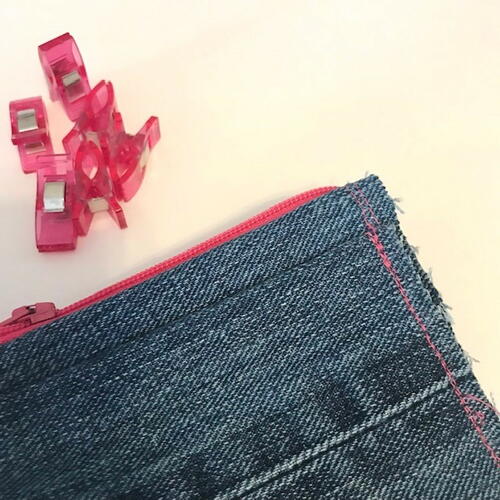
Keeping the ends of the zipper still tucked in, machine-sew again along both sides with visible stitching. Follow the existing stitch lines. The fabric will be pretty thick at this point, so go slowly on the machine. If this isn't working well on the machine this step can be done with a hand-sewing needle and thread.
-
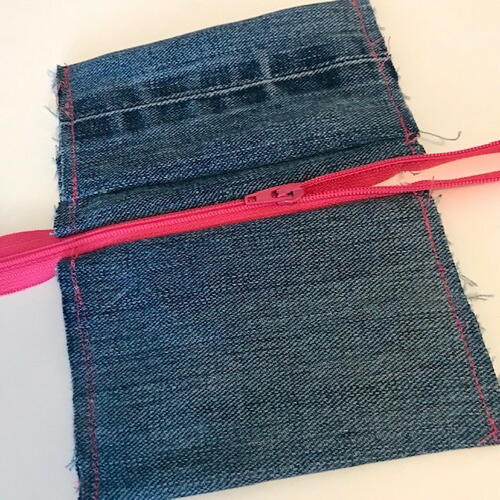
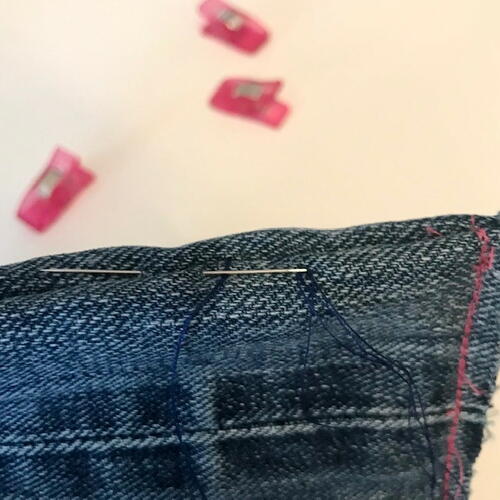
Close the bottom of the pouch with an invisible hand-stitch on the inside edges. A thread color that is the same color as the denim will allow it blend in seamlessly. Go back-and-forth at least twice so it is secure and there are no gaps or holes. Using a thimble can help guide the needle though more easily if there is any difficulty.
-
Clean up any threads that are in the way of the zipper and close it.
-
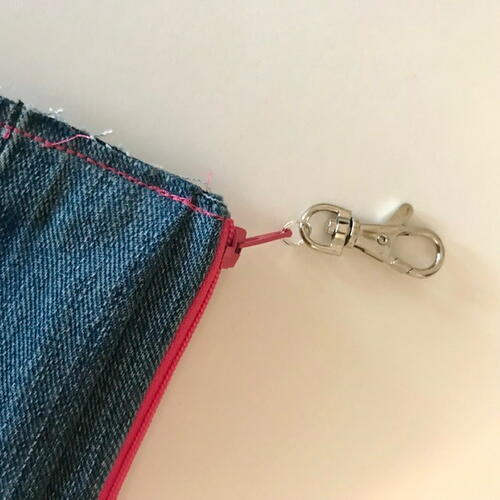
Add an optional swivel lobster clasp to the denim mini pouch! A jump ring was placed through the zipper pull’s small hole, then the clasp attached.
-
Enjoy your new denim mini pouch!

Why You'll Love This Recycled Craft
Are you wondering why you should try making the Upcycled Sewn Denim Mini Pouch? Here are the top 3 reasons why we think you should give this craft project a go:
1. Eco-Friendly Upcycling: By upcycling old, torn denim jeans into a mini pouch, you are not only giving new life to something that would have otherwise been thrown away, but you are also reducing waste and helping the environment. This project is a great way to practice sustainability and creativity at the same time.
2. Budget-Friendly and Accessible: This craft project is perfect for those on a tight budget or for beginners who may not have a lot of craft supplies on hand. All you need are a few basic materials that are likely already in your craft room or can be easily found at a local craft store. Plus, the finished product makes for a cute and practical accessory without breaking the bank.
3. Customizable and Versatile: One of the best things about this mini pouch project is that it can be easily customized to suit your personal style and needs. You can choose different denim washes, add embellishments like buttons or patches, or even adjust the size to make it bigger or smaller. The pouch can be used to hold small essentials like keys, coins, lip balm, or even as a mini wallet. The possibilities are endless!
So, what are you waiting for? Grab those old denim jeans, gather your sewing supplies, and get ready to create your very own Upcycled Sewn Denim Mini Pouch. Happy crafting!
This project is part of National Craft Month 2024!
Discover 31 NEW Projects in March >>
Read NextLarge Festival Tote Bag