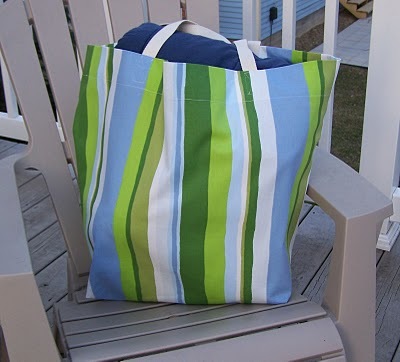
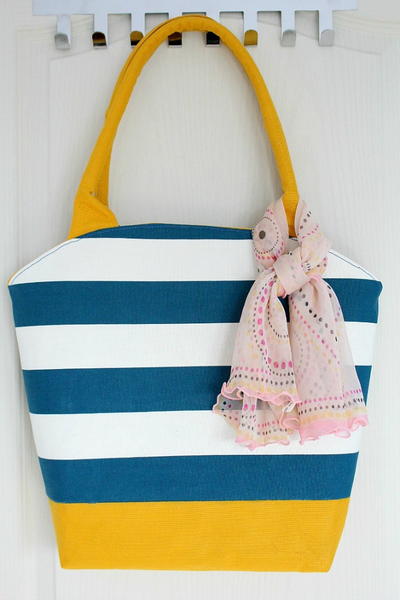
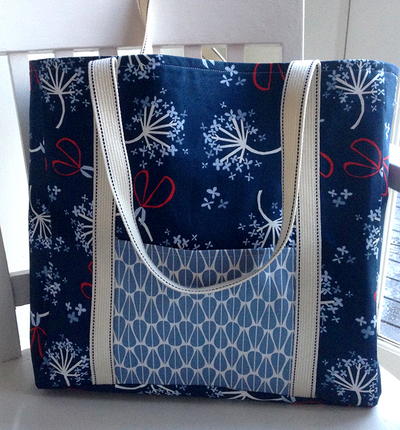
Simple Life Tote Bag Tutorial

If you're looking for an easy tote bag pattern, free patterns don't get much better than this one! Follow this tote bag sewing tutorial from Monaluna and learn not only how to make a tote bag with lining, but with a flat bottom, too! This pattern is so easy. All you need to do is cut your coordinating fabrics down to size and sew it together with your interfacing. You'll need to know the sewing basics before beginning, but any experienced beginner should be able to complete this project. Enjoy having your very own homemade tote bag!
Time to CompleteWeekend project
MaterialsFabric
Primary TechniqueSewing

Project TypeMake a Project
Materials List
- 2/3 yard cotton canvas
- 8x8” Square or scrap of contrasting canvas
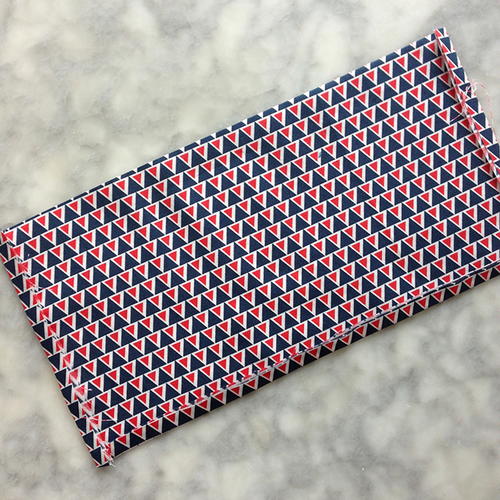
- 3/4 yard cotton poplin or lining weight fabric
- 1 ¼ yard craft weight fusible interfacing
- 100 inches sturdy cotton webbing
- Coordinating thread (I used white)
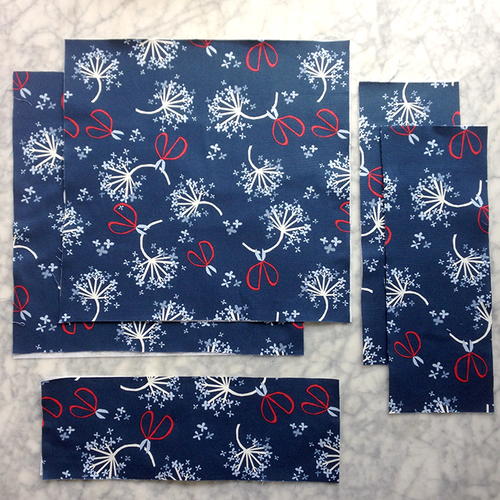
Cutting
-
From your canvas:
2 15x15” squares (front and back)
2 5x15” pieces (sides)
1 5x15” piece (bottom. This piece can have a different orientation if prints are directional)
1 8x8” piece (pocket) -
From your poplin:
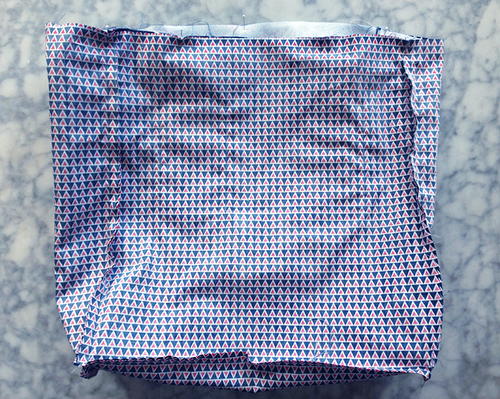
2 15x15” squares
3 5x15” pieces
1 10x10” pocket -
From your interfacing:
2 15x15” squares
3 5x15” pieces
Instructions
-
Cut all pieces to size.
-
Apply interfacing to the wrong side of your canvas pieces following manufacturer’s instructions.
-
Prepare the inside pocket: fold your 10x10” square in half, with the fold at the top. Press side and bottom edges 3/8” to the wrong side.
-
With the finished side up, center the pocket on the back lining piece, about 3” below the top edge, and pin in place. Topstitch down one side, across the bottom and up the opposite side, about 1/8” from edge. If desired, measure 3” in from the right edge of the pocket and topstitch an additional vertical seam to divide the pocket into 2 compartments.
-
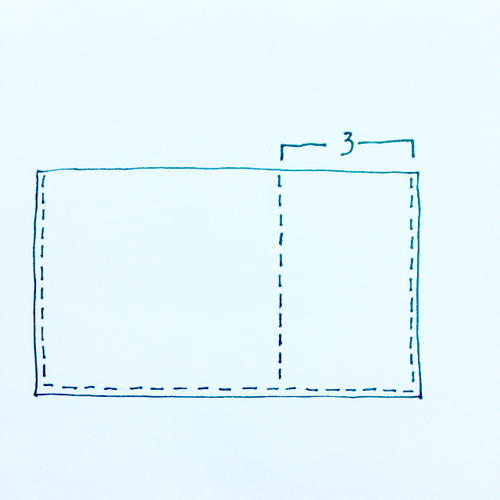
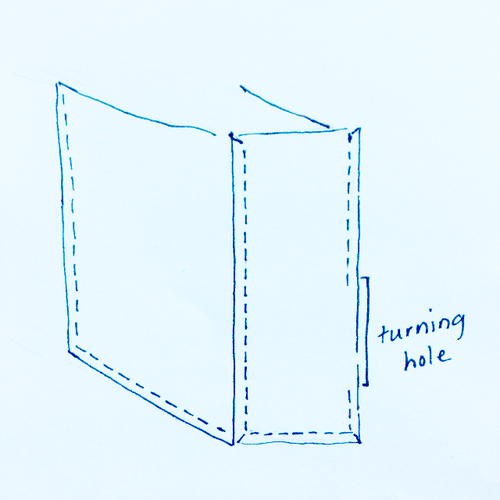
With right sides facing, join the front lining piece o the bottom lining piece with a ½” seam allowance, beginning and ending your seam ½” from the raw edges. Then join the bottom to the back lining piece in the same manner, to form a long rectangle. Then, pin the sides in place, matching edges and corners. Stitch with a 1/2” seam allowance, pivoting at the corners and carefully moving the seam allowance out of the way of stitching.
On the second side, stop stitching 2” up from the bottom and back stitch. Leave a 3” gap, and resume stitching to the top. This will be your turning hole when you finish the bag. When you finish stitching, clip the corners to reduce bulk. -
Prepare the outer pocket: Fold the top edge of the canvas pocket piece (8x8” square) 3/8” to the wrong side, and then fold over again, encasing the raw edge. Topstitch ¼” from top edge.
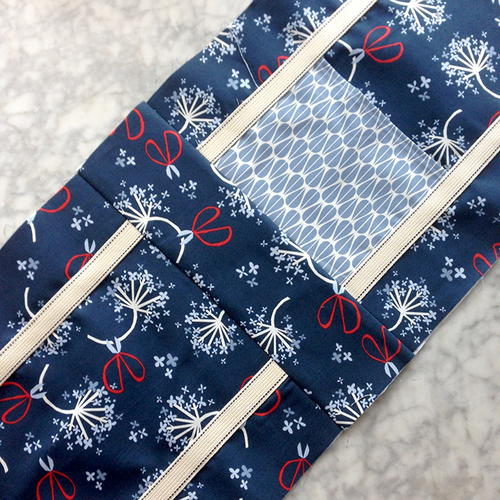
Center the pocket on the front canvas piece, 3 ½” from each side edge, with the bottom raw edges matching. Center your 50” cut of webbing on top of the pocket edges, with the raw edges matching the bottom edges. The outside edge of the webbing should be about 3” in from the front sides. -
Stitch very close to each edge of the webbing, stopping and backstitching 1” from the top edge of the bag.
Repeat on the back side of the bag, making sure that the webbing is in the same position as it is on the front side. -
Sew the canvas outer bag. Using the same process, stitch the front canvas piece to the bottom and the bottom to the back with a 1/2” seam allowance, stopping and starting your stitching ½” from the edges. Press seam allowance toward the bottom panel.
-
Then pin in and stitch the side panels. This time, don’t leave a gap for turning but stitch all the way to the top. Clip the corners.
-
Turn the canvas bag right side out, and press or finger press the seams.
-
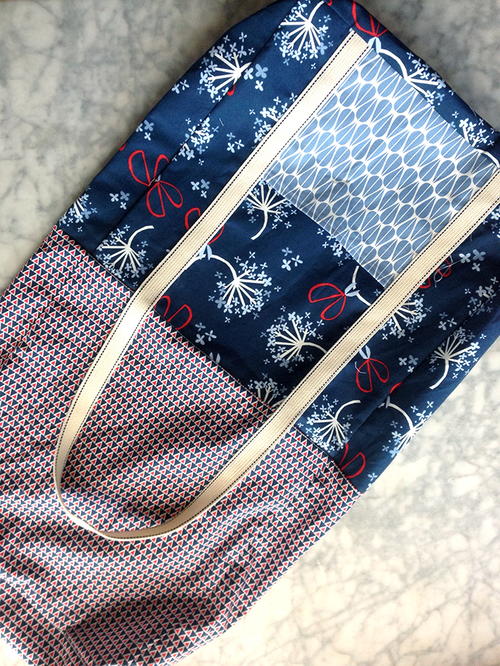
Put the right-side-out bag inside the wrong-side-out lining bag (so that right sides of fabric are facing), matching the raw top edges and side seams, and being sure to tuck the webbing handles out of the way. Pin and stitch all the way around the top with a ½” seam allowance.
-
Gently pull the canvas bag out through the turning hole and open out. Stitch the turning hole closed.
-
Fold the lining to the inside of the bag and press the bag, particularly around the top edge, making sure that the lining is completely turned to the inside of the bag.
-
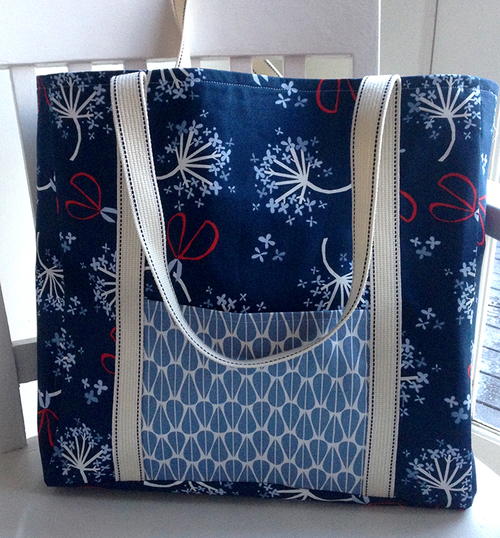
Topstitch all the way around the top of the bag, sewing over the webbing straps, ½” from the top edge.

Contest Rules:
- There is a maximum of one extra entry per person. The extra entry will be based upon a comment left on this post. Duplicate comments are not tallied.
- The winner will be selected at random from the comments on this page and the entries on the contest page.
- The winner will be contacted on the morning of December 26th, 2017.
- Email Address provided in their account (please do NOT leave your email address in the comments--you already provided it when you created your account)
- You have until December 24th, 2017 at 11:59pm EST to leave your comment on this post. Comments posted after that will not be counted.
- Contest open to anyone 18+ in US and/or Canada. Excludes Quebec and Puerto Rico.
What is your favorite project to make with fabric?
Read NextFabric Scraps Tote Bag
Your Recently Viewed Projects
Thanks for your comment. Don't forget to share!
renatepg 5795683
Oct 10, 2019
I have made another 'market' bag which does not have a pocket, that is why this one interested me.
andreamichellelong 7496288
Dec 19, 2017
I never knew it was so easy to make totes! And with pockets!
brendack 0343902
Dec 15, 2017
I have not made this tote yet, but it sure sounds very easy after reading the directions. Plus, the fabric that was used is so beautiful, I am off to find some fabric and other required items to make one for a gift.
txmlhl 4916988
Dec 15, 2017
I've made quite a few tote bags like these. They carry so much, they're light, and they are beautiful (love the blue). I made a lot of clothes when the kids were little - really helped save on money. thanks.
krledoux60 0805973
Dec 12, 2017
I love this bag! What a great gift to give to a student, or a new mom...we have both, lol. LOVE the fabric, too!
hug
Dec 12, 2017
Tote bags are essential when taking projects to a quilt guild meeting. This pattern is a great size and very attractive. The separate sections are very practical I rate this project as a 10 out of 10
amccolgan 9566177
Dec 12, 2017
I love to make bags too - but curtains, drapes, really anything for the house I love to make
kimlennie 9336847
Dec 11, 2017
I unfortunately don't sew but I have a friend who is awesome at sewing and even teaches classes and would be happy to make me this beautiful tote bag.
ridiculosity 67303 43
Dec 06, 2017
I think my favorite thing to wake with fabric is a stack! I have a stash of fabrics that people have given me and can't decide what to make of them.
Beth McC
Dec 04, 2017
I don't have a sewing machine, so I stick with hand-sewn bean bags and rice pillows for heating to alleviate pain )
Report Inappropriate Comment
Are you sure you would like to report this comment? It will be flagged for our moderators to take action.
Thank you for taking the time to improve the content on our site.