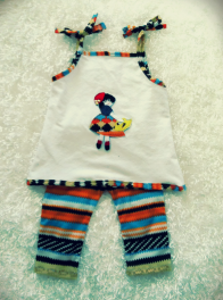
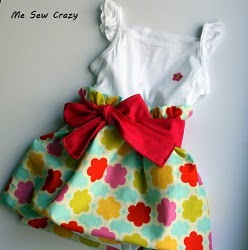
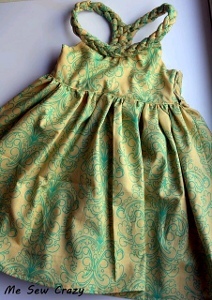
Girl's Braided Dress
Need instructions on how to sew a dress? Try the girl's braided dress from Jessica Gerblick, a simple, chic summer dress to make for your daughter. This free long dress pattern is so easy, you won't even believe it.

Materials:
- 1.5 yards of fabric
- Coordinating thread
- 3 buttons
- Pattern
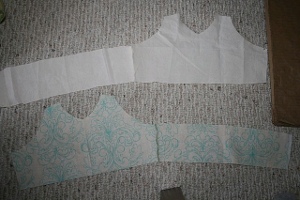
Cutting:
Print Pattern and cut pieces as follows:
Cut (3) 44”L x 3”W pieces of fabric
For Size 2 Cut:
Cut (2) 9L” x 44W” pieces of fabric for skirt pieces
For Size 3 Cut:
Cut (2) 13L” x 44W” pieces of fabric for skirt pieces
For Size 4 Cut:
Cut (2) 16L” x 44W” pieces of fabric for skirt pieces
For Size 5 Cut:
Cut (2) 18L” x 44W” pieces of fabric for skirt pieces
Instructions:
-
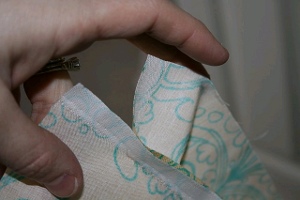
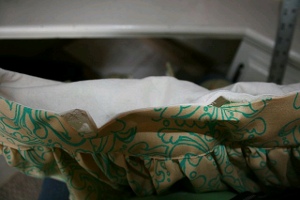
We will start with the skirt bottom. Take the 2 skirt pieces and match raw edges right sides together. Sew up the Length side seams on one side fully, and on the other side - sew almost all the way to the top, leaving 2” unsewn from top edge. See Photo:
-
Press seams open.
-
Turn bottom hem under ¼” towards the wrong side of the fabric and Press. Turn under again ¼”, enclosing raw edge, and Press. Sew hem closed.
-
Sew a line of gathering stitches along the top edge of the skirt and set aside.
-
Take the front bodice and back bodice and sew right sides together at ONE side seam. Repeat for lining. Be sure to sew on the same side seam for both fabrics! See Photo:
-
Now, placing the exterior bodice and the lining bodice right sides together, sew along side and upper edges, leaving the bottom edge open. Turn Right side out and press. See Photo:
-
Gather the stitches along the top of the skirt until they are the length of the bottom of the bodice.
-
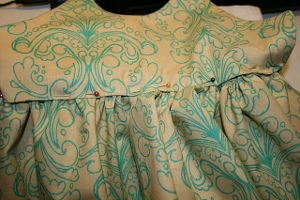
Slip gathered edge inside the bottom of the bodice and pin in place. Sew. See Photo:
-
Sew buttonholes along opening in side of bodice, spaced evenly. Sew buttons on other side to match up. See Photo:
-
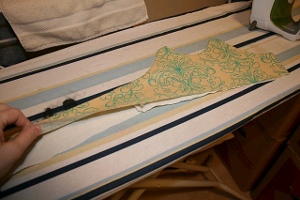
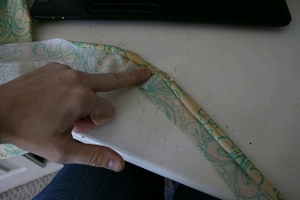
Taking the 44” x 3” piece of fabric, start rolling on one side, pinning as you go, until you get to the end. It helps to roll it in cycles, little by little, pinning and unpinning. See Photo:
-
When you get to the end and it is all pinned up, gently put a thin strip of fabric glue at the end of each roll along the entire strip until it is all rolled together.
-
For a thicker, more firm roll, wrap fabric around piping and glue at the end.
-
Repeat for all 3 pieces.
-
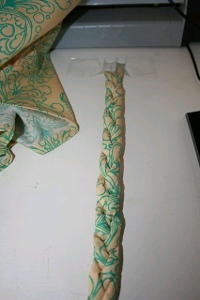
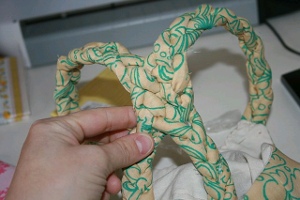
Once the fabric glue is all dry, with the three pieces all lined up, take a piece of tape and stick them together to a surface you can work on. Start braiding, be sure to keep even while braiding, until you reach the end. Secure the bottom with tape as well. See Photo:
-
Finding the middle of your braid, attach to the top of your front bodice and pin in place (I found it easier to push the pins through the back). See Photo:
-
Now this part you will have to sew on my hand (unless you have a heavy duty sewing machine). Attach braid to top of dress. As you can see, I hand sewed all along the back, whipstitching it on top, and kind of just securing the bottom (I get lazy with hand sewing, you might want to be more secure...lol). See Photo:
-
At this point I tried the dress on my daughter to see where I wanted the straps to fall, and where I should line the braid up in the back. Once I had that marked we were able to continue...
-
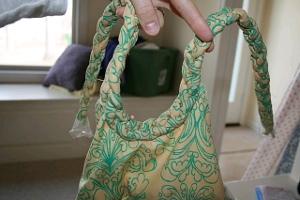
Undoing the bottom of the braids, at my marked point, I started weaving them together. Continue this only for about an inch. Then separate braids, and braid as normal again. See Photo:
-
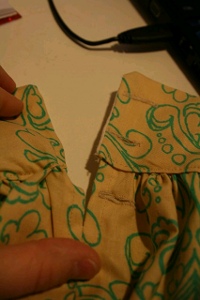
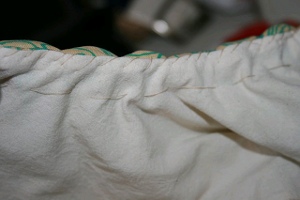
Now, because I wasn’t smart enough to figure out exact placement before, I need to VERY CAREFULLY snip open 2 small areas in the stitching of the top of the back bodice, where I want the straps to enter. See Photo:
- Slip braids inside, pin and very carefully sew closed.
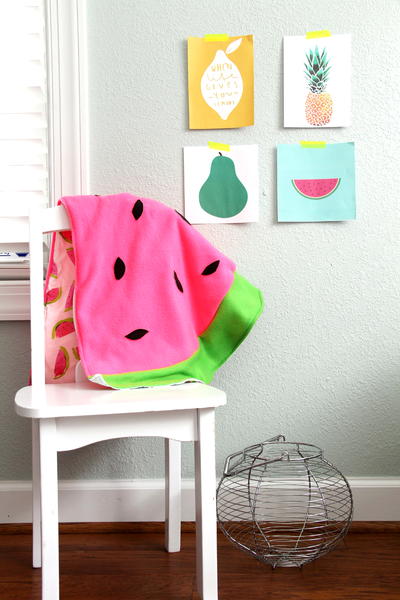
Read NextWatermelon Baby Blanket Pattern
Your Recently Viewed Projects

Thanks for your comment. Don't forget to share!
Weberme
Apr 07, 2016
Love this braided back. I have made many dresses for my grand daughter and for baby gifts but never one with this back. This is beautiful and seems like I can handle making it. I love how your tutorial explains the steps so I get it. And the photos help a lot. I will be needing size 8 for my grand daughter and someone said in comments to add 1/2" for each size difference. Has anyone tried this yet" Thanks for the tutorial.
sewn4b
May 31, 2014
Seam allowances included in pattern?? If so,what are they? Thanks
Melissa Ryan
Jun 02, 2014
Hi Sewn4b- Thanks for the comment. For pattern-related questions, we suggest contacting the designer directly. You can find her contact info by clicking her name in the byline. Thanks so much!--FaveCrafts Editor
Thanisu
Apr 29, 2013
Wonderful pattern, I made one for my 6month old and it turned awesome. Thank you verymuch.
owensgrma
Jul 13, 2011
I also have girls in sizes 8 and 10 that would love this dress and the Jackie-O dress and was dismayed at the sizing. HOWEVER, on the Jackie-O bodice patterns there are hash marks for the different sizes that are just about exactly the same distance apart, i.e., one-half inch difference in each size so at the size 5 markings I will add 3 of the "distances" for my size 8 and 5 for the size 10. My explanation is quite sketchy, but hopefully you can understand what I am saying. Have not tried it yet but that is my plan. If anyone has a better idea, I would surely be excited to know.
MissMaggie
Jul 11, 2011
Hi jewkesliz 1669772, Unfortunately, as we do not design the patterns ourselves, we cannot tell you specifically how each pattern fits exactly. You can always measure one of your girl's dresses and size the pattern to fit those specifications. Thanks! -Editors of FaveCrafts
jewkesliz 1669772
Jul 10, 2011
Love your sewing ideals, but need more clarification on the size's. Like the age limit that may fit size 1,(toddler, misses, youth, plus size) My daughter is 11 years old and in a sewing club. The Jackie O dress, and the braid dress looks like something that they can work with if the dresses will fit. The club sizes range from 8 to 16, ages 9-17. Could you please send me some cute, simple dresses or other patterns that these girl can sew and model after they have completed there projects.I need this information by this Saturday to make the decision of what pattern they will be able to use in the class room, as we only be able to allotted them so many hour in a two day period. Thank you , Elizabeth Jewkes
Karisa
Jul 06, 2011
If you download the pattern you'll see the pieces to cut for the bodice. The sewing instructions for the bodice start in step 5.
KatiesCabin
Jun 27, 2011
I too do not see the bodice instruction. Glad I read through before I cut and wasted the fabric.
bevjs06 5669184
Jun 26, 2011
Did I miss something? I don't find cutting instructions for the bodice of the dress.
Report Inappropriate Comment
Are you sure you would like to report this comment? It will be flagged for our moderators to take action.
Thank you for taking the time to improve the content on our site.