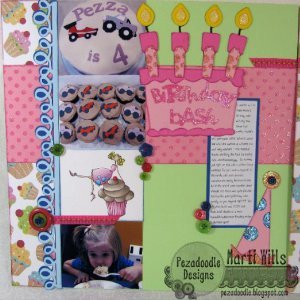
How to Scrapbook Using a Sketch
Sometimes the hardest part of scrapbooking is figuring out the layout...but with this tutorial on how How to Scrapbook Using a Sketch from Marti Wills, you can figure out your layout before getting to work. Plan out your scrapbook layout ideas ahead of time with the help of this video!
Materials:
- Layout Sketch from Page Maps or other sketch site (http://pagemaps.com/may12maps.htm)
- Pictures to scrap
- Papers
- Embellishments
Video:
Instructions:
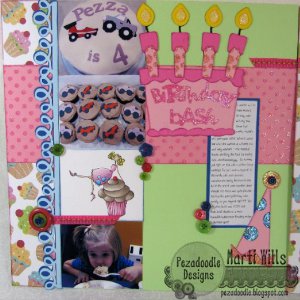
- Choose your pictures according to the pictures in the sketch. Don't worry if you don't have as many pictures as the sketch - you can put a stamped image or die-cut in those blank spots.
- Choose your papers - I recommend choosing patterned paper first and then picking remaining patterns and solid colors from there. Notice in your sketch how many different patterns are in the sketch.
- Cut and layout the largest papers according to the sketch onto your base papers.
- Lay out your pictures according to the sketch. pictures can sometimes get lost in the layout. Set them apart by matting them onto paper a bit larger. To add even more interest use a border punch/die or electronic die cutting machine on one edge of your picture mat(s). If you have any borders on your sketch do them using the same thing as the border on your picture mat.
- Do the larger embellishments and the journaling portion if you are including them. Do your title piece. Think of each embellishment by itself - make your title piece elaborate by using die-cuts, premade titles, stickers or chipboard shapes. Work on it and any other larger embellishments as little individual works of art! Place them on your layout.
- DON'T GLUE ANYTHING UNTIL THE VERY END!!!
- Finally work on the smallest embellishments - add ribbon, flowers, buttons, etc using the sketch as a guide for placement.
- Ink the edges of ALL of your papers!
- Glue everything in place paying attention to how they are layered over/under each other in the sketch.