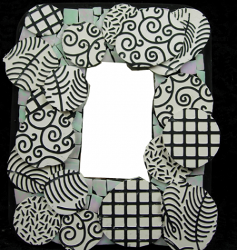
Custom Mosaic Mirror
Use Cool2Cast and texture plates to create your own Custom Mosaic Mirror from Heidi Borchers. Easy home decor crafts can make any space shine. Create a mirror that you can display for years to come. This is also a great gift idea for a friend.

Materials:
- Cool2Cast by Tiffany Windsor
- Measuring cups
- Water
- Plastic zip bag(s) (to mix Cool2Cast)
- Plastic lid from lettuce container
- Wire – 18 gauge bent into hanger shape
- Toothpick
- Tape
- Fiskars Texture Plates
- Staz-On Jet Black Ink
- Aleene’s Original Tacky Glue
- Mosaic tiles and mirror
Instructions:
- Lay mold on level work surface. Mix Cool2Cast according to package instructions. I like to use a plastic zip bag to mix my Cool2Cast because then I just snip off the corner to pour into my mold. I used a plastic lid from a grocery store salad container so I poured up to the rim of this container. (If you have additional Cool2Cast remaining in the bag, you will need to use it up right away. See step below to pour onto texture plates until entire batch is used.)
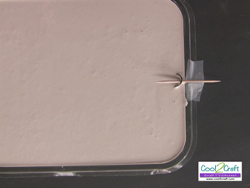
- Let the Cool2Cast sit for about 10 minutes and then gently press in wire hanger.
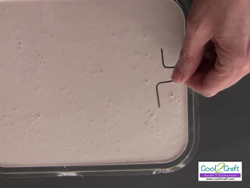
- If Cool2Cast has not set long enough, the hanger can sink to the bottom so I use a toothpick and tape to keep the loop raised to the top. Let sit undisturbed for several hours on level surface. Gently turn over and press plaster shape from plastic mold. Let set overnight to dry completely.
- Paint front and sides with black paint. Set aside to dry.

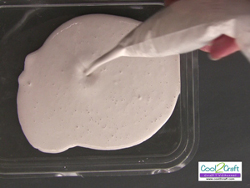
- Mix a fresh batch of Cool2Cast in plastic bag. For the direct pour method, I like to keep my mixture on the thicker side so I use slightly less water when mixing. Squeeze puddles of Cool2Cast onto the texture plates. Gently tap plates to help Cool2Cast to settle. Leave undisturbed for one hour.
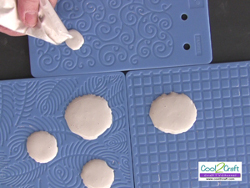
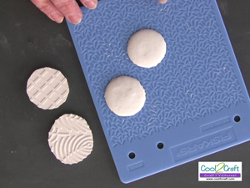
- The hardened Cool2Cast should pop right off the texture plates. Set aside to dry completely.
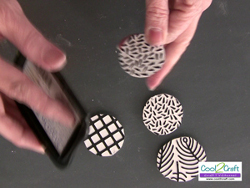
- To add the black accents, rub raised design surface of Cool2Cast pieces with ink pad. Let ink dry.
- Apply Aleene’s Tacky Glue to back of pieces and glue along edge of base.


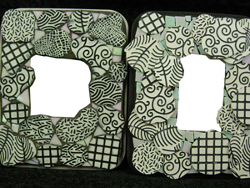
- Cut and glue mosaic tiles in place around Cool2Cast pieces. Be sure to allow for placement of mirror in center. Continue gluing Cool2Cast and mirror tile pieces in place around mirror.

- In this comparison, I wanted to show you that I have grouted the piece on the left and on the right I have only glued the pieces in place (no grout). Either technique makes a very cool mosaic mirror.
For a comprehensive photo tutorial of this project, check out How to Make a Cool2Cast Mosaic Frame.
Read NextRags-to-Rugs Craft