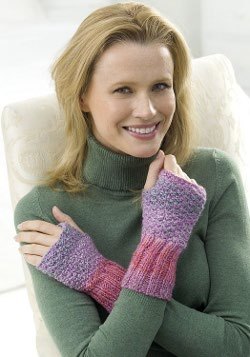
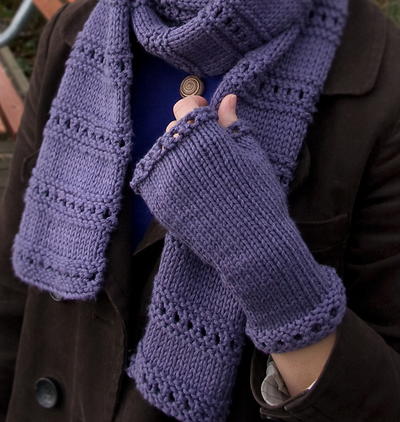
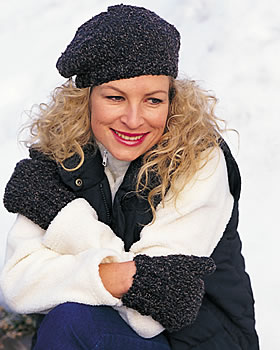
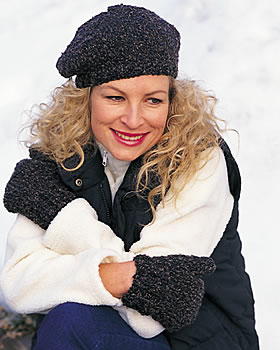
Boucle Mittens and Matching Beret
Knit a pair of cozy boucle mittens and matching slouchy beret with this free mitten knitting pattern from Bernat Yarns. You only need one ball of yarn to make these warm mittens for winter.

Find this beautiful pattern and more knit hats in 27 Free Hat Knitting Patterns.
Materials:
- Yarn: Bernat Soft Bouclé (140 g / 5 oz) Mitts and Beret 1 ball
- Knitting Needles: Size 5 mm (U.S. 8) or whichever needles you require to produce the tension given below.
Tension: 18 sts and 24 rows = 4 ins [10 cm] in stocking st.
Instructions:
Mitts: Left Mitt: **Cast on 34 sts.
1st row: (RS). K2. *P2. K2. Rep from * to end of row.
2nd row: P2. *K2. P2. Rep from * to end of row.
Rep these 2 rows (K2. P2) ribbing for 2H ins [6 cm] ending on a 2nd row.
Work 4 rows in stocking st.**
Shape thumb: 1st row: K15. (M1. K1) twice. Knit to end of row.
2nd and alt rows: Purl.
3rd row: K15. M1. K3. M1. Knit to end of row.
5th row: K15. M1. K5. M1. Knit to end of row.
7th row: K15. M1. K7. M1. Knit to end of row.
9th row: K15. M1. K9. M1. Knit to end of row. 44 sts.
11th row: K27. Turn. Cast on 1 st. P13 (including cast on st). Turn. Cast on 1 st. K14.
***Beg with a purl row, work 9 rows in stocking st.
Next row: (K2tog) 7 times. Break yarn. Thread end through rem sts. Draw up and fasten securely. Sew thumb seam. With RS of work facing, join yarn to last st on right hand needle. Pick up and knit 2 sts at base of thumb. Knit across sts on left hand needle. 34 sts.
Cont even until work from top of ribbing measures 6 ins [15 cm] ending with RS facing for next row.
Shape top: 1st row: K1. Sl1. K1. psso. K11. K2tog. K2. Sl1. K1. psso. K11. K2tog. K1.
2nd and alt rows: Purl.
3rd row: K1. Sl1. K1. psso. K9. K2tog. K2. Sl1. K1. psso. K9. K2tog. K1.
Cont in this manner, having 2 sts less between dec every alt row to 18 sts. Cast off purlways. Sew top and side seam.***
Right Mitt: Work from ** to ** as given for Left Mitt.
Shape thumb: 1st row: K18. (M1. K1) twice. Knit to end of row.
2nd and alt rows: Purl.
3rd row: K18. M1. K3. M1. Knit to end of row.
5th row: K18. M1. K5. M1. Knit to end of row.
7th row: K18. M1. K7. M1. Knit to end of row.
9th row: K18. M1. K9. M1. Knit to end of row. 44 sts.
11th row: K30. Turn. Cast on 1 st. P13 (including cast on st). Turn. Cast on 1 st. K14. Work from *** to *** as given for Left Mitt.
Beret: Cast on 82 sts.
Work 4 rows in (K2. P2) ribbing as given for Mitts inc 3 sts evenly across last row. 85 sts.
Proceed as follows:
1st row: (RS). Knit.
2nd and alt rows: Purl.
3rd row: K1. (M1. K14) 6 times. 91 sts.
5th row: K1. (M1. K15) 6 times. 97 sts.
7th row: K1. (M1. K16) 6 times. 103 sts.
Cont in this manner, inc 6 sts as before on every alt row until there are 115 sts.
Work 4 rows even in stocking st.
Next row: K1. (K2tog. K17) 6 times. 109 sts.
Next and every alt row: Purl.
Next row: K1. (K2tog. K16) 6 times. 103 sts.
Next row: K1. (K2tog. K15) 6 times. 97 sts.
Cont in this manner, dec 6 sts as before on every alt row to 31 sts. Purl 1 row.
Next row: K1. (K2tog. K3) 6 times. 26 sts.
Break yarn leaving a long end. Thread yarn through rem sts. Draw up tightly and fasten securely. Sew back seam.
Your Recently Viewed Projects

Thanks for your comment. Don't forget to share!
nutsforknits
Jan 01, 2017
Hotmomaknitter,I was unsure about the "2H ins (6 cm)" insyruction, as well. I think it means 2 and Half inches. Since 1 inch is = to 2.5 cm, then 2.5 inches would be approximately 6 cm.
parkies mom
Feb 25, 2011
I would also like to know what M1 stands for. I t would be helpful to show what the abbreviations stand for.
Knitter80
Jan 04, 2010
I just finished knitting The Great American Afghan, which has a "M1" or make 1 stitch in it. In the one I did, it's just a simple increase - to "M1" using a left-slanting increase, you insert the needle front to back between the last stitch knitted and the first stitch on the left needle. Then you knit, twisting the strand by working into the loop at the back of the needle. It's easy to do, and it makes a nice increase.
Crafter 8893236
Dec 07, 2009
what does the instruction (M1) mean in this pattern. help would be appreciated.thanks
Cinnamon
Nov 17, 2009
I need to understand what the instruction (M1) means in this pattern. Your help would be appreciated.
Report Inappropriate Comment
Are you sure you would like to report this comment? It will be flagged for our moderators to take action.
Thank you for taking the time to improve the content on our site.