Little Pumpkin Buttons
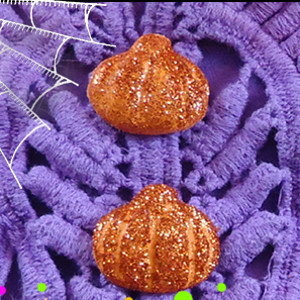
Learning how to make buttons is so much fun. These Little Pumpkin Buttons are made from polymer clay, and they are so easy to create. You will absolutely love how these little guys turn out. Be prepared to get inspired. These DIY button crafts will put your creativity and crafting skills to the test. Don't stop with these Little Pumpkin Buttons, because once you start making these buttons, you will realize how easy it is to make buttons of just about anything!
Primary TechniqueClay

SeasonFall
Materials:
- Polymer clay – orange and scrap clay
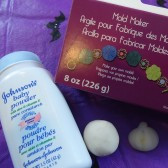
- Mold making medium
- Crochet needle
- Wire
- Round nose pliers
- Chan nose pliers
- Wire cutters
- Needle tool or toothpick
- Glue
- Glitter
Instructions:
- Make a small, flat backed pumpkin shape. Use a crochet needle to mark the sections of the pumpkin.
- You can use scrap clay for this, because this will be the piece you make a mold of.
- Bake according to directions. Allow to cool.
- You will need a mold making medium. You’ll also need powder and a brush to spread it.
- Brush and dab the powder on the original piece.
- Push the powdered piece into a ball of mold medium. Turn it over and push a little bit to even the surface.
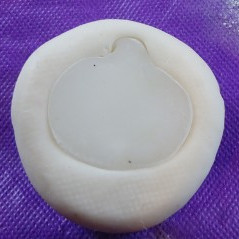
- Very gently pull the mold medium away from the baked piece ever so slightly and push a tiny bit on the back side of the mold medium to release the piece. Bake the mold as directed and allow to cool.
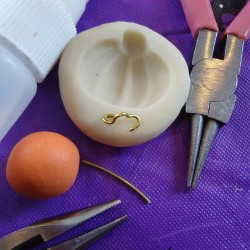
- To make the button and shank you’ll need orange clay, the baked mold, a water spritzer, 20 gauge wire, round nose pliers and chain nose pliers.
- Cut a 1″ piece of wire and bend it around the round nose pliers.
- Bend both ends out to the side with the chain nose pliers.
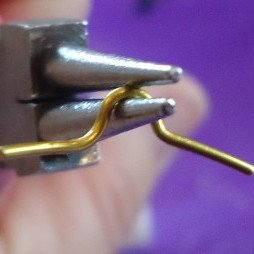
- Put a bend in both ends keeping the ends level.
- Push a small amount of clay into the mold. You may need to adjust the amount of clay. You don’t want it to extend beyond the edge and have it be sloppy.
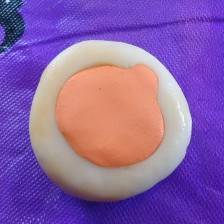
- Place the wire on the clay. Press down slightly.
- Put a dot of clay over the wire ends.
- Smooth the dots the best you can. Turn the mold over and gently push the back to release the clay.
- Bake as directed and allow to cool.
- Paint the pumpkins with glue and pour glitter on. I held the button with pliers while I glittered. It worked well. Pull through the wet glue in the creases for more depth.
- Allow to dry.
Why This Halloween Craft is Scary Great!
1. Add a personal touch to your clothing: Making your own buttons allows you to customize your clothing and accessories with unique and whimsical designs. Whether you add these Little Pumpkin Buttons to a cozy fall sweater or a cute tote bag, you'll love the personalized touch they bring to your wardrobe.
2. Fun and relaxing crafting experience: Making these Little Pumpkin Buttons out of polymer clay is a great way to unwind and destress. Crafting can be a therapeutic and enjoyable experience, allowing you to take a break from the hustle and bustle of daily life. Plus, seeing your finished buttons will give you a sense of accomplishment and pride in your creative skills.
3. Explore your creativity: These DIY button crafts are perfect for exploring your creativity and pushing your crafting skills to new heights. Once you've mastered making these Little Pumpkin Buttons, you'll be inspired to try creating buttons in all sorts of shapes, colors, and styles. The possibilities are endless when it comes to making your own buttons, and you'll love the sense of freedom and creativity that comes with this craft project.