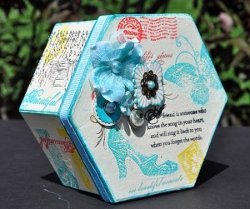
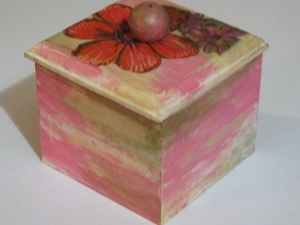
Trinket Box
Use a combination of wood distressing and decoupage techniques to make this trinket box, perfect for storing small adornments, such as earrings or rings. This cute wooden box also makes a great gift box for a small piece of jewelry for moms, friends, or sisters.

Materials:
- Square wooden trinket box
- Napkin with suitable flowers printed on them
- Mod Podge
- Water-based varnish
- Acrylic paint in the following colors: white, flesh, sweet memories (bright pink) and pale gold
- Grey felt
- One natural wooden bead
- Fine paint brush
- Hairdryer
- Pair of standard scissors
- Fine sanding paper
- Old dry cloth
- Few sheets of old newspapers to protect the working area
- Strong bonding glue
Instructions:
- Sandpaper the whole box thoroughly, and dust well with a dry cloth.
-
Add a distressed, rustic look to the wood:
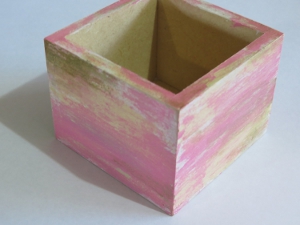
- Apply single coats of the white, flesh, sweet memories and pale gold acrylic paint in random areas, one at a time, allowing each layer to dry before adding the next color. Use the sandpaper again to rough up and partially remove some of the paint.
-
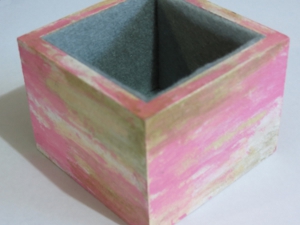
Cover the inside of the box with felt. Make sure that the felt is glued thoroughly into all the edges and corners.
- To protect the paint from wear and tear, add a layer of water-based varnish to the box and dry with the hairdryer.
Making the Lid
-
Sandpaper the whole lid thoroughly, and dust well with a dry cloth.
-
Add a distressed, rustic look to the wood, using the same technique and paints as for the bottom of the box. Allow to dry thoroughly before continuing with step 3.
-
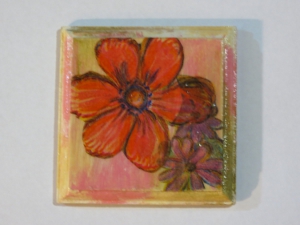
Cut out the flowers from the napkin and decide how they will be arranged on the lid.
-
Remove the bottom layers from all the napkin cutouts.
-
Put the first cutout in place and paint a substantial amount of Mod Podge over the top of the cutout, so that it will stick to the lid.
-
Use the hairdryer to dry the cutout.
-
Repeat steps 5-6 with the other cutout.
-
With the brush, paint a thin layer of Mod Podge over the top of the lid. The Mod Podge will protect the flower cutouts and give the product a smoother finish.
-
Dry the lid with the hairdryer.
-
Repeat steps 8-9 ~ you need to apply at least 5 coats of Modge Podge, but remember that with every layer, the direction in which the Modge Podge is applied, must be changed from horizontal to vertical to horizontal, etc. Also, remember that after every layer of Mod Podge, the lid must first be dried thoroughly with the hairdryer.
-
Add a layer of water-based varnish to the top of the lid and dry thoroughly with the hairdryer. Now do the same with the bottom of the lid.
-
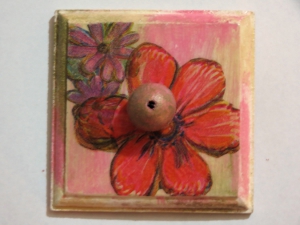
Paint the wooden bead with the sweet memories paint. Allow to dry, and then add some detail with the pale gold acrylic paint.
-
Paint the wooden bead with water-based varnish and allow to dry.
-
Glue the wooden bead to the top of the lid, using strong bonding glue.
Read NextIce Cream Sandwich Boxes


Thanks for your comment. Don't forget to share!
Report Inappropriate Comment
Are you sure you would like to report this comment? It will be flagged for our moderators to take action.
Thank you for taking the time to improve the content on our site.