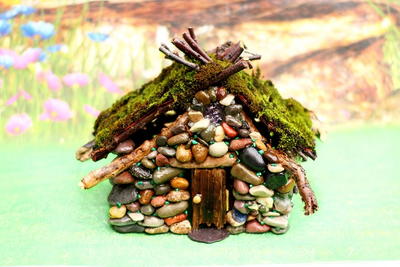
Crochet Kneeling Garden Cushion
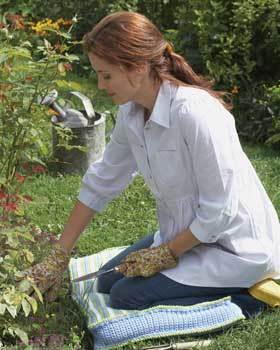
Stay comfortable while gardening with this kneeling garden cushion crochet pattern from Lily Sugar n' Cream. The sturdy cushion is both functional and attractive. Included in this crochet pattern are optional applique words: "I'm digging this!"

Materials:
- Yarn: Lily® Sugar ’n Cream (70.9 g/2.5 oz/109 m/120 yds )
Main Color (MC) (00083 Cornflower Blue) 6 balls
Contrast A (00001 White) 1 ball
Contrast B (01712 Hot Green) 3 balls
- Crochet Hook: Sizes 4 mm (U.S. G or 6) and 5 mm (U.S. H or 8) crochet hooks or size needed to obtain gauge
- 3 inch [7.5 cm] thick piece of foam 24 ins [61 cm] long x 16 ins [40.5 cm] wide
- Zipper 22 ins [55 cm] long
Size: Approx 24 ins [61 cm] long x 16 ins [40.5 cm] wide x 3 ins [7.5 cm] deep.
Gauge: 13 sc and 14 rows = 4 ins [10 cm] with larger hook.
Instructions:
FRONT
With MC and larger hook, ch 79.
1st row: (RS). 1 sc in 2nd ch from hook. 1 sc in each ch to end of ch. Turn. 78 sc.
2nd row: Ch 1. 1 sc in each sc across. Turn.
Rep last row until 62 rows in total have been worked. Fasten off.
BACK
With MC and larger hook, ch 79.
1st row: (RS). 1 sc in 2nd ch from hook. 1 sc in each ch to end of ch. Turn. 78 sc.
2nd row: Ch 1. 1 sc in each sc across. Join B. Turn.
3rd row: With B, as 2nd row. Join A. Turn.
4th and 5th rows: With A, as 2nd row. Join B. Turn.
6th row: With B, as 2nd row. Join MC. Turn.
7th and 8th rows: With MC, as 2nd row. Join B. Turn.
Rep 3rd to 8th rows 9 times more (62 rows in total). Fasten off.
Side Panel
With B and larger hook, ch 10.
1st row: (RS). 1 sc in 2nd ch from hook. 1 sc in each ch to end of ch. Turn. 9 sc.
2nd row: Ch 1. 1 sc in each sc across. Turn.
Rep last row until work from beg measures 80 ins [203 cm] when slightly stretched.
Fasten off. Place sets of markers on side edges 24 ins [61 cm], 40 ins [101.5 cm], 64 ins [162.5 cm] up from foundation row (leaving 16 ins [40.5 cm] free at end).
FINISHING
Appliqué Words
“I’m”
For ‘I’, with B and smaller hook, ch 4.
1st row: (RS). 1 sc in 2nd ch from hook. 1 sc in each of next 2 ch. Turn. 3 sc.
2nd row: Ch 1. 1 sc in each sc across. Turn.
Rep 2nd row 13 times more. Fasten off. For ‘’’ (apostrophe), with B and smaller hook, ch 3.
1st row: (RS). 4 sc in 2nd ch from hook. Sl st in next ch. Fasten off.
For ‘m’, with B and smaller hook, ch 3.
1st row: (RS). 1 sc in 2nd ch from hook. 1 sc in next ch. Turn. 2 sc.
2nd row: Ch 1. 1 sc in each sc across. Turn.
Rep 2nd row 3 times more.
6th row: Ch 1. 1 sc in first sc. 1 hdc in next st. Turn.
7th row: Ch 2. 1 hdc in first hdc. 1 sc in next sc. Turn.
8th to 11th rows: Rep 6th and 7th rows twice more.
12th row: Ch 7 1 sc in 2nd ch from hook. 1 sc in each of next 5 ch. 1 sc in next sc. 1 hdc in next hdc. Turn.
13th row: Ch 2. 1 hdc in first hdc. 1 sc in next sc. Turn. Leave rem sts unworked.
14th row: Ch 1. 1 sc in first sc. 1 hdc in last sc. Turn.
15th to 20th rows: Ch 1. 1 sc in each st across. Turn. Fasten off at end of 20th row.
“digging”
For ‘d’, with B and smaller hook, ch 3.
1st row: (RS). 1 sc in 2nd ch from hook. 1 sc in next ch. Turn. 2 sc.
2nd to 15th rows: Ch 1. 1 sc in each sc across. Turn.
**Place a marker on last sc worked. Do not fasten off. Do not turn.
Sl st in side of last 2 rows. Ch 10. Miss side of next 5 rows. Sl st in side of next 2 rows. Turn.
Work 1 sc in each of next 10 ch. Sl st in marked sc. Fasten off.**
For ‘i’ (make 2), with B and smaller hook, ch 3.
1st row: (RS). 1 sc in 2nd ch from hook. 1 sc in next ch. Turn. 2 sc.
2nd to 7th rows: Ch 1. 1 sc in each sc across. Turn. Fasten off at end of 7th row.
For '.' (dot), with B and smaller hook, ch 2.
1st rnd: 5 sc in 2nd ch from hook. Join with sl st in first sc. Fasten off.
For ‘g’ (make 3), with B and smaller hook, ch 3.
1st row: (RS). 1 sc in 2nd ch from hook. 1 sc in next ch. Turn. 2 sc.
2nd row: Ch 1. 1 sc in each sc across. Turn.
3rd row: Ch 2. 1 hdc in first sc. 1 sc in next sc. Turn.
4th row: Ch 1. 1 sc in first sc. 1 hdc in next hdc. Turn.
5th row: Ch 2. 1 hdc in first hdc. 1 sc in next sc. Turn.
6th to 21st rows: Ch 1. 1 sc in each st across.
Rep from ** to ** as for ‘d’.
For ‘n’, with B and smaller hook, ch 3.
1st row: (RS). 1 sc in 2nd ch from hook. 1 sc in next ch. Turn. 2 sc.
2nd to 5th rows: Ch 1. 1 sc in each sc across. Turn.
6th row: Ch 1. 1 sc in first sc. 1 hdc in next st. Turn.
7th row: Ch 2. 1 hdc in first hdc. 1 sc in next sc. Turn.
8th to 11th rows: Rep 6th and 7th rows twice more.
12th row: With working yarn, ch 7. 1 sc in 2nd ch from hook. 1 sc in each of next 5 ch. 1 sc in next sc. 1 sc in next hdc. Ch 2. Sl st in 2nd ch from hook. Sl st in next sc. Fasten off.
“this!”
For ‘t’, with B and smaller hook, ch 3.
1st row: (RS). 1 sc in 2nd ch from hook. 1 sc in next ch. Turn. 2 sc.
2nd row: Ch 1. 1 sc in each sc across. Turn.
3rd row: Ch 2. 1 hdc in first sc. 1 sc in last sc. Turn.
4th row: Ch 1. 1 sc in first sc. 1 hdc in last hdc. Turn.
5th row: Ch 2. 1 hdc in first hdc. 1 sc in last sc. Turn.
6th to 11th rows: Ch 1. 1 sc in each st across. Turn.
With separate length of yarn, join B with sl st to first sc of last row. Ch 2. Fasten off.
12th row: Ch 3. 1 sc in 2nd ch from hook. 1 sc in next ch. 1 sc in each of next 2 sc. 1 sc in each of last 2 ch. Turn. 6 sc.
13th row: Ch 1. 1 sc in each sc across.
Turn.
14th row: Sl st in each of first 3 sc. Ch 1. 1 sc in same sp as last sl st. 1 sc in next sc. Turn. Leave rem sc unworked.
15th and 16th rows: Ch 1. 1 sc in each sc across. Turn. Fasten off.
For ‘h’, with B and smaller hook, ch 3.
1st row: (RS). 1 sc in 2nd ch from hook. 1 sc in next ch. Turn. 2 sc.
2nd to 5th rows: Ch 1. 1 sc in each sc across. Turn.
6th row: Ch 1. 1 sc in first sc. 1 hdc in next sc. Turn.
7th row: Ch 2. 1 hdc in first hdc. 1 sc in next sc. Turn.
8th to 11th rows: Rep 6th and 7th rows twice more.
With separate length of yarn, join B with sl st to first hdc of last row. Ch 7. Fasten off.
12th row: Ch 7. 1 sc in 2nd ch from hook. 1 sc in each of next 5 ch. 1 sc in next sc. 1 sc in next hdc. 1 sc in each of next 7 ch. Turn. 15 sc.
13th row: Ch 1. 1 sc in each sc across. Fasten off.
Work ‘i’ as for ‘digging’.
For ‘s’, with B and smaller hook, ch 3.
1st row: (RS). 1 sc in 2nd ch from hook. 1 sc in next ch. Turn. 2 sc.
2nd row: Ch 2. 1 hdc in first sc. 1 sc in next sc. Turn.
3rd row: Ch 1. 1 sc in first sc. 1 hdc in next hdc. Turn.
4th row: Ch 2. 1 hdc in first hdc. 1 sc in next sc. Turn.
5th to 8th rows: Rep 3rd and 4th rows twice more.
9th row: Ch 2. 1 hdc in first sc. 1 sc in next hdc. Turn.
10th row: Ch 1. 1 sc in first sc. 1 hdc in next hdc. Turn.
11th row: Ch 2. 1 hdc in first hdc. 1 sc in next sc. Turn.
12th to 17th rows: Rep 10th and 11th rows 3 times more.
18th row: Ch 1. 1 sc in first sc. 1 sc in next hdc. Fasten off.
For ‘!’, with B and smaller hook, ch 11.
1st rnd: Sl st in 2nd ch from hook. Sl st in next ch. 1 sc in each of next 8 ch. 3 sc in last ch. Working along opposite side of ch, 1 sc in each of next 8 ch . Sl st in last 2 ch. Fasten off.
Work '.' (dot) as for 'i'.
Position ‘I’m digging this!’ letters on Front as shown. Sew around outer edge of letters securely.
Pin Front and Back pieces to Side Panel, having markers on Side Panel at corners of Front and Back.
Back Edging: With RS facing and larger hook, join MC with sl st at any corner of Back. Ch 1. Working through Back and Side Panel at same time to join, work 1 rnd of sc evenly around outer edge, working 3 sc in corners. Join B with sl st to first sc. Break MC.
Next rnd: With B, ch 1. Working from left to right instead of from right to left as usual, work 1 reverse sc in each sc around.
Join with sl st to first sc. Fasten off.
Front Edging: With RS facing and larger hook, join MC with sl st at bottom right corner of Front. Ch 1. Working through Front and Side Panel at same time to join, work 1 rnd of sc evenly around outer edge working 3 sc in corners to opposite bottom left corner of Front. Work rem of rnd in sc across Front only, leaving Side Panel free to insert zipper. Join B with sl st to first sc. Break MC.
Next rnd: With B, ch 1. Working from left to right instead of from right to left as usual, work 1 reverse sc in each sc around.
Join with sl st to first sc. Fasten off.
Sew zipper in position.
Read NextDiy Patriotic Mason Jar Herb Garden
Your Recently Viewed Projects

Thanks for your comment. Don't forget to share!
purpleheartAW2mom
May 12, 2012
well if she still has not made the pillow after all this time, try this: http://knitting.about.com/od/finishingtouches/ht/add-zipper.htm - it is for knitting but anything with yarn directions should work for this also. Good luck.
Member 15448
Apr 09, 2010
Could anyone help me on how to sew the zipper in? I've never ever tried this before, but I like this cushion. Help Please!!!
Report Inappropriate Comment
Are you sure you would like to report this comment? It will be flagged for our moderators to take action.
Thank you for taking the time to improve the content on our site.