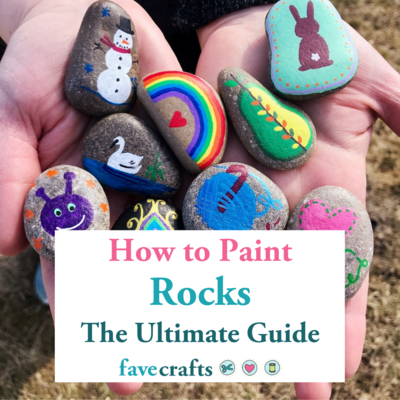
How to Paint Rocks: The Ultimate Guide
Learn how to paint rocks to hide or to display in your garden. This rock painting guide covers everything you need to know.

Rock painting is a trendy and fun hobby that's perfect for anyone, from children to adults. With this ultimate guide, learn how to paint rocks alongside helpful tips, techniques, and inspiration for mastering. Plus, learn how to seal rocks for hiding or displaying outside.
Walking is one of my favorite activities to do alone, with a partner, or as a group. I am fortunate to live close to many forest preserves with beautiful trails.
One day, I was walking with a group and we noticed something purple at the base of a tree. We took a closer look and realized it was a painted purple rock. On the back was a note that it was a hiding rock and that we should take a pic, post it in the Facebook group, and rehide the rock for someone else to find.
Since that day, we've been finding more rocks and started painting our own to hide. I've learned a lot along the way, which is why I wanted to share this rock painting guide so you can join in on the fun. It's a fabulous activity for families and helps children get outside and exercise (adults, too!).
Rock Painting Supplies
For preparing rocks:
- Dish soap
- Towel/paper towels
- Parchment paper
- Baking sheet
- Oven
- Paper for sketching
- Pencil for sketching
- Smooth, flat rocks (see notes on where to get them below)
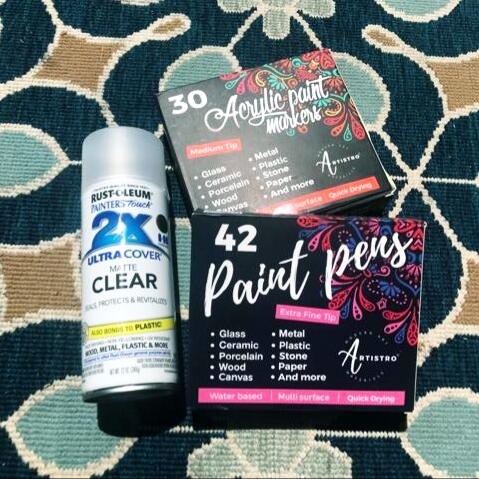
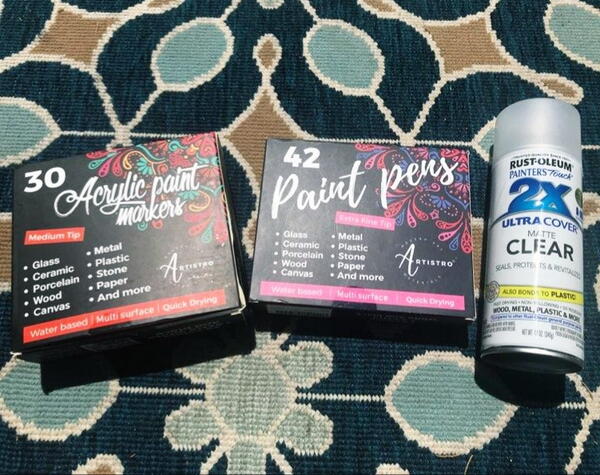
- Acrylic paint or acrylic paint pens/markers (see note below)
- Foam brushes (optional)
- Paintbrushes (optional)
- Sealant (Mod Podge/spray sealant)
- Additional embellishments if desired
Where to Buy Rocks to Paint
If you happen upon a small- to medium-sized rock with a smooth texture that’s less porous, you might want to grab it. However, taking rocks from preserves or beaches is not recommended or environmentally conscious (sometimes illegal), so it’s best to buy them.
Painted rocks can be any size but you don’t want the rock to be too small (difficult to paint and spot/find when outdoors). You also don’t want it too big if you are planning on moving it around. However, if it will be sitting in a garden, bigger might be fine. It all depends on your plan.
Bags of rocks can be purchased online (be sure to check the sizes) or at big box home improvement stores. The bags are usually in the garden/landscaping section and are labeled as river rocks. I recently purchased a 50-lb bag for only $10. Not every rock in the bag works well for painting but most fit the bill.
How to Prep Rocks for Painting
The idea of washing and baking rocks is odd but it's an important step if painting. You won't want to paint a rock that's covered in dirt because your paint won't go on smoothly and you could ruin your supplies.
Baking then dries out the rock completely, which is also an important step in making sure your rock is the perfect canvas for your art.
- Preheat the oven to 350 degrees Fahrenheit.
- Wash the rocks using basic non-lotion dish soap and warm water.
- Leave rocks to dry on a towel or a few paper towels for about 10 minutes.
- Line a baking sheet with parchment paper and place the rocks on a single layer.
- Once the oven is preheated, bake for 10 minutes.
- After 10 minutes, turn off the oven and leave rocks to cool inside for about one hour.
Note: Rocks may remain warm to the touch after an hour but can be handled if needed. Rocks should be left to cool completely before painting.
Rock Painting Techniques
There are countless ways in which you can decorate rocks. I'll list some of the most common and popular techniques used for rock painting and you can choose what works best for you:
- Paintbrushes and acrylic paint
- Sponges and acrylic paint
- Finger painting technique
- Spray paint
- Paint pens/markers
- Stencils (using spray paint or acrylic paint)
- Paint pouring technique
- Decoupage technique (using paper or stickers and Mod Podge)
However, it's fun to experiment! Just keep in mind that costs will vary and some supplies can get expensive when you add everything you need for properly painting rocks for gardens or to hide.
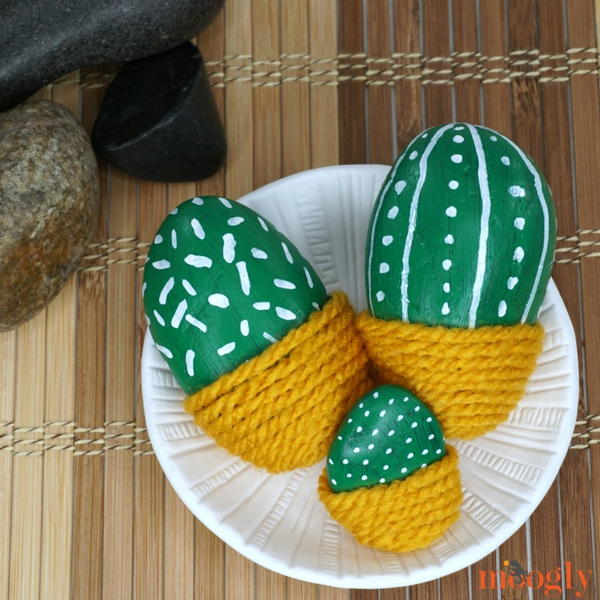
Things to Paint on Rocks
There is no right or wrong when it comes to rock painting ideas, just let your imagination run wild! You don’t even need to be an artist to get beautifully painted rocks. The secret? Acrylic paint pens/markers.
For more of a challenge or artistic adventure, you can use traditional paint and brushes or foam sponges, but it’s up to you.
Craft acrylic paints are usually less expensive but you also have to buy brushes, so they often end up being comparable.
Paint pens allow you to get details and bright colors without knowing how to paint. You can even combine the two types on one rock or decide based on each design. Popular paint pen brands include Artistro (shown below), Tooli-Art, Magicfly, Art Owl, and Arteza.
For inspiration, scroll down to see pictures. I’ll also share some more general rock painting ideas that work well for most rocks and your creativity can go from there:
- Words, phrases, quotes (kindness rocks are popular)
- Landscapes
- Animals
- Plants
- Characters
- Emojis
- Space/Galaxy
- Abstract/Geometric
- Holiday/Seasonal
- Tie-dye

How to Paint Rocks
Finally, what you've been waiting for: the rock painting tutorial. Keep in mind that this is just a basic overview and the actual steps can vary based on how you plan to decorate your rock.
- Look for a rock that inspires you. Perhaps it has a particular shape or color that provides a starting point.
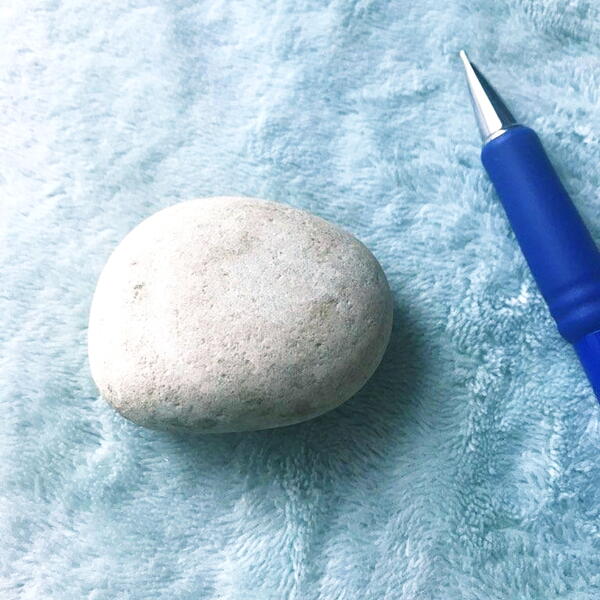
- If desired, sketch out your rock design on paper to get the sizes and shapes right. You can also choose colors and color-code your sketch to remember.
- Use a pencil to draw out your design on the rock. This helps determine composition. You will paint over the sketch so no need to add details, just overall shapes.
Note: You can skip this part and go straight to the painting if you’re confident in getting it right the first time. Once the paint is on, it’s difficult to remove.

- Start with the largest color areas first. Medium- to fine-tip paint pens work well for coloring. Or use paint and brushes. Then, fill in other areas with colors as needed.
Note: Be sure to follow the priming instructions for paint pens before using them.
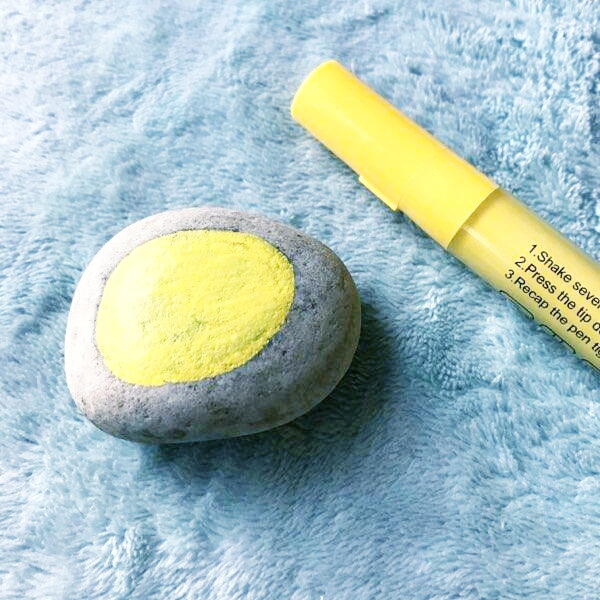
- Once all the main areas are colored in, focus on the details. Fine- or extra-fine tip pens are best for this.
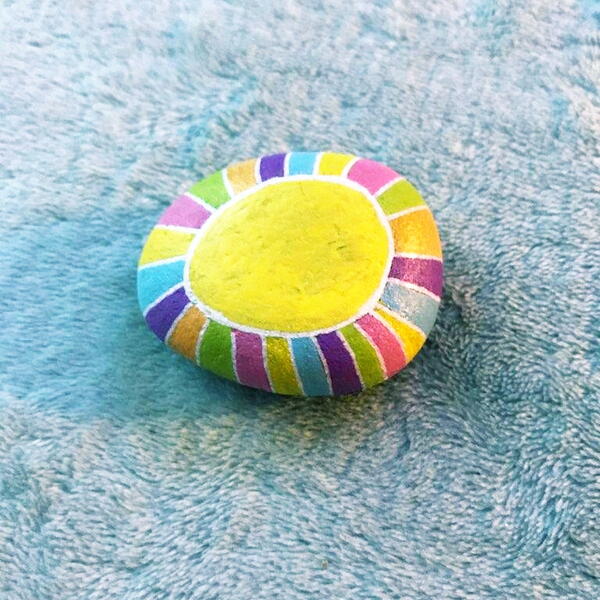
- Outline, add accents, words, etc.

- Let dry.
- Seal the rock (see below for suggestions).
How to Waterproof Painted Rocks
Even if you are keeping the rock indoors, it’s best to seal it to prevent paint bleeding or future damage.
Mod Podge is a good choice as it’s a water-based glue, sealant, or finish. It’s available in matte, satin, or gloss. It’s a thin paste that can be layered and should dry clear.
Note: Heat can cause Mod Podge to become sticky and lose its protective properties, so it is not recommended alone as a sealant for outdoor rocks.
Carefully read and follow the instructions, but it should be to use a foam brush or paintbrush to apply a thin coat. Let dry 30 minutes before applying a second coat. Then repeat for the other side.
Another strong option is a spray sealant. There are a lot of brands and types available, such as Rust-Oleum or Krylon. Spray sealant is easy to use, dries quickly, and tends to be more even and thin. Again, carefully read and follow the instructions, but it should involve shaking and spraying from 6-10 inches away.
Let dry 30 minutes before applying a second coat. Then repeat for the other side. Repeat one to two more times.
What to Do With Painted and Sealed Rocks
Hide rocks around your local forest preserves or parks for people to find! Search Facebook, Twitter, or Instagram for rock hiding or geocaching groups. One active Chicagoland Facebook group is Lake Michigan Rocks!.
Add rocks as decorative elements or structural pieces to your yard or garden. Adding a rock wall with colorful rocks is a fun way to bring extra color into your space.
Make magnets! All you need is a magnet that is heavy enough to hold the weight of your rock and fits on the back. Adhere it with strong glue or epoxy.
Give as gifts. Paint something they love, inspirational word or quote, or make friendship rocks that will always remind them of you!
Rock Painting Tips
- Paint pens are best stored horizontally and need to be shaken regularly.
- Always let the paint dry a few minutes before adding another coat or color. This not only helps keep the colors sharp but it keeps the pens clean. Patience is key.
- For certain colors, adding multiple coats will achieve better coverage and vibrancy (think yellows and whites).
- Unnatural embellishments (jewels, glitter, etc.) are not recommended if you plan to leave the rock in nature because they could eventually fall off and become litter. However, if you are decorating rocks for indoor use or gifts, adding embellishments can be fun.
Rock Painting Patterns and Inspiration
We’re sharing a few tutorials here on FaveCrafts, but we also have more pictures for inspiration below. Take a look and see if something inspires you.
- Kindness Rocks
- Galaxy Painted Rocks (shown below!)
- Sea Stone DIY Bracelet

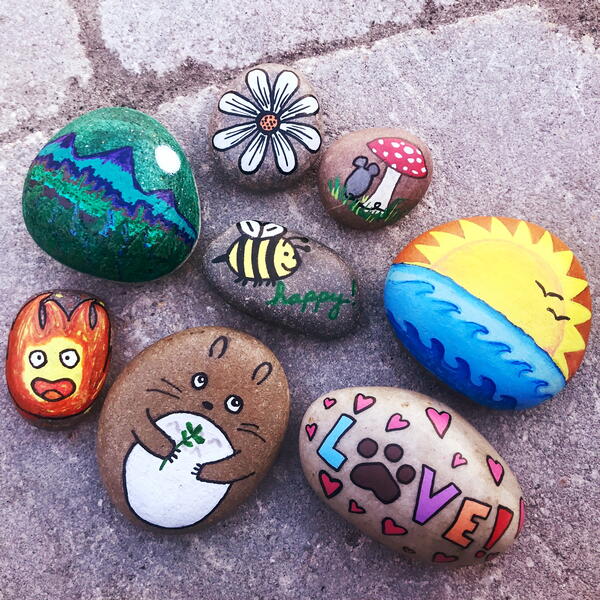
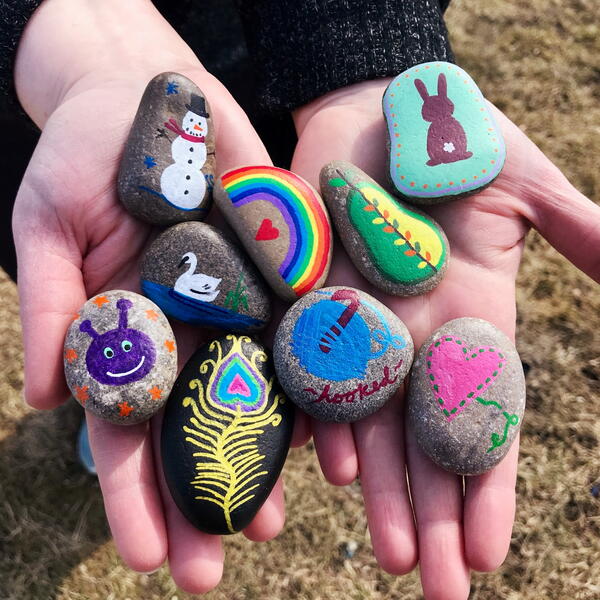
Rock Painting Pictures for Inspiration
Here are a few of the rocks that my family, friends, and I have painted:
Quotes and kindness rocks:

Character rocks:

Nature rocks:

Animal rocks:

A few random rocks:

Tips for Hiding Rocks
Since we've discussed the idea of painting and hiding rocks for others to find, we thought we would share a few ideas and tips for anyone wanting to do the same.
When hiding rocks, DO:
- Place rocks in nooks and crannies, such as a fence or a tree fork.
- Place rocks on benches, tables, or other objects people frequent.
- Keep rocks visible, not too far hidden where people will not find them.
- Place rocks in logical sightlines.
- Keep rocks out of areas that might see heavy wind (and rain if you wish).
Below, the rock on the left was hidden in a gap of a fence post. The rock on the right was placed on a fork of a tree.

Now onto the don'ts...
When hiding rocks, DON'T:
- Place rocks where lawnmowers or other tools might become damaged by hitting them.
- Place rocks where people might trip over them.
- Harm trees, plants, or other natural elements to hide rocks. If the rock doesn't fit without damage, choose a better location.
- Place rocks on private property unless you have permission.
- Camouflage the location too much. As we said above, you want the rock to be found! It's ok to hide it where not everyone might look but you want to be sure that someone will eventually find it.
Below you see the rock on the left sitting on a rock wall. On the right, the rock fits nicely in the gap of a bench right by the water. How perfect is that for a swan?

Read NextUpcycled Plastic Bottle Decor Items