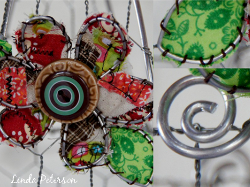
Retro Fabric and Wire Flowers
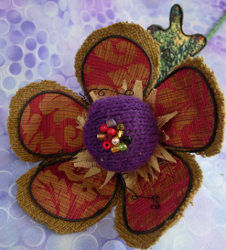
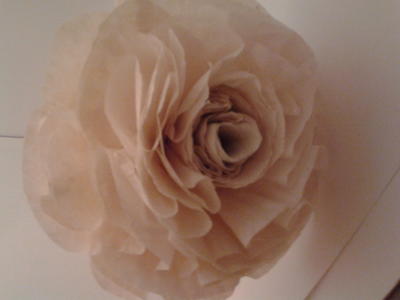
This flower craft is a real blast from the past. Create your own DIY fabric flowers using an old school technique when you follow this Retro Fabric and Wire Flowers tutorial from Heidi Borchers. These flower crafts are perfect for decorating your home. Give the center of the flower a little bit more flair by adding some small beads. These blooms so fun to make that you might be inspired to craft a whole bouquet of them to keep in your bedroom.
For more beautiful handmade flower projects, check out our collection of 53 Printable Flower Patterns.

Materials:
- Aleene’s Turbo Tacky in the Tacky Pack
- Drink bottle cap (for bending wire)
- 18 gauge wire (approximately 8″ for each petal)
- Fabric (I used upholstery and sweater fabrics on my flower)
- Scissors
- Needle and thread (to create fabric yoyo for flower center)
- Polyfil (for flower center)
- Florist tape – green
- Wood skewer (for flower stem)
- Wire and beads (optional for flower center)
Instructions:
-
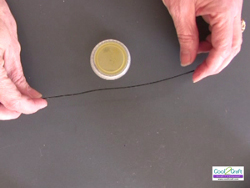
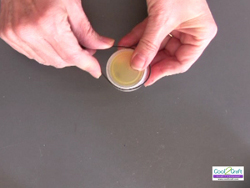
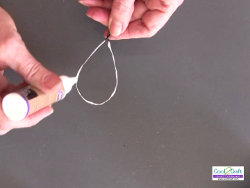
Select drink bottle cap to create desired size for petal. If desired, you can paint wire with black acrylic paint (or any color desired).
-
Bend wire around bottle cap to help form top edge of petal shape.
-
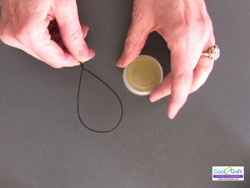
Twist ends of wire to form petal shape.
-
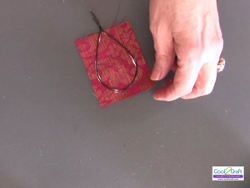
Apply Aleene’s Turbo Tacky Glue to the wire.
-
Press wire onto the right side of fabric. I like to line up the twisted end of the petal with the edge of my fabric because it makes it easier to cut when the glue is dry. Use your fingernail or toothpick to remove excess glue from fabric. You want to the glue to hold to the fabric but you don’t want too much excess glue. Set aside to dry. Repeat to create 5 petals per flower.
-
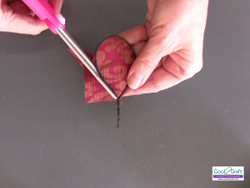
When the glue is dry, cut away excess fabric from outside of wire petal.
-
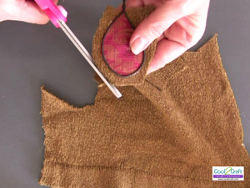
Apply line of glue to back edge of fabric and press onto next layer of fabric. Let dry for about 10 minutes.

-
Cut away excess fabric leaving approximately 1/4″ to create layered fabric look, tapering away fabric as you reach the twisted wire.
-
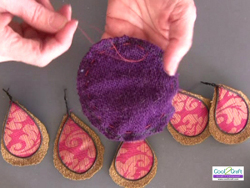
Cut circle of fabric from fabric (I used sweater material). Sew running stitch approximately 3/8″ from edge. Pull stitch to create yoyo shape, insert polyfil and then pull stitching tight. Knot thread to hold in place.
-
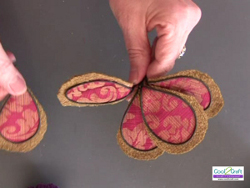
Bend ends of petal wires down. Gather 5 petals together.
-
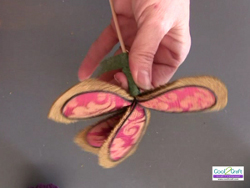
To hold petals together, wrap wires with florist tape. Place wooden stick next to wrapped wires and attach by wrapping with florist tape.
-
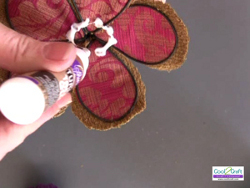
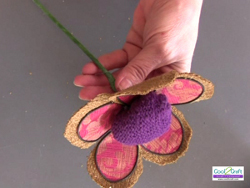
Adjust petals as desired. Apply Aleene’s Turbo Tacky Glue to center of flower.
-
Press flower center into glue with seam side down.
-
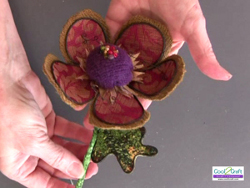
To create leaf, bend wire into desired shape. Glue onto fabric. Let glue dry completely before cutting fabric along wire line. On this sample, I also added fringed fabric and wired beads to the center of my flower. To finish the stem, tear strip of green fabric approximately 1″ wide. Apply dab of glue to end of fabric and begin wrapping around stem, securing with glue every few inches. Secure at end with glue and cut off excess.
For a comprehensive video tutorial of this project, check out How to Make Fabric and Wire Flowers.
Read NextVintage China Flower Display