Beginner-Friendly Free Crochet Cape Pattern

Make a beautiful cape to keep those shoulders warm on brisk spring or autumn days! Featuring basic stitches and simple constructions, this is a fantastic first wearable pattern to crochet!
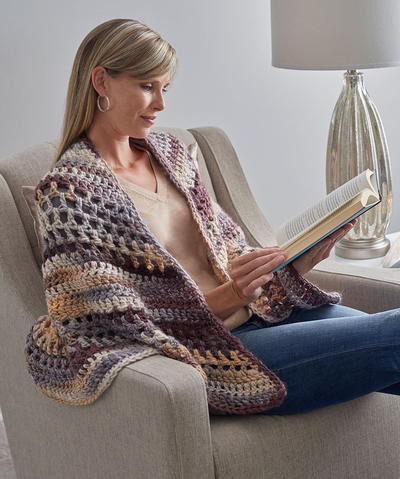
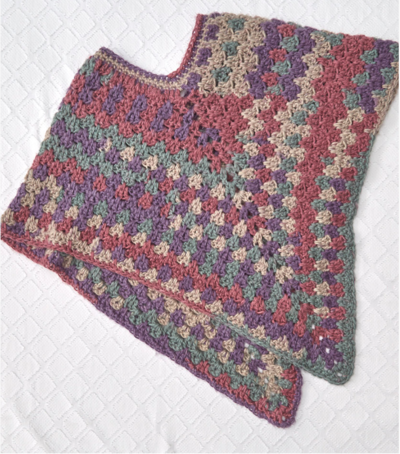
From the Designer: "This crochet cape is an eye catcher in this royal purple color. The entire crochet cape is worked in single crochet. This was a very deliberate design choice in order to keep the focus on the silhouette or shape. I did try this with several different stitches but it only distracted from the strong, sleek shape."

Crochet HookH/8 or 5 mm hook
Yarn Weight(4) Medium Weight/Worsted Weight and Aran (16-20 stitches to 4 inches)
Finished SizeDimensions for size Small: Front panel neck to bottom = 26 inches; width at widest point 19.5 inches. Back panel neck to bottom = 26.5 inches; width at widest point 31 inches
Materials List
- #4 weight Yarn Used here Yarn Bee Soft Secret; 19 ounces/1000 yards/Color Hot Grape. May substitute with Michael’s Loops & Threads Soft & Shiny or equivalent yarn.
- Crochet hook size H/5 mm
- 10 – 12 buttons no larger than 3/4 inch
- Yarn needle
- Scissors
Instructions
This free crochet pattern version is for a size small. Line by line instructions for size Medium, Large, XLarge, 1X and 2X are available in the Etsy pattern Crazy Cool Crochet Cape
NOTE: Add length to your preference. For front panel measure from the bust line to your preferred length. Decrease rows will begin at the bust line. Adding length to the back panel will require 4 additional rows than the front panel to accommodate draping over the shoulder.
Video Tutorial
FRONT PANEL
Ch 73
-
Row 1: sc in 2nd ch from hook and ea ch across. 72 sc’s. Ch 1 Turn
-
Row 2 – 75: sc in 1st sp and ea sp across. 72 sc’s. Ch 1 Turn
-
scdec = single crochet decrease (view video above for more instruction)
-
Row 76: [For sizing see note above regarding preferred lengths.] sk 1st sp to begin decrease row; sc in ea sp to last 2 sp’s; scdec over the last 2 sp’s. 70 sc’s. Ch 1 Turn
-
Repeat Row 76, decreasing 1 sc on ea side of ea row until you are at 20 sc’s. Ch 1 Turn


NECK BORDER
-
Work 5 rows of sc’s working in BLO (back loop only). 20 sc’s. Tie off.

BACK PANEL
Ch 113
-
Row 1: sc in 2nd ch from hook and each ch across. 112 sc’s Ch 1 Turn
-
Row 2: sc in 1st sp and ea sp across. 112 sc’s. Ch 1 Turn
-
Rows 3 – 99: Repeat Row 2
-
Row 100: sc in 1st sp and next 13 sp. * scdec over next 2 sp’s; sc in next 2 sp’s*; repeat from * to * 3 times more; scdec. 5 dec’s total. Sc in next 22; scdec 2x; sc in next 22 sp’s. Repeat from * to * 4 times; scdec. 5 dec’s total; sc in last 14 sp’s. 100 sc’s total. Ch 1 Turn
-
Row 101: sc in 1st sp and next 12 sp. * scdec over next 2 sp’s; sc in next 2 sp’s*; repeat from * to * 3 times more; scdec. 5 dec’s total. Sc in next 38 sc. Repeat from * to * 4 times; scdec. 5 dec’s total; sc in last 13 sp’s. 90 sc’s total. Ch 1 Turn
-
Row 102: sc in 1st sp and next 11 sp. * scdec over next 2 sp’s; sc in next 2 sp’s*; repeat from * to * 3 times more; scdec. 5 dec’s total. Sc in next 13 sc; scdec 2x; sc in next 13 sp’s. Repeat from * to * 4 times; scdec. 5 dec’s total; sc in last 12 sp’s. 78 sc’s total. Ch 1 Turn
-
Row 103: sc in 1st sp and next 11 sp. * scdec over next 2 sp’s; sc in next 2 sp’s*; repeat from * to * 4 times more; scdec. 6 dec’s total. Sc in next 10 sp’s; repeat from * to * 5 times more; scdec. 6 dec’s total. Sc in last 12 sp’s. 66 sc’s. Ch 1 Turn
-
Row 104: sc in 1st sp and next 9 sp. *scdec, sc in next 2 sp’s*. Repeat from * to * to last 10 sp’s (you will have worked the last scdec and have 10 sp’s remaining). Sc in last 10 sp. 54 sc Ch 1 Turn
-
Row 105: Repeat Row 104. 45 sc. Ch 1 Turn
-
NOTE: the decreases will cause puckering. This is normal.
-
Rows 106 – 110: sc in BLO of ea sp. 45 sc. Tie off.

BORDER
With right side facing you, attach yarn at top left corner. Work one row of sc evenly spaced along the edges only (not the top or bottom). Tie off.
NOTE: Back panel will be slightly longer than the front panel by design. The back panel drapes over the shoulders while the front panel does not reach the shoulders.
ATTACH PANELS
-
Place front panel (right side facing up) on top of back panel (wrong side facing up). Folding over the back panel at the shoulder so the wrong side of the front panel (the sc border) sits on top of the back panel (sc border). Match up the front neck border with the back neck border at the corners to begin seaming.
-
With yarn needle and length of yarn, bring the needle from inside of back panel up through the top of front panel. Taking care to match up rows as you g; insert the hook slightly to the left of the stitch you just completed (top panel), insert needle through top panel through the back panel. Insert needle slightly to the side of stitch you just completed (back panel), up through the front panel.
-
Continue seaming in this manner until you reach the row where the decrease row began.
-
Repeat the seaming for the opposite side.
-
Sew buttons evenly spaced with sewing needle and thread.


Discover More Featured Patterns:
Read NextEmpire Waist Crocheted Tunic