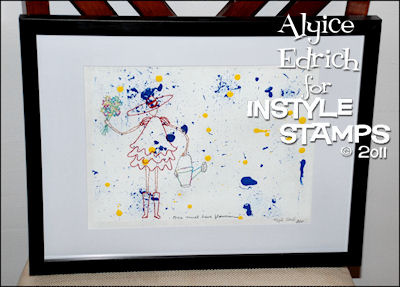
Embroidered Abstract Art
Use these art project ideas from Alyice Edrich to make embroidered abstract art, which is great for decorating your home and sprucing up your walls.

Materials:
- 9" x 12" Watercolor Paper
- 6.466" x 8" print out (Flora from InStyle Stamps)
- Frame with 9" x12" matted opening
- Gesso - white
- Acrylic Paints: Blue, yellow
- Matte acrylic sealer
- Graphite pencil
- Regular Ballpoint Pen
- Micron fine tip pen
- Eraser
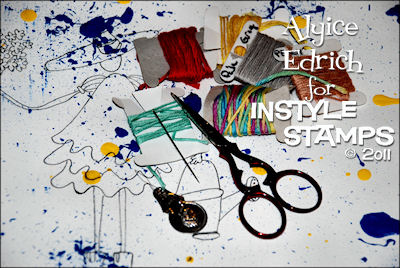
- Embroidery Thread: flesh (peach), red, grey, multi-colored strands
- Needle for hand quilting
- Threader
- Scissors
- Masking Tape
- Printer
- Digital software
Instructions:
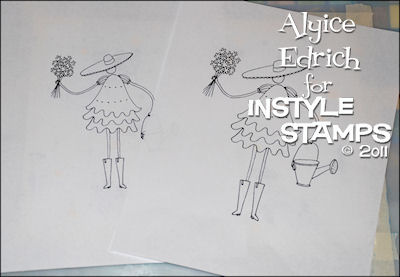
- Download your purchased digital stamp from InStyle Stamps.
- Resize image so that it is 8 inches tall.
- Print it out on regular copy paper and set aside.
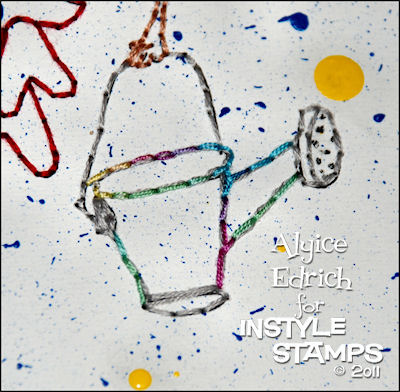
- Tape the edges of your watercolor paper to your tabletop using masking tape. If you go in 1/8", you'll create a nice subtle border.
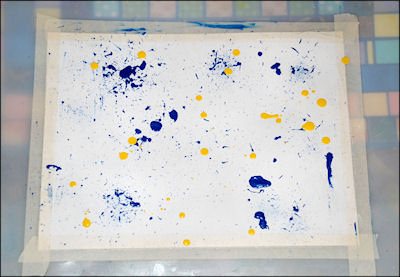
- Paint the entire sheet of watercolor paper with white Gesso and let dry.
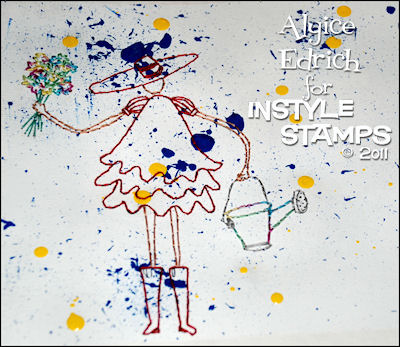
- Splatter blue and yellow paint over the paper and let dry.
(You can create splatter by placing paint on an old toothbrush and then flicking the paint onto the paper, you can simply hold the paint bottle upside and allow it to slowly drip out, or you can squeeze a near-empty tube of paint over the paper.)
- Flip the print out over, and using a graphite pencil, shade in the entire backside.
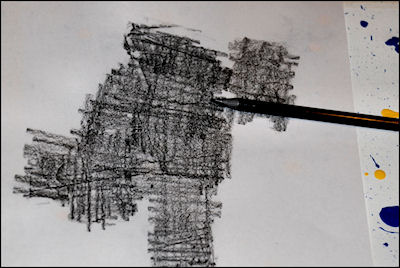
- Flip the print out over, place it on top of your painted paper and using your pen trace the design onto the paper. (To make sure your image is transferring, lift up the corner. If it's not transferring, remove and add more shading.)
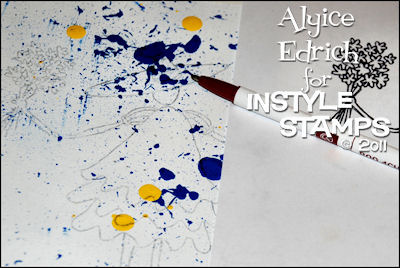
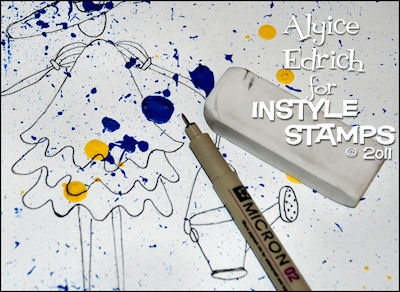
- Use a fine tip Micron pen to trace the outline, referencing the original image to fill in any gaps that didn't transfer well.
- Gently erase the graphite lines.
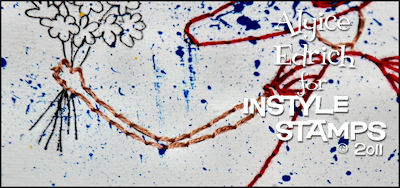
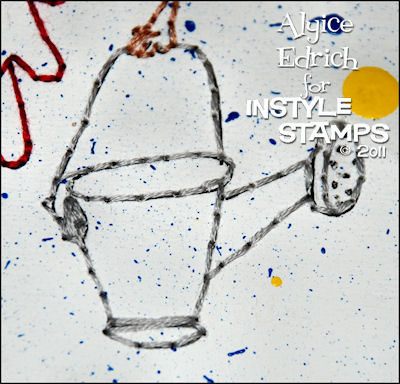
- Embroider the outline of your digital image.
When embroidering paper you want to be very careful, if you poke holes in the paper too close together or you pull at the thread to hard, you will create rips so take your time. Start with one area, and one color, then when that color is completely stitched in, move onto the next color.
It's best to use a basic backstitch when starting out. Basically you will poke a hole into your design from the front of the paper, then come up from the back of the paper, pulling the threaded needle through the paper. Next, poke a second hole about 1/8" behind your original hole and pull the threaded needle back through the paper. Repeat this process, until you've stitched the entire image.
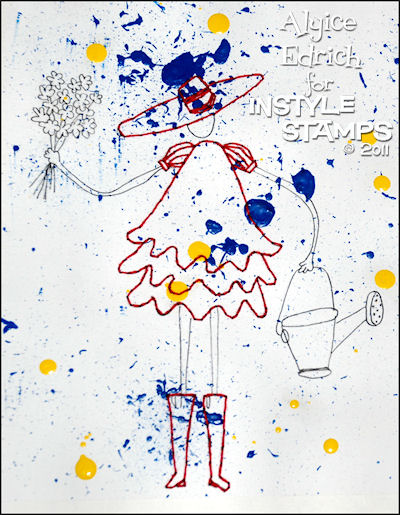
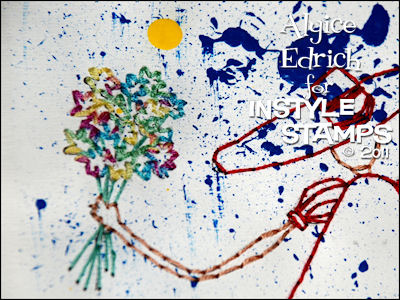
- Handwrite "One must have flowers" on the bottom of the page using the Micron pen, sign and date.
- Seal with acrylic spray sealer and let dry overnight.
FTC Disclaimer: Flora digital stamp was provided, free of charge, by InstyleStamps. This post was written while I participated on the InStyleStamps design team as a Chickie. www.InStyleStamps.com