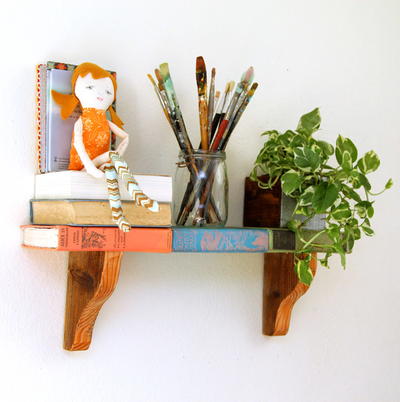
Vintage DIY Coat Rack
Make a DIY coat rack that contains clutter and adds vintage style at the same time.

Add some seriously stylish DIY home décor to your space when you learn how to make your own coat rack. This Vintage DIY Coat Rack is a charming home décor project that is relatively easy to make and multi-purpose. This delightful piece of DIY furniture will look chic and pretty in your entryway. If you lack an entryway or are just looking for unique ways to use homemade organizer ideas, this project could be converted into a bedroom organizer to hang jewelry, coats, or even scarves. Simple, budget-friendly, and sturdy, this vintage craft idea is sure to find a place in your home.
Estimated Cost$21-$30
Time to CompleteWeekend project
Primary TechniqueRepurposing

Materials List
- Design Master übermatte Wisteria 557
- 36” x 7 ¼” x ¾” wood slat – pine used here
- 2 – 36” Wood trim of different patterns
- 4 Wood die cut trims in varied colors
- 4 Drawer pulls – 2 each of varied style
- Remnant candle for wax
- Hack saw
- Fine grade sand paper
- Wood glue or similar
- Drill and drill bits
- Needle-nosed pliers
- Paper towel
- Latex gloves
Make the Vintage DIY Coat Rack
Instructions
-
Layout patterned wood trims, die cut trims and placement of knobs on wood slat. Mark centers of any die cuts that will need a hole in its center. Mark location of the knobs on the wood slat.
-
Use a drill bit the size of the screw stem on the knob and drill a hole in any die cut trims needing a center hole. Use the same bit to drill a hole for each knob placement on the wood slat.
-
Turn the wood slat over to its backside. With a larger drill bit drill, a counter sink the depth of nut. This will keep the backside of the shelf flush when screwing the nut on the knob stem.
-
Sand the edges of the wood slat to soften edges. Remove the sanding dust.
-
With the candle, rub desired areas of the wood edges to create the worn effect. The wax will be removed later to reveal the raw wood under the paint.
-
Spray the wood slat Wisteria. Apply 2-3 coats, allowing each coat to dry between applications. Raw wood is porous and may take additional coats.
-
Wipe away the wax to reveal underlying wood. Holding can about 15” mist Wisteria lightly over the exposed wood to soften.
-
Spray the patterned wood trims in Wisteria. When dry, spray Wisteria onto the tip of your index finger that is wrapped with paper towel. Immediately wipe away color in select areas for a washed effect. Repeat with more spray in towel as needed. On the trim used here, the leaf pattern is revealed on one trim and the ribbing highlighted on the second. You can also use Design Master MESS MASTER or acetone to do this step.
-
Glue the wood trims in place.
-
You will most likely need to cut down the screw stems of the knobs. Measure the cut by inserting the knob through the die cut trim and align them on the edge of the wood slat. Use a piece of tape to mark the section of stem to remove. Cut excess stem with the hacksaw.
-
Insert the knob stems through the die cut trims and then into predrilled holes. On the backside screw the nut over the stem. Hold it in place with needle-nosed pliers while turning the knob tight to secure. No need to glue the die cut trim in place.
-
Attach picture hanging kit on backside and, hang!
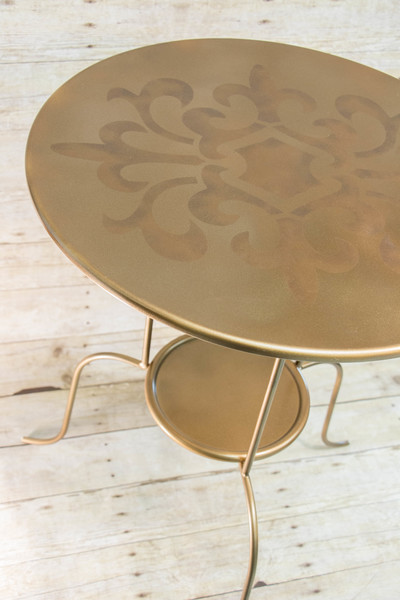
Read NextVintage Design DIY Side Table
Your Recently Viewed Projects

Thanks for your comment. Don't forget to share!
Marilyn B
Apr 30, 2017
This is a lovely idea! Using various door pulls is a cute and clever way to add to your decor. Another take on this idea is to use old doorknobs! I have seen it with those glass knobs and it looks really pretty too. But with all the many choices of vintage or new drawer pulls you could compliment any decor! I also,love the artistic pattern on the wood, so pretty! Thanks for sharing!
Report Inappropriate Comment
Are you sure you would like to report this comment? It will be flagged for our moderators to take action.
Thank you for taking the time to improve the content on our site.