15 Minute Macrame Rainbow

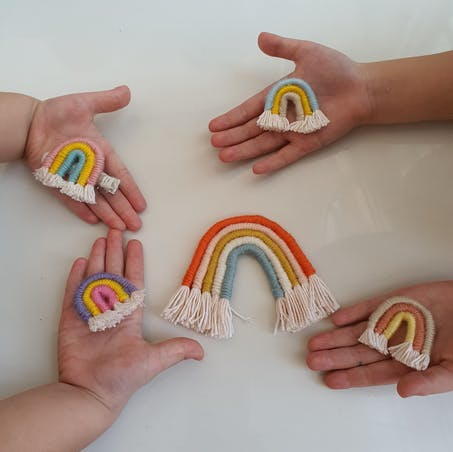
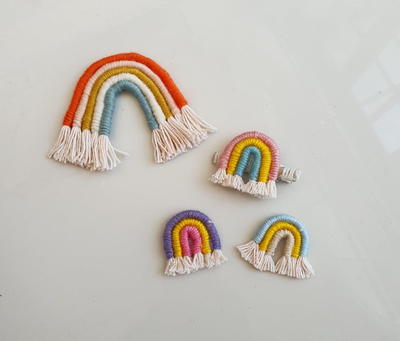
This 15 minute macrame rainbow might be the most adorable scrap yarn project we've ever seen! You can create these little rainbows using any color combinations you want. If the rainbow isn't for you, that's okay! You can easily use this technique to make any shape you like, and the results are sure to be beautiful and versatile! Want to glue it to a hair clip or headband? You can! Maybe you want to attach it to a keychain or thread it onto a necklace with some beads? You can do that, too! This awesome and easy macrame craft is just the quick project you've been looking for!
PLUS Enter to win the LoveCrafts Paintbox Yarn and Bag Giveaway as part of our 12 Days of Christmas in July giveaways as well as our 12 Days Grand Prize!
Estimated CostUnder $10
Time to CompleteUnder an hour
Main MaterialYarn

Materials List
- Paintbox Yarns Simply DK
- Tape
- Hot glue
- Bendable wire
- Scissors
Instructions
-
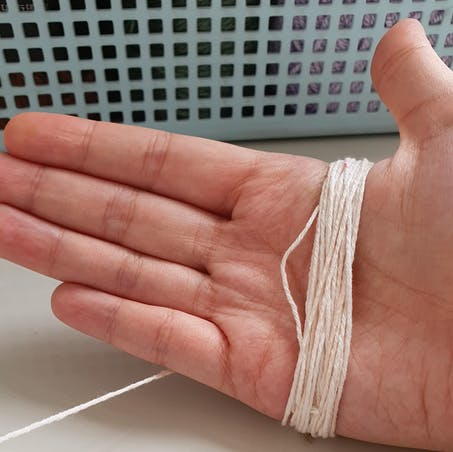
With the neutral coloured yarn, wrap around your palm 15 times, or how ever many it needs to get the thickness you want, depending on your size of yarn.
-
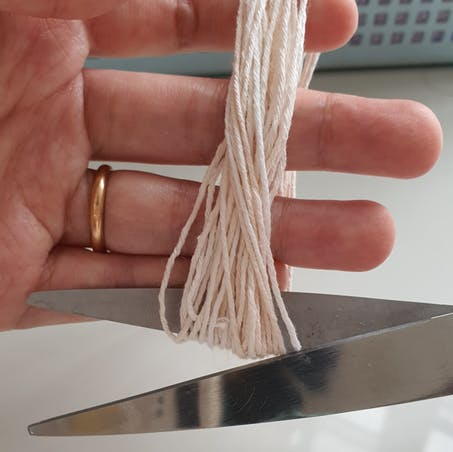
Cut the yarn on the bottom and also on the top. You’ll have 2 bundles of yarn for now. You can also use a piece of carton or anything you have to wrap your yarn on and get the needed length.
-
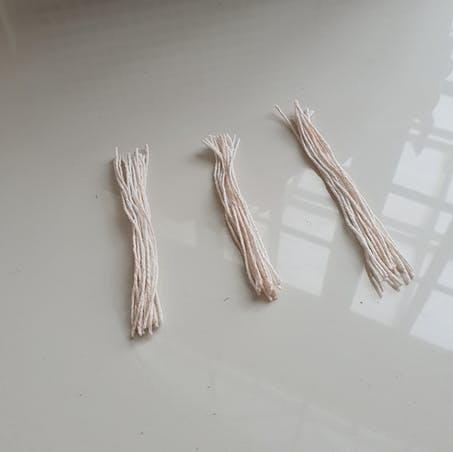
Make one more bundle of yarn this way so you’ll have 3 bundles of yarn.
-
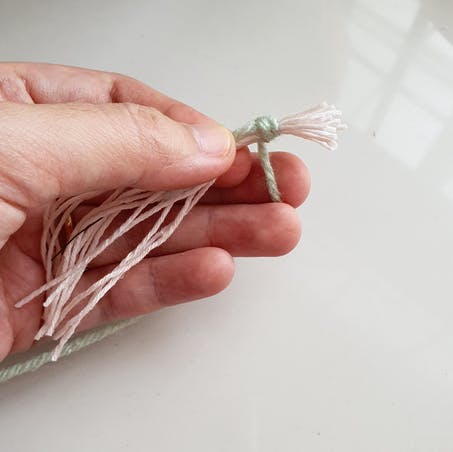
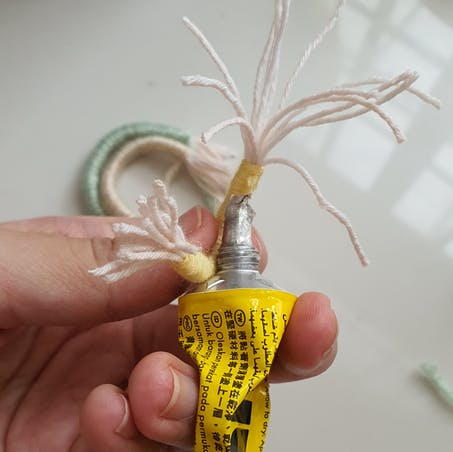
Cut 3 strips of clear tape and place it aside for now. Place the wire in between the yarn and secure one end with the clear tape tightly. Cut off any excess length of wire. Repeat to the other bundles.
-
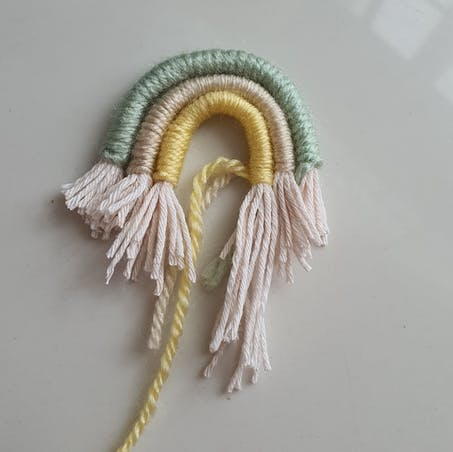
Choose 3 colours of yarn you’d like for your rainbow. Tie your first colour yarn on top of the clear tape. Pull the yarn end and hold it in the same direction with the rest of the yarn.
Now start wrapping tightly. Cut the yarn once you get to the other end, and tie it off securely. Bend it so you’ll have the first rainbow arc. -
Repeat the same steps with the other 2 bundles using different colours, but this time bend and align to the first arc so your wraps would start and end on similar point. Cut excess wire if there is any.
-
Cut the yarn tail, leaving a tiny bit of it. Dab some glue on the tiny bit, press and hold tight until the glue is dried so it won’t unravel. Do the same to the other arcs.
-
Take the smallest arc and glue all the way following the arc, take the middle arc and place it on top of the glue. Make sure the starting and ending point are aligned, and hide the tiny glued bit hidden in between the arcs. Press together until the glue is dried. You can use clips if you want. Repeat the process with the largest arc.
-
Trim the excess yarn on the bottom so you’ll have straight edges. That’s it you’re done!