This project was submitted by one of our readers, just like you.
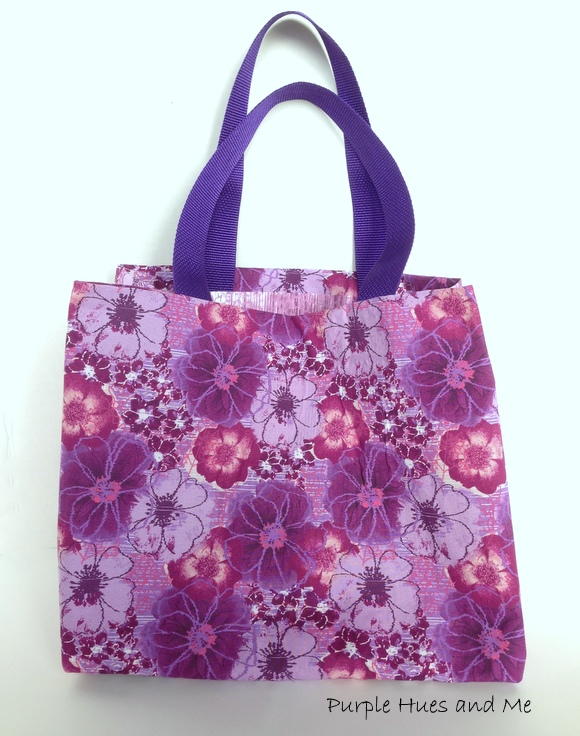
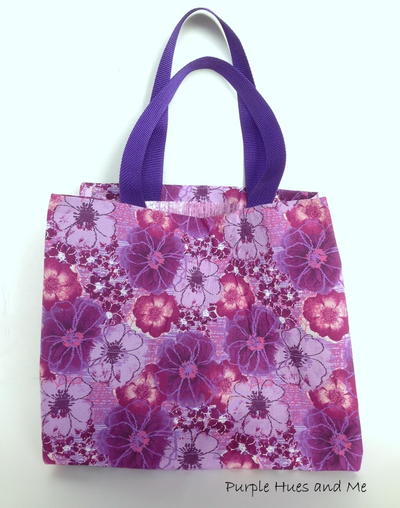
Fat Quarter and Duct Tape Tote Bag (No Sew)

"Knowing how to make your very own tote bag comes in handy these days since many people are choosing re-usable totes for their special bag needs! Using tote bags also reduces the amount of plastic bags (a no-no today) and helps to reduce waste! And the uses for a tote bag are almost unlimited - from shopping, grocery, school, work, carry-on, garden, book, storage, overnight, weekend, gym, beach, etc., or just as a fashion accessory! So many!"
Primary TechniqueFabric Crafts

Materials List
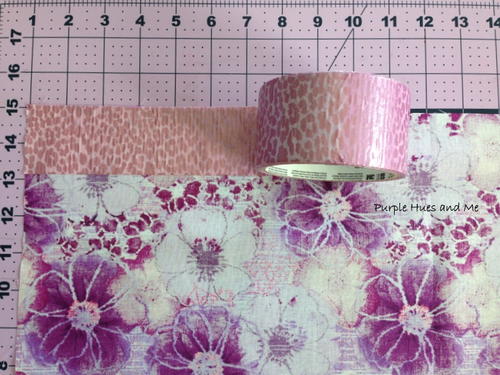
- Fat Quarters (2-21"x18") fabric - (ironed)
- Duct tape - ten yard roll (2)
- Stapler
- Scissors
- Ruler
- Webbing strap (2-24")
- Lighter
- Cardboard for bottom *optional
Instructions
-
Lay the ironed fabric down, wrong side up, left to right (21"), on a cutting mat or non-stick work surface and begin taping down strips of duct tape across the fabric starting at the top.
-
Overlap each strip just a bit as you continue adding duct tape along the entire surface of the fabric. Make sure to smooth down the edges of each duct tape strip on the fabric - turning over to check for smoothness, too. The fabric might wrinkle up on the other side, so be sure to smooth it out! Then apply the duct tape to the second fabric piece the same way.
-
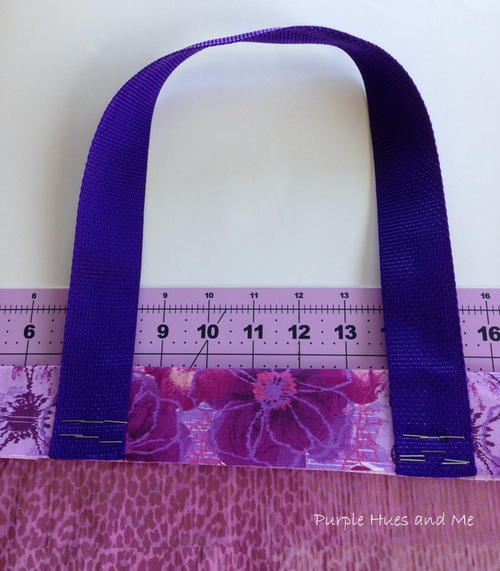
To add straps - first, seal the ends of the 24" webbing with the flame of a lighter to prevent fraying.
-
Next, fold down the fabric of each piece, two inches on the longer side (21") creating a flap. Then using a ruler, measure 7 inches from side end of fabric and place down one end of the webbing strap and staple midway through the flap several times.
-
Next, curve the webbing strap around to the opposite side at the 7" placement and staple to fabric flap several times, as before.
-
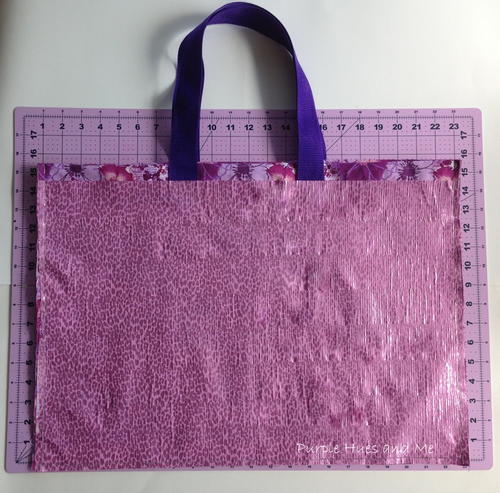
Then lay a strip of duct tape from one side to the next, across handles and edges, covering all staples. Add a second strip of duct tape for extra hold and reinforcement.
-
Use the strap placement from the first piece for the second piece strap match-up. Once both handles are secure, place the two fabric pieces right sides together, matching edges and begin stapling edges together in a straight line about a quarter of an inch from edges - down one side and then the next, until all three sides are stapled together.
-
Next, cover all staples with duct tape, first placing tape half way down on one side edge and smoothing over on to the other side, covering and sealing all the staples on all three sides.
-
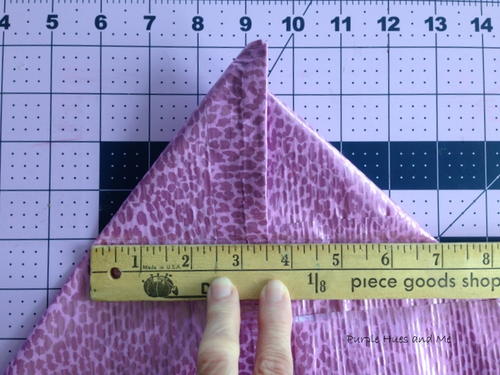
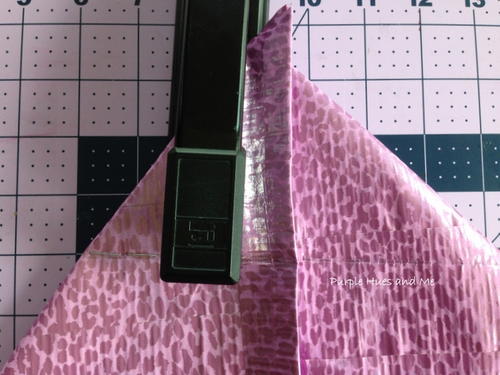
To square the bottom of the bag, push the inside corner out with your hand creating a triangle. Then flatten and smooth out the triangle pointed end and measure down seven inches, then staple across, keeping edges flat and straight.Next, cover and seal staples with duct tape.
-
Once both triangles are stapled and taped, turn bag right side out, placing triangle corners flat inside bag. Cover corners down to bottom of bag with strips of duct tape. Add additional strips of duct tape for extra reinforcement.For additional bag support, make a flat piece to insert in bottom of bag, by cutting a piece of cardboard the inside width and length of the bag and cover with duct tape.
NotesHow cool is this tote bag! Made out of fabric, staples and duct tape!