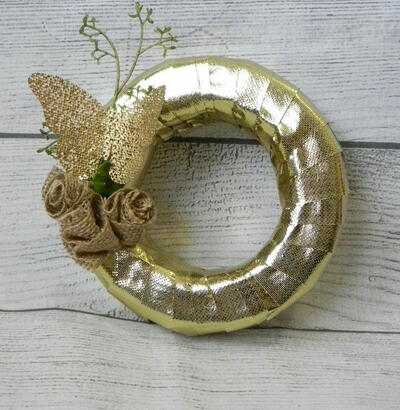
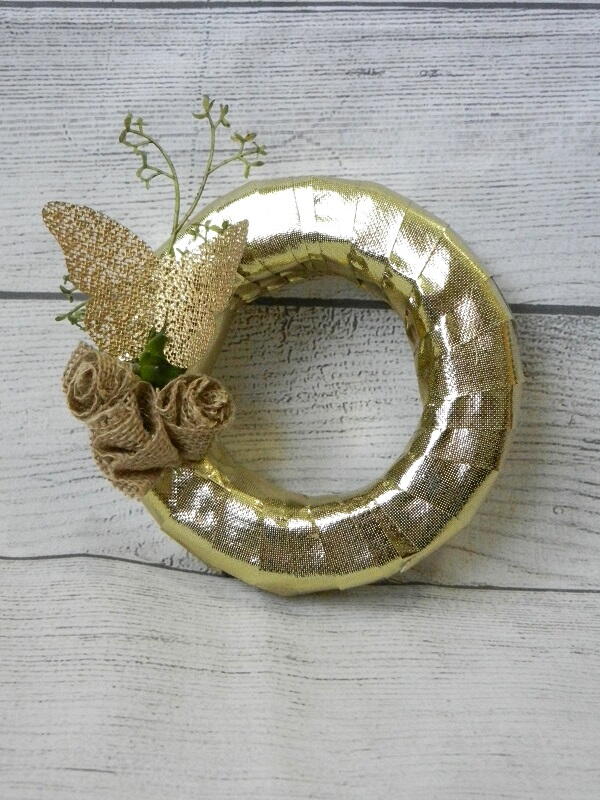
Metallic Gold Spring Butterfly Wreath

Neutral burlap meets radiant gold with this elegant spring wreath! Learn how to make burlap roses, a butterfly full of texture, and finish off the shiny wreath with a floral sprig.
From the Designer: "A wreath is a beautiful way to decorate your home. Here is a simple spring wreath project that you can customize for your own personal taste."
Time to CompleteIn an evening

SeasonSpring
Project TypeMake a Project
Materials List
- Foam ring
- Gold ribbon or fabric strips
- Artificial floral greenery
- Burlap ribbon
- Meshdecor
- Hot Glue Gun
- Hot Glue Sticks
Instructions
Wrap your Spring Wreath
Take your foam ring and put a dab of hot glue on it to glue down the end of the gold ribbon. You will wrap the gold ribbon around the ring adding a dot of glue as needed as you go along to secure it. Always place the glue on the ring and that wrap the gold ribbon over that to hide where you glued it down.
Rolled Flowers for your Spring Wreath
Next, grab your burlap ribbon. If it has wire in it, you can pull that out since you do not want these flowers to be too stiff. Roll and scrunch the ribbon on one end to create the little flower bunches. They do not have to be perfect. I rolled and kind of folded mine to create the flower. I used some hot glue as I rolled to secure the flower. Use the hot glue to secure the rolled flowers to the spring wreath. Place them in a small grouping, and then slide the artificial floral greenery on one side of the rolled flowers.
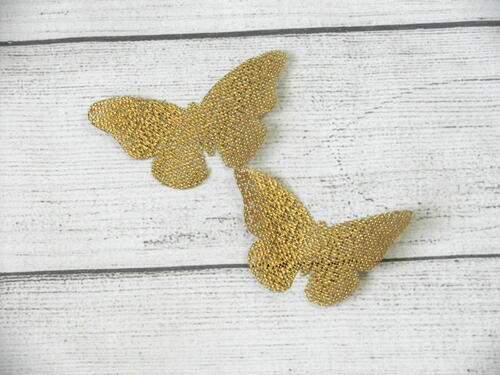
Meshdecor Accent
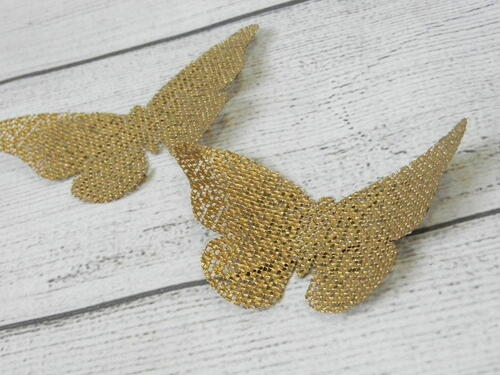
On this spring wreath I added a butterfly accent that I cut from Meshdecor. If you have not used Meshdecor before, the best way that I can explain it is like a stiff tulle fabric. It comes in a range of beautiful colors, and personally I love the little bits of sparkle in it when the light hits is just right.
Tips for using Meshdecor
-
Cut your Meshdecor on your Strong Stick Cricut mat. It is really important that the Meshdecor does not move around on the Cricut mat when cutting. You can also tape down the edges of the Meshdecor to the cutting mat to help secure it even more. I use painters tape for this. Last, I set my material to Custom on my Cricut and then choose the Burlap, Bonded from the Fabric section. I have shown this on the image below to help you find it. I have a short video about using Custom Material Settings HERE.
-
Once cut, this is what my Meshdecor butterflies looked like. Look at those little sparkles of glitter in the weave of this material!
Note: click images for larger versions. -
I used another dab of hot glue to secure a butterfly to the wreath.
Discover More Featured Projects:
Read NextSpring Hedgehog Yarn Wreath