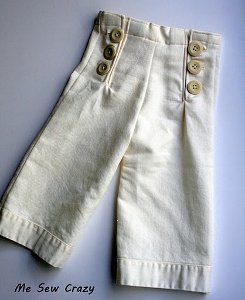
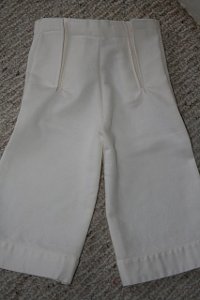
Girls' Sailor Trousers
You probably won't find garments this fashionable when searching free sewing patterns for kids clothes. Jessica Gerblick has a talent for designing stylish, intuitive sewing patterns for kids, like these Girls' Sailor Trousers.
Materials:
- ½ - ¾ yd fabric, depending on the size of your child
- Scrap interfacing
- Buttons
- Fabric marker
- Ruler
- Coordinating Thread
- Pair of pants that already fit well, for pattern sizes
- Strip of elastic for waistband
Note: Use 1/2 inch seam allowances unless otherwise noted
Instructions:
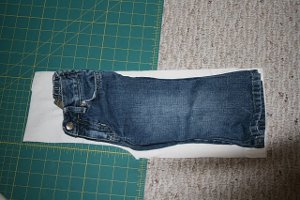
- To get your pattern pieces, you will need a pair of well-fitting pants to trace around. Lay folded pants on folded fabric and cut around, adding ½ inch for seam allowance on sides, 2 inches on top for waist band, and 1 inch on bottom for hem band. Cut (4) of these. You could turn the pants around and cut a back pattern for a more specific fit, but I find that when making pants for kids under 2 or 3, the difference is not that great. Note that I am using an old tablecloth for my pants in the photos, so you will not see the additional seam allowance for the hem band in my cut, as I will use the existing tablecloth hem for mine:
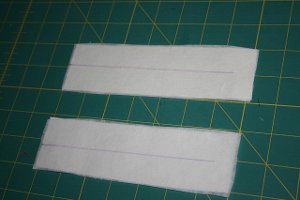
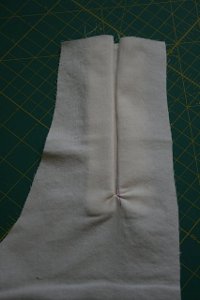
- Lay the 2 front pattern pieces right side up. Measure in halfway from the middle of the top, and use a ruler to draw a straight line down, stopping at about 2 - 2.5 inches above where the front seam curve ends. See Photo:

- Add 1 inch to the length of that line, and cut 2 rectangles of fabric and 2 rectangles of interfacing as long as that number and 2 inches wide. For example, my line was 7 inches long, so I added 1 inch and cut (2) 8 x 2 inch rectangles of fabric and (2) 8 x 2 inch pieces of interfacing.
- Interface the wrong sides of your (2) 8 x 2 inch pieces of fabric (or whatever you measurement was for the length).
- On the pieces that you just interfaced, mark a line down the center of the interfacing equal to the line you marked on your pants, leaving the bottom 1 inch unmarked. See Photo:
- For the button flaps: Using the same line measurement from the pants pieces, add 2 inches for the length of the button flaps. Cut (4) rectangles of fabric 3 inches wide each for the button flaps. For example, my button flaps were 9 x 3 inches.
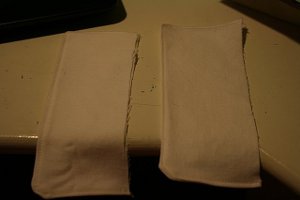
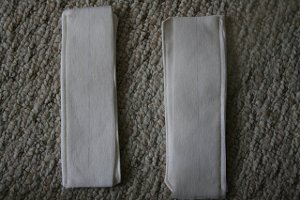
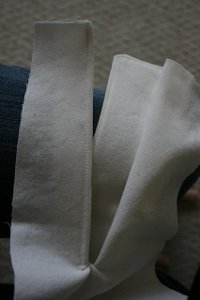
- Take (2) of the button flaps and lay right sides together, matching raw edges. Sew along the 3 outer edges, leaving one long edge open. Turn right side out and press. Edge stitch. Repeat for other button flap. See Photo:
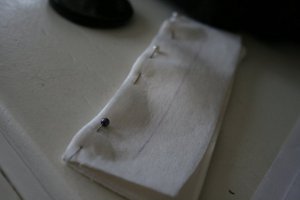
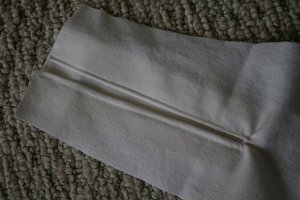
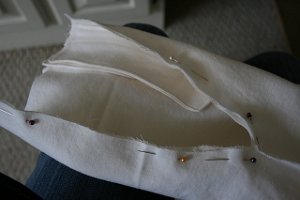
- Fold down the unsewn edge of the button flap ¼ inch and press. Lay the interfaced piece on top of the button flap, right sides together, with the folded edge in the middle. Pin along the folded edge side and sew. *Be sure the line on the interfaced rectangle is on top* See Photo:
- Repeat for other button flap and interfaced piece, but be sure to reverse the side you are doing it on! Previously, you sewed along the left side; this time you will sew along the right side. You will now have this:
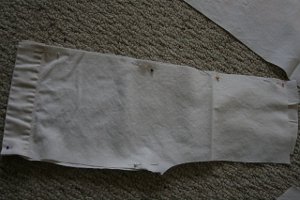
- Unfold the button flaps and lay them on top of the front of the pants, right sides together. Match up the lines drawn on the pants and the lines drawn on the interfacing. The sewn unfolded flaps will be going towards the center. See Photo:
- Pin the drawn lines together, and sew a curved U-Shape starting at the top of the pants, down and around the drawn line, and back up to the other side. Sew AROUND the drawn line as CLOSE to the line as possible. Repeat for both front pant pieces. See Photo:
- Very carefully cut down the drawn line. See Photo:
- Now, turn the flap towards the inside of the cut line, to the wrong side of the fabric, and press around cut line. Repeat for other leg. You should have this when finished:
- Next, edge stitch around the line in front, to secure the pieces of the button flap in place. First, move the flap backwards, and edge stitch down the side without the flap. See Photo:
- Then, flipping the flap back in place, edge stitch down the other side, securing the flap in place with the edge stitching. You will have this when done. See Photo:
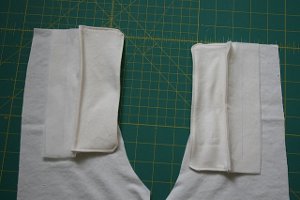
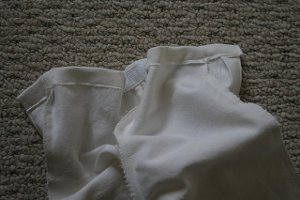
- To construct the pants: Lay the back of the pants on top of the front of the pants, matching side seams, right sides together. Sew along side seam, and up leg seam, stopping at the curved crotch. Repeat for other leg. See Photo:
- Turn one pant leg right side out, and slip inside other leg, matching seams and right sides together. Pin around center crotch seam and sew. See Photo:
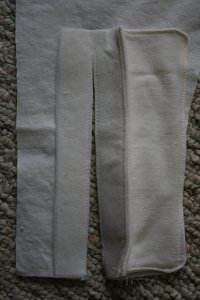
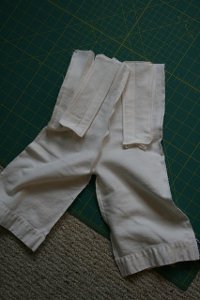
- Pull pant leg out and you should now have something that looks like this (With the exception of the hemmed leg; remember I am making mine from an old tablecloth and had the hem there to begin with):
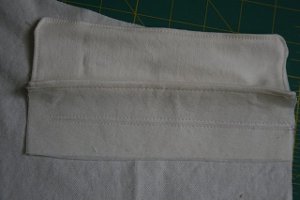
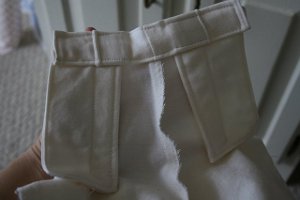
- To make the waistband: Starting with the front flap, fold down 1 inch towards wrong side and press. Fold down again towards wrong side and sew along bottom, top, and side edges. See Photo:
- Fold the back waist down 1 inch towards wrong side and sew in place.
- Measure your child's waist and the waist of the pants. The difference minus 2 inches will be your elastic length. (So, if my son has a 19-inch waist and the pants are 24 inches around, the difference between the two is 5 inches. This difference minus the 2 inches equals 3 inches of elastic needed.)
- Pin the middle of the elastic to the back waist seam and stitch in place with a wide stationary zigzag stitch. Stretch the elastic out 1 inch on either side, pin it, and then stitch it down with the stationary zigzag. Don't worry about it looking a little bunched; it will be pulled out when the band is sewn.
- Fold down 1 inch more towards wrong side, enclosing the elastic. Straight stitch along both edges of the waistband. Turn the pants right side out and you should now have this:
- To hem the bottom of your pants, simply turn ¼ inch towards wrong side of fabric and press. Turn again ½ - ¾ inch and press. Sew hem in place.
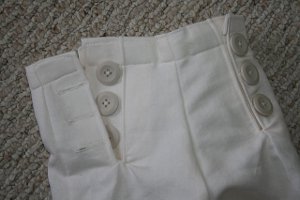
- When sewing on your buttonholes and buttons, be sure to mark them evenly, so they line up properly. Sew the buttonholes on the outside and the buttons on the inside flap. See Photo:
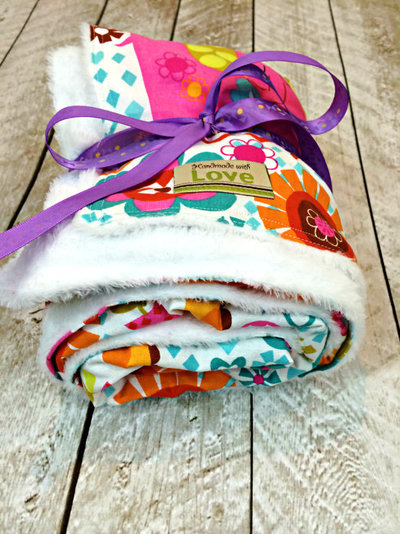
Read NextTwenty Minute Baby Blanket