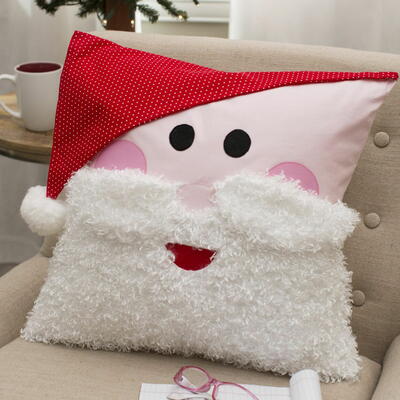
How to Make a Santa Pillow

Learn How to Make a Santa Pillow for this holiday season. This Christmas throw pillow will bring a jolly mood to any atmosphere. Santa's vibrant red color will be sure to brighten gloomy winter days, and his soft, fuzzy beard will bring cozy warmth to living room gatherings and activities. Simply follow this free and easy sewing pattern to make this festive pillow a part of your family's cheerful Christmas season. And be sure to spread the Christmas spirit by gifting the rosy red pillow to your extended family and friends.

Materials List
- Coats Dual Duty XP All-purpose threads,color 100 white, 900 black, 1210 pink, 1840 hot pink
- Coats polyester zipper, 16" (40.64cm) 01 White
- 5⁄8 yd (57.15cm) white-on-white cotton fabric
- 1⁄3 yd (30.48cm) curly fleece
- ⁄3 yd (30.48cm) red/white dot cotton
- 1⁄4 yd (22.86cm) pale pink cotton
- Small scraps: bright pink and red cotton fabrics, and black felt
- 21⁄2" (6.35cm) white pompom
- 18" (45.72cm) square pillow form
- Paper-back fusible web
- Template: for nose, mouth, cheeks, eyes, mustache, hat
- Click here for PDF instructions and pattern

We're so excited to share more easy Christmas crafts with you! Browse100+ Easy Christmas Crafts for Adults
Instructions
Cutting
-
From the white fabric, cut: 1 square, 181 ⁄2" (46.99cm) for pillow front 2 rectangles, 10" x 181 ⁄2" (25.40cm x 46.99cm) for pillow backing
-
From the curly fleece, cut: 1 rectangle, 11" x 181 ⁄2" (27.94cm x 46.99cm) Save the remainder for the mustache.
-
From the pale pink cotton, cut: 1 rectangle, 81 ⁄2" x 181 ⁄2" (21.59cm x 46.99cm)
-
From the red/white dot, cut: 2 hats using template
Assembling the Pillow
-
Using a 3 ⁄4" (1.91cm) seam allowance, insert the zipper in the pillow backing, along the 181 ⁄2" (46.99cm) rectangle edges.
-
Baste the pale pink rectangle to the pillow front square, matching raw edges, and sewing the outer edges as well as the center edge.
-
With right sides together, place the curly fleece along the center edge of the pale pink rectangle. Sew in place using a 1 ⁄4" (.64cm) seam allowance. Fold the fleece down and with the pillow front wrong side up, baste along the edges to hold the fleece in place; trim the excess fleece.
Tip: Curly fleece is quite slippery and can easily distort while sewing, so handle carefully -
Trace the nose, two cheeks, mouth and two eye templates onto the fusible web paper backing. Following the manufacturer's instructions, fuse the nose to pale pink fabric, the cheeks to bright pink fabric, the mouth to red fabric, and two eyes to the black felt. Cut out on the drawn lines.
-
Mark the vertical center of the pillow front and place the facial features as desired. Fuse in place, being careful of the areas being fused to the fleece—touch those only with the tip of the iron to avoid damaging the fleece surface.
-
Using matching thread and a narrow zigzag, appliqué the features in place.
-
To make the moustache, fold the remaining fleece rectangle right sides together and pin. Trace two mustache shapes on the wrong side of the fabric and stitch on the lines, leaving a small opening for turning. Trim the fabric leaving 1 ⁄4" (.64cm) seam allowance. Turn each mustache section right side out, poke out the corner and hand-stitch the opening closed.
-
Place the two hats right sides together and sew the curved section and short straight edge using a 1 ⁄4" (.64cm) seam. Clip the curve and turn the hat right side out, poking out the corner. Baste the long edges together.
-
Position the hat over the pillow front, aligning the long raw edges. The hat should be 1 ⁄4" (.64cm) in from the pillow left edge. Baste in place along the upper edge. Fold and pin the left side out of the way to avoid catching it in the seam.
-
With the zipper open, place the pillow front and back right sides together, matching raw edges. Be sure the finished hat edge is away from the seamline. Sew around the pillow using a 1 ⁄4" (.64cm) seam allowance. Clip the corners and turn the pillow right side out.
-
Poke out the pillow corners to square. Unpin the hat point. Hand-stitch the pompom to the hat point. Position the mustache on the pillow front and handstitch the center curves in place. Loosely hand-stitch the pointed mustache ends in place.
-
Insert the pillow form and zip the zipper.
What holiday character would you love to see on a festive throw pillow?
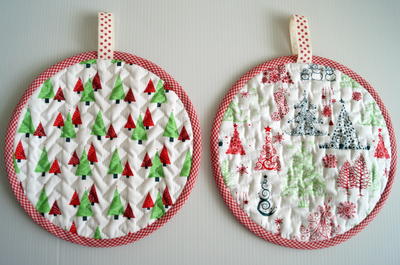
Read NextFestive Pot Holder Pattern
Your Recently Viewed Projects
Thanks for your comment. Don't forget to share!
Report Inappropriate Comment
Are you sure you would like to report this comment? It will be flagged for our moderators to take action.
Thank you for taking the time to improve the content on our site.