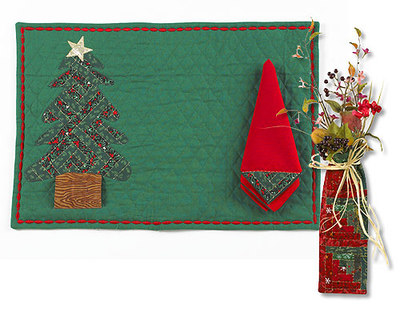
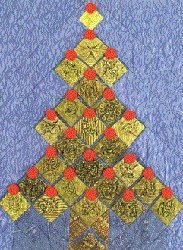
Christmas Tree Quilt
Christmas quilts make great gifts and fantastic keepsakes. This Christmas Tree Quilt from Clover Needlecraft is perfect for the holiday season - you'll love the beautiful design.

Supplies:
- Large Puff Quilting Clip Set Art. No. 8401
- Small Puff Quilting Clip Set Art. No. 8400
- Small Yo-Yo Maker Art. No. 8700
- Rotary Cutter Art. No. 7501 or 7502
- Cutting Mat Art. No. 7522
- Ruler Art. No. 7002
- 2/3 yd. total assorted Greens for pocket top and base
- 1 fat qtr. Brown for tree trunk
- 1 fat qtr. Red silk for yoyo ornaments
- 1 10” sq Gold silk for tree topper
- ½ yd. fabric for background (more if using a directional print)
- ½ yd. for backing
- 1/8 yd. for binding
- 24 Small snaps
- 1 Square 30”x30” batting
Cutting Directions for Tree & Trunk:
- Use the Large Puff Quilting Clip Set from the assorted Greens cut: 23 Tops each 5 ¼” x 5 ¼” and 23 Bases each 3 ½” x 3 ½”
- From the Brown cut: 1 Top 5 ¼” x 5 ¼”, 1 Base 3 ½” x 3 ½” and 1 Square 4 ½” x 4 ½” then cross-cut diagonally twice to make a quarter-square triangleTree Topper Use the Small Puff Quilting Clip Set
Cutting Directions for Tree Topper:
- Tree Topper Use the Small Puff Quilting Clip Set
- From the Gold Silk cut: 1 Top 4-1/8” x 4-1/8” and 1 Base 2 ¾” x 2 ¾”
- From the background fabric cut: 25 squares each 3 ¼” x 3 ¼”. These squares will be behind the dimensional pockets. Cut: 1 square 8” and cross-cut diagonally once to make a half square triangle for section 1 of the assembly. Cut: 4 strips 3 ¼” x 8 ½”. 2 strips 3 ¼” x 14”, 2 strips 3 ¼” x 17”, 2 strips 3 ¼” x 20” and cut: 1 square 18” and cross-cut diagonally once to make a half square triangle for use in sections 6 & 7 of assembly.
- Note: If using a directional fabric pay close attention to cutting the strips so they flow in a straight line from top to bottom or left to right.
Sewing Directions:
- Follow the directions included with the Puff Quilting Clip Set and clip;
- From green fabric for the Tree make 22 rose designs, 1 cross design
- From brown fabric for the Trunk, 1 rose design
- From gold silk for the Tree Topper make 1 cross design
- Note: After the clips are set on the squares the sewing will be as follows: Sew the base to the top at two adjacent sides on the stitch line, leaving the clips on the two un-sewn edges. Turn right side out, set on the background 3 ¼” square, lining up the raw edges and baste to the square. This creates the pockets. See below for illustrations.
- At this time you can manipulate the fabric to create the roses and crosses and add beads and sequins as desired. OR this can be done after the quilt is assembled.
- All seam allowances are ¼” wide. Follow the assembly charts below.
Quilt Assembly:
- After all sections are sewn together, trim the outer edges to the size desired.
- Make 24 Yoyos. Attach half of the snap to the back of the yoyo and the other half to the wall hanging just above the top point of the pocket. Stitch the lower portion of the yoyo to the top edge of the pocket point, matching up the snap sections.
- Layer the wall hanging top with batting and backing; baste.
- Quilt as desired. Add binding and a sleeve for hanging.
- Remember to sign and date.
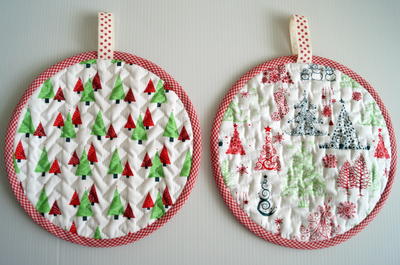
Read NextFestive Pot Holder Pattern
Your Recently Viewed Projects


Thanks for your comment. Don't forget to share!
mulberrygalprinces s
May 22, 2018
I love this ebook. It has so many great ideas. I have done a few quilt projects that turned out very well so I think I will be able to make this since the directions are so well written and easy to follow. Thank you for sharing this beautiful project.
Report Inappropriate Comment
Are you sure you would like to report this comment? It will be flagged for our moderators to take action.
Thank you for taking the time to improve the content on our site.