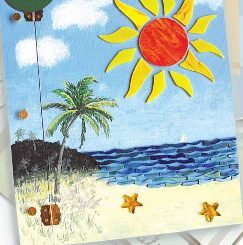
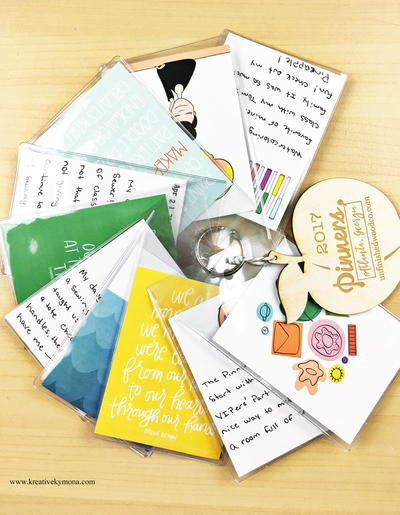
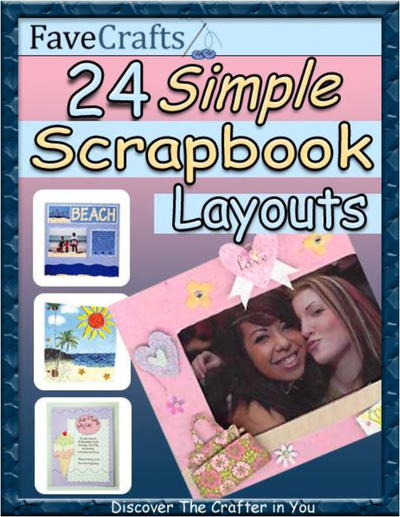
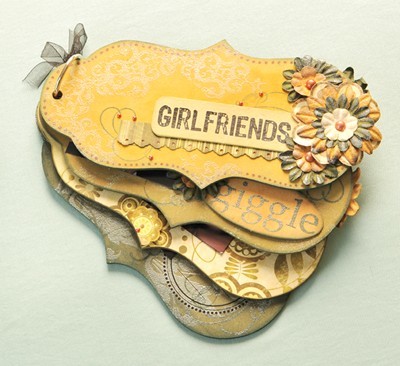
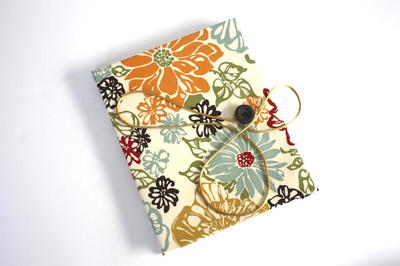
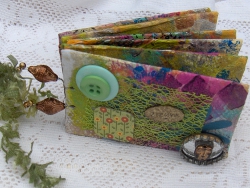
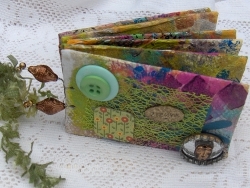
Cute Mini Scrapbook
Keep your memories alive with this Cute Mini Scrapbook from Cynthia Gagen. This scrapbooking idea is fun and easy enough for beginners. It's a great way to remember important events in your life.
Find this project and more in our free eBook, 14 Toilet Paper Roll Craft Ideas.
Materials:
- Toilet paper tubes
- Large binder clips
- Paint
- Paper towel
- Hole puncher
- Embellishments of your choice
Instructions:
-
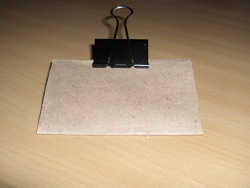
You need to start by flattening your tubes. Each tube makes a page. I found that 6 tubes was pretty much the maximum I could get in a book without it being much too bulky. If you’re planning to add quite a few 3D embellishments, you may want to cut this back to 4. I began by just “smashing’” the tubes with my hands and then making better creases with a bone folder. I found it helpful then to place the tubes under a stack of heavy books for a day or two to flatten further. Using some of those large binder clips on them also helped. They generally won’t get 100% flat but by the time you cover them and bind them, I find they are flat enough for this purpose.
-
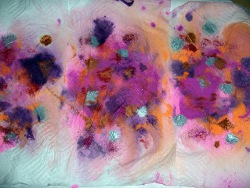
The next step was to create some papers to cover my pages with. I used a method based on something I saw from Traci Bautista. I covered a tray with freezer paper, shiny side up. I found that putting it on a tray rather than flat on your work surface worked really well to contain the paints and keep them from running all over and making a mess. Then, I just dribbled acrylic craft paints all over the surface of the freezer paper. I did it randomly but you can also apply the paint in simple designs. Sprinkle the surface with some glitter and then spray with water to allow the colours to run, soften and blend into each other a bit. Lay a piece of paper towel over the top of the painted surface. I even save the paper towels that I have used to wipe up some paint spills or clean my brushes on and further colour these in this method. You may want to brayer over the paper towel – or as I often do, just use your fingers to press the paper towel into the paints and spread them around more. I spray on top of the paper towel with some more water – this will get the colours blending even further. You can even add some more paints and glitter at this point. More pressing and “brayering” and then when I’m happy with how the paper looks, I lift it off onto another surface (I find wax paper or old newspapers work well) to dry. Often without even applying any more paint, I’ll find that I have enough paint to apply another layer or two of paper towels and get more prints from this one painting. You may want to spray more water on to loosen up any of the paints that may have started to dry a bit.
-
Once these have dried, they stiffen a bit and become quite a bit stronger than before. If you’re using 2 ply (or more) paper towels, sometimes you can even separate the plies into layers (I find this easiest to do when they’re still damp) and that will give you more bang for your buck AND thinner, more translucent layers to work with. If you keep the paper towels intact, as I said, they will become stronger than before and they will now hold up to techniques like adding stitching to them. I used Liquitex Gel Medium to glue the paper towels to the toilet paper tube pages. The paper towel pages I was using (yes some of them vary in size) were 4 by 2 1/2 inches, so I cut a piece of paper towel that was 5 inches square. That gave me a big enough piece to wrap around both sides of the tube and a little overlap on each end. I covered both sides of the flattened tube with the gel medium and then wrapped the paper towel around to cover it. On each end where the opening of the tube is, I would apply a little of the gel medium about 1/4 to 1/2 inch on the inside of the tube so I could fold the ends of the paper towel piece into each end so the edges would look finished as well.
-
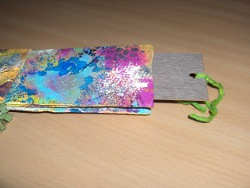
I punched holes in one end of the page. A regular paper hole punch worked fine for this as long as I only did one page at a time. I found that wire worked the best to assemble the pages into a book as I could get a nice tight hold with the wire that not only held the book together securely but also assisted in further flattening the book. One of the nice benefits of this style of book is that because you’re starting with tubes, once you bind one end of the tubes, you are still left with an opening at the other end of each one. That opening is perfect for sliding a tag inside, giving you yet another surface/page to your book. Here, I’m using laminate counter samples that I got from a home improvement store. My plan is to finish decorating the pages with embellishments and photographs or images and then adhering paper to the tags to make a writing surface for the journaling.
Your Recently Viewed Projects
Thanks for your comment. Don't forget to share!
Hannah
Aug 29, 2017
I used to make small scrapbooks. I enjoyed pasting photos, coloring the pages, decorating the cover page and writing short messages or phrases.
bjm1
Oct 15, 2011
You created a super looking mini book and used an item which typically ends-up as garbage or usually only napkin holders. I think you did an awesome job and love the looks of these. * I have used the laminate samples as jewelry pendants only embellished the typed-on side first with various bits & bobs. LOVE THIS. Cheers, BJM
Report Inappropriate Comment
Are you sure you would like to report this comment? It will be flagged for our moderators to take action.
Thank you for taking the time to improve the content on our site.