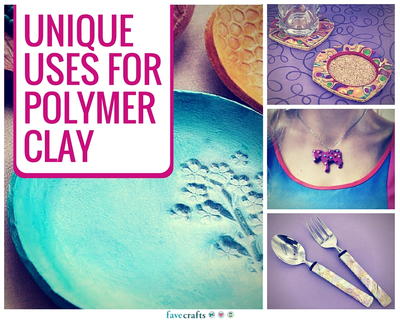
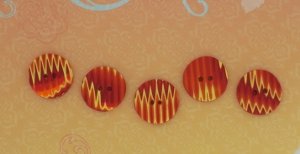
Heart Line Buttons
This easy polymer clay technique can help you create these stunning Heart Line Buttons, great for dressing up a jacket, shirt, hat, or scarf. You could even turn them into stunning beads and jewelry that's sure to make anyone's heart skip a beat. Use whatever color combination you'd like to create a look you're sure to love.
Materials:
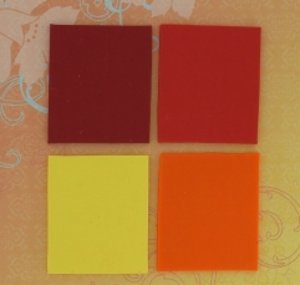
- 1 block Sculpey® III: Red Hot Red - 2 oz
- 1 block Sculpey® III: Just Orange - 2 oz
- 1 block Sculpey® III: Lemonade - 2 oz
- Clay Conditioning Machine
- Sculpey Acrylic Roller
- Sculpey® Etch ‘N Pearl
- Sculpey® Super Slicer
- 7/8" circle cutter
Instructions:
-
Do not use unbaked clay on unprotected furniture or finished surfaces. Start with clean hands and work surface area. Good work surfaces include wax paper, metal baking sheet, or disposable foil. Knead clay until soft and smooth. For best results, clean your hands in between colors. Shape clay, pressing pieces together firmly. Bake on oven-proof glass or metal surface at 275°F (130°C) for 15 minutes per ¼" (6 mm) thickness. For best baking results, use an oven thermometer. DO NOT USE MICROWAVE OVEN. DO NOT EXCEED THE ABOVE TEMPERATURE OR RECOMMENDED BAKING TIME. Wash hands after use. Baking should be completed by an adult.
-
Begin by preheating oven to 275°F (130 °C). Test temperature with oven thermometer for perfectly cured clay. For best results, condition all clay by running it through the clay dedicated pasta machine several passes on the widest setting. Fold the clay in half after each pass and insert the fold side into the rollers first.
-
Sheet each color through the clay machine on the thickest setting. Cut out rectangles of each color approximately 2-1/4" X 2-1/2".

-
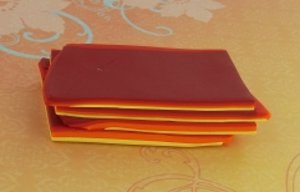
Stack the colors starting with Lemonade on the bottom, then Just Orange, then Red Hot Red, and finishing up with Red on top. Make sure to roll over each color as you stack them with the roller so that air bubbles are pressed out between layers.


-
Using the acrylic roller and pressure, roll over the layers making the sheet of colors longer and thinner. Continue rolling over sheet until it is at least twice as long as it was originally. As you roll over the top it will be easiest if you flip the sheet upside down and roll from the other side as well. Cut the sheet into fourths.
-
Stack the four sections back up to make a thick striped slab. Repeat steps three and four again.

-
After stacking the layers up a second time, roll over them to seal, and then form the slab by pressing on all six sides with your hands and fingers. This should make a fairly thick loaf.
-
Stand the loaf in front of you with the stripes parallel to your body. You should have a single color on the side of the loaf facing you and not stripes. Gently cut down through the loaf with the ripple blade so that the blade is parallel to the stripes. Make several cuts through the loaf about 1/8" thick.

-
Press the rippled sheets back through the pasta machine on the thickest setting to smooth out the ripples and elongate the pattern.

-
Cut out buttons shapes with the circle cutter. Gently poke the small Etch n Pearl tool through the center of each button twice to make buttons holes. To make neat holes, go through one side of the button and then poke the tool back through the other side to clean up the holes
- Bake according to directions above. When cool you can sew them onto a matching garment.
Tip:
- You can definitely wash --but *NOT* DRY CLEAN -- buttons made from polymer clay
Read NextPolymer Clay Butterfly Tutorial
Your Recently Viewed Projects
Thanks for your comment. Don't forget to share!
bigsis836 2384382
Dec 08, 2013
This is the technique I have been looking for. Thanks works great
Report Inappropriate Comment
Are you sure you would like to report this comment? It will be flagged for our moderators to take action.
Thank you for taking the time to improve the content on our site.