One Gorgeous Beetle

If you’re looking for a quick painting session that lifts your mood, stop here. Yes, I suggest that you paint a gorgeous beetle! This will be a stylized illustration, but I also try to keep some realistic characteristics of the insect. I think such a balance of stylizing and realism is a great way to make an illustration look interesting and eye-catching. Let’s get started.
Time to CompleteIn an evening
Main MaterialPaint
Primary TechniquePainting

Project TypeLearn a Technique
Materials List
- White or craft paper
- Pencil and eraser
- Round brushes in different sizes
- Detail brush
- Project colors: white, purple, cerulean blue, and rose
COLOR MIXING
Pastel purple (white + purple, proportion 1:1)
Pastel blue (white + cerulean blue, proportion 1:1)
Pastel pink (white + rose, proportion 2:1)
DIRECTIONS
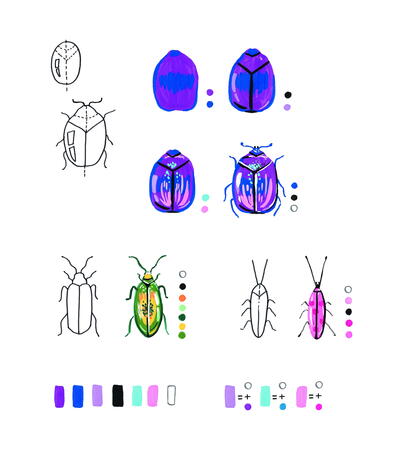
STEP 1
Start with a light pencil sketch before moving on to the gouache. For this, take a look at Figure 1, which shows the outline of the beetle we will paint. I suggest you draw an oval for your sketch first, and then modify it to the beetle’s outline (Figure 2). Once the sketch is ready, you can begin painting.
NOTE: In this project, we will apply only the layering technique.
Fill the base shape with purple paint, as shown in Figure 3, by using a medium round brush. If the edge of the painted shape doesn’t look accurate and smooth, try to fix it with the detail brush and paint with a pretty balanced consistency. The consistency of the paint should not be watery, but not too thick (see Consistency of Gouache Paint, page 7). Once it’s dry, add an ultramarine blue layer. Allow the painted layer to dry.
STEP 2
In this step, we’ll bring those realistic characteristics to the illustration I mentioned earlier: some shadows and highlights (see Figure 4). Take a small round brush and add details one by one, first in pastel purple and then in black. Let the painted layer dry completely, then go to the next step.
STEP 3
It’s time to add a pattern and decorations to the beetle. Take a detail brush or a round one with a thin tip and paint spots, lines and dots with pastel blue and pastel pink, as shown in Figure 5, or use your imagination and add any decoration you like. There is only one thing to take into consideration: do not cover the highlights and shadows we added in the previous stage. Allow the painting to dry completely.
STEP 4
Finally, we get to the stage where this project turns into a gorgeous illustration. Keep working with the detail brush. Prepare the following colors: white, black and ultramarine blue. Paint all the details with the colors corresponding to the ones in Figure 6. Add antennae and legs using ultramarine blue; also paint highlights in white on the beetle’s body and the mandible in black. Most important, the legs and antennae of the beetle should look symmetrical. Our illustration is complete.
Using the steps in this lesson, I suggest you continue painting different types of beetles. You can find some examples in Figures 7 and 8. This is a great exercise for your imagination to practice your gouache painting skills. Experiment with a color combo, as well as with the shapes of the insects. It’s very simple and does not take much time. I hope you enjoy the project and return to it often.
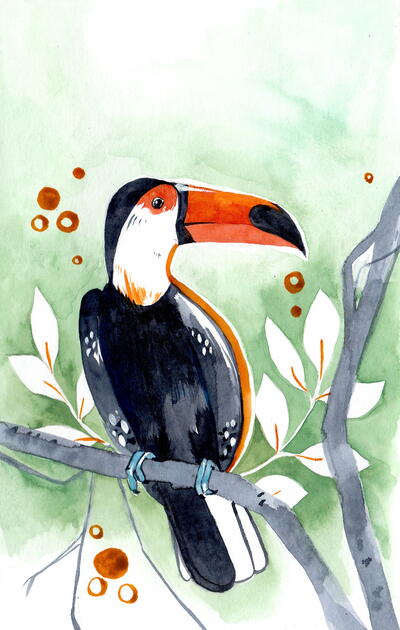
Read NextToco Toucan