This project was submitted by one of our readers, just like you.
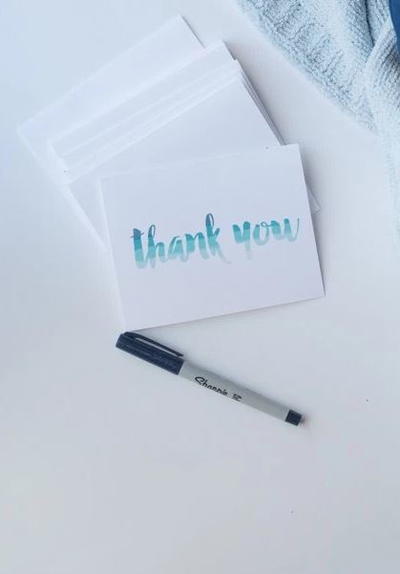
Happy Homemade Thank You
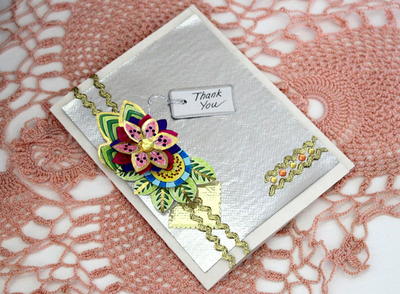
Adding coloring book pages to your handmade cards adds a hint of love that you would never expect.
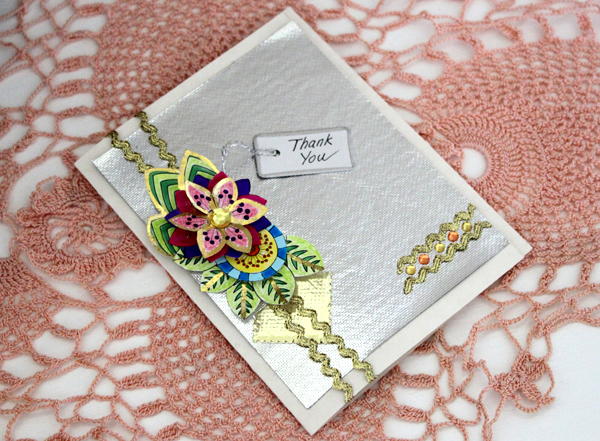
In the Designer's Words: Art coloring books are one of the hottest trends in the crafts industry at the moment and I was excited to receive coloring books from Leisure Arts. I love to draw and have a large collection of markers, colored pencils, pastels, paints and more from many different manufacturers. Unfortunately however, I'm not someone who can sit and color. For me, coloring has to have a purpose so I decided to work with the sheet of border designs then use them as embellishments for this Thank You card - the perfect project for the manufacturers who sent me the product. Not just for cards, you can use these techniques for many kinds of paper and mixed media projects. There are so many coloring books available, but not all can be colored with water color markers and pencils, so always look for books with good quality paper."
Coloring book pages are the perfect accents to add to your homemade card ideas. While these adult coloring sheets were not created solely for making paper crafts, their chic and customizable designs provide the perfect avenue for adding coloring to your world. This Happy Homemade Thank You tutorial shows you how to incorporate portions of adult coloring pages into your paper crafting creations.
Estimated Cost$11-$20
Time to CompleteIn an evening
Primary TechniqueColoring
Project or Page SizeCard
Type of Paper UsedCardstock

Materials List
- Leisure Arts Coloring book - Patterns
- Sakura 3-D Ink Glaze markers
- Sakura 3-D Soufflé Opaque Puffy Ink markers
- Oly*Fun Metallic craft material - Silver
- Therm O Web iCraft Deco Foil - Gold
- Therm O Web iCraft Adhesive Pen
- ZOTS™ Singles Clear Adhesive dots
- Therm O Web 3 D Foam Squares
- Card stock
- Water color pencils
Instructions
-
Color the areas of the leaves as shown with the green glaze marker. As you can see on the left the glaze produces a shiny look. Color around the glazed areas with a light green water color pencil. Use a light touch when coloring with pencils.
-
Use a yellow water color pencil to color the center of the flowers, purple and blue glaze to color the outer petals of the flowers and orange soufflé for the small center ring and dots at the end of each stamen.
-
Color the large petals with dark pink glaze and light blue soufflé on the outer circle of the round flower. Use a damp paintbrush, or the water brush to lightly blend the areas colored with water color pencils.
-
To add even more dimension, I colored a second, small flower as follows: Trace the outline of the petals with the adhesive pen. After about 30 seconds, place the gold foil sheet with the gold facing UP on top of the design. The gold foil will stick to the adhesive to give those areas a look of gold leafing. I love the look of foiling, so I outlined some of the leaves with the chisel tip of the adhesive pen and added foil to those areas too.
-
Lightly color the petals with dark pink water color pencil, then blend with a damp brush. Dot the tips of the stamens with dark purple glaze. Note: The color on the 2 petals on the lower left was not blended to show the difference blending makes.
-
Cut all the colored pieces apart!
Read NextFoiled Butterfly Notecards
Your Recently Viewed Projects
Report Inappropriate Comment
Are you sure you would like to report this comment? It will be flagged for our moderators to take action.
Thank you for taking the time to improve the content on our site.


