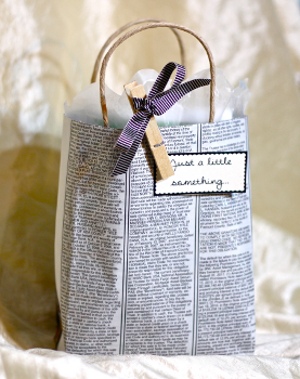
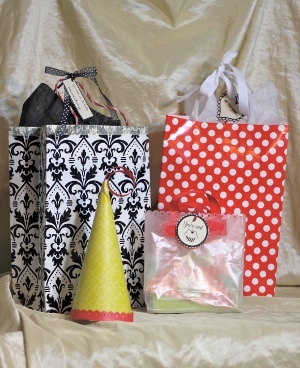
Boutique Paper Gift Bags
With this video tutorial from Maureen Wilson, you'll learn how to make a paper gift bag from wrapping paper, scrapbook paper, or any paper you have around the house. Now you can make customized gift bags for all of your gifts without breaking the bank. Make a paper bag or two after you watch this video; it's easy!

Materials:
- Wrapping paper, waxed paper, or newspaper
- Hot glue gun
- Ruler
- Ribbon, paper twist, or pipe cleaners (for handles)
- Cardstock
- Boutique Gift Tags
- Decorative scissors, paper punch, or washi tape (optional)
Video:
Instructions:
- First I’ll demonstrate the folding technique for a large sack on a piece of wrapping paper. Cut the paper to 24 x 14 inches. If you really want your bag to stand out on the present table, consider giving it a decorative top edge. Before you begin folding, add a border of washi tape on the top long edge, or use decorative scissors or a paper punch to create a pretty edge.
- Lay the paper face down on the table, with the shorter ends making up the sides and the long ends at top and bottom.
- Fold the left side of the paper in 1/2 inch and crease. Include the folded portion in your measurement, and measure 4 inches in from the left side. Fold and crease.
- Now we need to divide the 4-inch segment you just made.So fold the paper over along the crease you just made. Then, bend the paper backwards to line up with the fold, accordion-style. Crease. This will create a mountain fold on the left side of your paper.
- Measure 7 3/4 inches in from the closest crease. Fold.
- Measure 4 inches from that crease, and fold. Again, we need to divide this 4-inch segment in half, so fold the paper back over itself and crease to create a mountain fold like the one on the left. (The remaining paper on the right should measure 7 3/4 inches.)
- Next fold up the bottom edge 3 inches.
- We’ll be making three cuts now. Starting from the right side, make a slit along the first crease, up to the bottom fold line. Skip over the mountain fold crease, and snip on the next fold, as well as the one after that.
- Now we can assemble the bag. I’m using a hot glue gun on this project. It won’t show like tape does, and it provides a strong hold. Add a stripe of hot glue to the folded 1/2 inch segment on the left.
- Fold the right edge of the paper over to meet up with the left side. Align the edges and press together.
- Make a final cut behind where the papers are glued on the right. Snip up to the bottom fold line.
- Fold the two short flaps up inside the bag. Then fold one of the long flaps inside as well. Add a strip of hot glue along the edge of the remaining long flap.
- Fold the flap with the glue inward. Stand the bag up on the table so the flap is flat against the surface. Reach inside the bag and press down the other long flap on top of the glue.
- Reach in the bag and add glue to the short flaps, and press those down against a flat surface.
Making the Handles
- Now we need to make handles for our bag. You have a few different options. The most traditional choice is “Paper Twist.” This is twisted paper cord, and costs between .70-$1.50 per package. You could also use twisted poly rope, like this laundry line I bought at my $1 store. Or, you could use pipe cleaners or even ribbon.
- Cut a scrap of cardstock to 4×4 inches. Fold it in half. Hot glue the ends of your handle to the inside of the cardstock, with the ends touching the middle fold. Add more glue to the cardstock and press the other half of the paper up to seal the handle. Make a second one for the other side.
- Hot glue the handles to the inside of the bag.
Making a Small Bag
- Here’s how to make a small gift bag using newspaper. First, fold the newspaper in half with the crease at top. This will strengthen your bag.
- Cut your paper to 18.5 x 8 inches. Add a strip of hot glue along the edges between the layers.
- The following steps will be the same as they were for the first bag, but the dimensions will be different. Fold the left side in 1/2 inch.
- Crease 3 inches in from the left edge. Fold paper over along that crease, then fold backwards to divide the 3-inch segment in half.
- Measure 6 inches in from the closest fold, and crease. Measure another 3 inches and crease. Again, divide the 3-inch segment in half by folding back over itself.
- Fold the bottom edge up 2 inches and crease. Starting from the right, snip the first crease up to the bottom fold line. Skip the mountain fold, and then snip the next two creases. Glue and assemble as with the large bag.
Read NextBlessing Bags DIY
Your Recently Viewed Projects
Thanks for your comment. Don't forget to share!
Weberme
Nov 30, 2018
Make your own botique paper gift bags for a fraction of the cost of the botiques is a great idea. I'm on board and you can use leftover gift wrap,ribbon or you can hit the dollar store . I like that you can choose what you want to use and it is so simple to do. This is a great idea to put your Christmas,birthday or any gift in. You can even add some ebellishment on them or glitter for sparkle. Get creative and see what you can do. Very good project.
flowergirl
Sep 05, 2017
I couldn't have found this at a better time. Plastic was banned where I come from and so no more carrier bags for us. For alternatives I'll need to make a bunch of these. Thanks for the detailed instructions. The video is a plus btw
Report Inappropriate Comment
Are you sure you would like to report this comment? It will be flagged for our moderators to take action.
Thank you for taking the time to improve the content on our site.