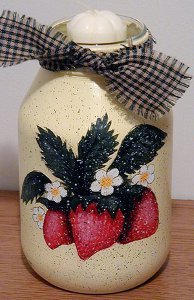
Strawberry Jar
Looking for mason jar crafts? You can turn an ordinary mason jar into a cheerful summer home accent using this craft idea and template from Amanda Formaro. This strawberry jar is a great summer craft to make as a gift.

Find this project, and many more, in our free eBook, 20 Crafts with Mason Jars: Wedding Ideas, Centerpieces, Decor, and More.


Materials:
- Template
- Liner, shader & small scruffy brushes
- Micron black & brown craft pens
- Old toothbrush
- Stylus
- Black carbon transfer paper
- Acrylic matte sealer spray
- Empty glass jar or wine bottle
- strip of gingham fabric, edges frayed
-
Paint Colors (these shades are Delta Ceramcoat):
- Custard
- Berry Red
- Black Cherry
- Leaf Green
- Forest Green
- Straw
- Yellow
- White
- Hydrangea Pink
- Black
Instructions:
-
Prepare the surface of the jar by washing it, removing all labels and glue, then giving the jar a rinse in white vinegar or rubbing alcohol.
-
Base coat the surface of the jar with Custard. Allow this first coat to dry completely before attempting a second coat. If you don't let it dry, your send coat could cause peeling of your first coat! Let it dry for several hours, overnight is best.
-
Apply 1-2 more coats of Custard to the jar.
-
Trace the pattern onto the base coated surface using transfer paper and stylus.
-
Paint leaves with Leaf Green and strawberries with Berry Red. use a scruffy brush and Forest Green to fill gaps in between leaves, flowers, and berries.
-
Shade leaves with Forest Green and highlight very lightly with Straw.
-
Use a stylus to dot on spots with Straw (onto berries). Float outside edges of berry with Black Cherry. Highlight lightly with Hydrangea Pink. Add heavier shading to the berries with Black Cherry mixed with a touch of Black.
-
Paint blossoms with White, do centers with Yellow. When dry, use a brown craft pen to add dots to centers and lightly outline the petals.
-
Splatter completed painting with White and with Black using an old toothbrush.
-
Sign your work! Spray the completed project with 2-3 coats of acrylic sealer spray.
- Tie a frayed piece of gingham fabric around the rim of the jar to accessorize.
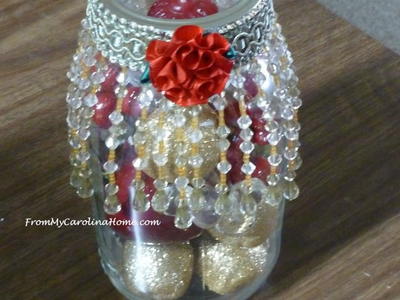
Read NextBeaded Mason Jar Crafts
Your Recently Viewed Projects
Thanks for your comment. Don't forget to share!
Marilyn B
Jun 06, 2017
Anyone who wishes to learn how to paint a creation like this can really get some inspiration from this project. If you are artistically talented, you could free form this design and just copy the photo as a model. Thank you for the tip regarding the use of the proper paint for glass, good to know. Thank you!
edselone1
Mar 18, 2014
This is an excellent craft. the instructions are easy to read and follow. One word of caution - the paints listed in the supply list are NOT made for glass painting and are NOT recommended by the manufacturer for painting on glass. I used comparable paints (Martha Stewart Satin - which can be used on glass) and picked matching colors. These paints must be heat treated after your design is done. My result were amazing and I was very happy to give these jars as gifts.
sharadapersaud 378 6249
Jun 05, 2013
How do I transfored the pattener on to the jar, do I use a carbon sheet?
Report Inappropriate Comment
Are you sure you would like to report this comment? It will be flagged for our moderators to take action.
Thank you for taking the time to improve the content on our site.