Easy Decoupage Frames
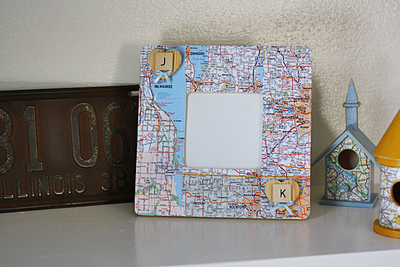
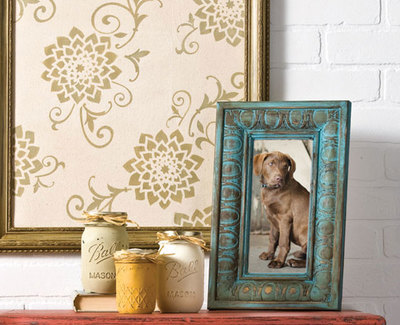
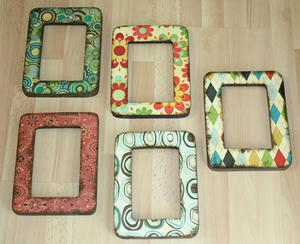 Take inexpensive frames and scrap paper and you'll have stylish Easy Decoupage Frames for your home! If you're looking for decoupage ideas, this homemade picture frame is a simple afternoon project that add a pop of color to a wall or coffee table. One you learn how to decoupage using plain frames from your local craft store, you'll never want to buy the pre-made version ever again. Best of all, this project doesn't take long to complete. Plus, it's perfect for beginners, so you don't have to worry about the look of the finished product.
Materials:
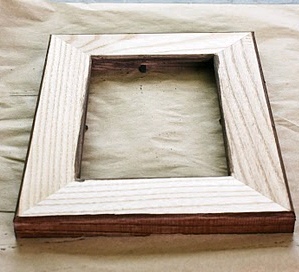
- Unfinished wood frame
- Spray adhesive
- Scrapbook paper
- Foam brush
- Paint or water-based stain
- Scissors
- X-acto knife (razor blade cutting tool)
If you're looking for even more great decoupage ideas, check out our free downloadable eBook, 12 Fun & Fabulous Mod Podge Projects- Jewelry, Gifts & Decorations for the Holidays. The free printable PDF is perfect for beginners and decoupage experts alike. There are tons of great Christmas gift ideas, holiday craft projects and more. Print or save your copy today!
Instructions:
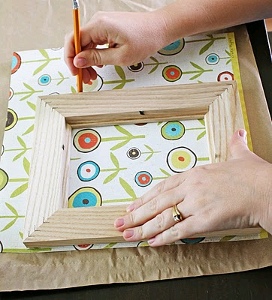
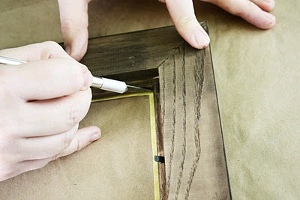
- Position the frame on the paper where you want it and then trace it lightly with a pencil. Trace the outside of the frame and the inside. Then cut it out.
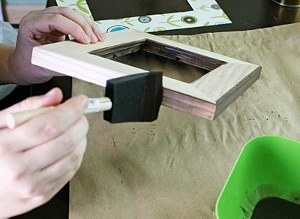
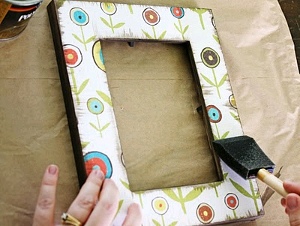
- Next, paint or stain the back of the frame, the sides and the inside. Don't stain the top. I find that the spray adhesive sticks better to the unfinished wood better than when it is painted or stained.
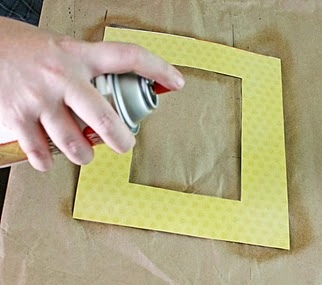
- Spray the adhesive on the backside of the scrapbook paper. Get it nice and even but not too thick. I use the regular adhesive. I don't buy the heavy duty or the fast drying kind because I want to be able to take it off if it is crooked and try again. The regular spray adhesive gives you a little bit of time to get it right before it is permanent.
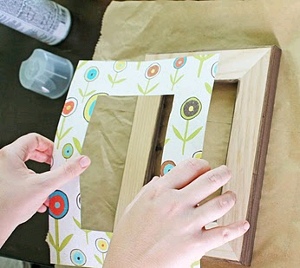
- Place the paper on the top of the frame and when it is straight, rub all over to make sure it sticks well and there are not any bubbles.
- Use an X-acto knife or some other kind of razor blade to trim off any excess paper. Make sure the blade is sharp so it doesn't rip the paper.
- I like to antique mine but you can feel free to skip this step. I use either watered down brown paint or water based stain. You can also use distress ink. Make sure there isn't very much on the brush. Practice on a scrap piece of paper first. Gently brush along the edges on the outside and the inside.
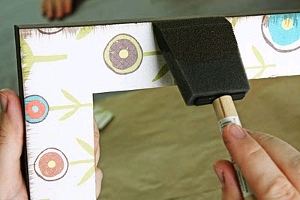
- The next step is to seal it. Most people would probably use Mod Podge. It works great. I didn't have any this day so I used polyurethane. It works really well too. Either way you want to go will work. I use foam brushes because you don't get lines from bristles.
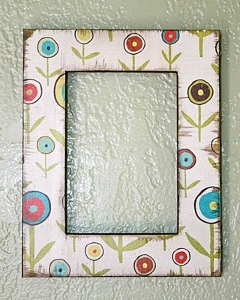
- And there you have it!!! You can pick paper to match any decor and make it custom just for you.
Read NextEasy Decoupage Frames
Your Recently Viewed Projects

Thanks for your comment. Don't forget to share!
Morehouse17
Oct 31, 2017
Just the other day while out shopping at the local thrift store, I saw a box of old photo frames. Now that I have seen this idea, I plan to go back and see if they are still there. I am thinking about holiday time and I can use holiday print and create one of a kind gifts. Thanks for the inspiration.
Hannah
Aug 22, 2017
A clever idea for my daughter's photos. I would hang our photos on the wall with just plain colored frames. Now I have several options, choosing different scrapbook papers in the bookstore.
Delphine Bryant
Mar 31, 2017
These easy decoupage frames are a fantastic way to spruce up any dated or flea market find photo frames you may have. The possibilities are endless. Making a gallery wall with this idea could really make a conversation starter in your home and display those valued photos at the same time.
M Altenberg
Feb 06, 2017
These frames are very colorful and really make a statement for your wall decor when placed in the right way. Looks like a fun project to make.
flowergirl
Jan 25, 2017
I really love this idea...so well written instructions that are simple to follow and very economic. I'd use wallpaper and place the frame on a painted wall. I think you need to pick a pattern that isn't too loud otherwise it would draw the attention from your picture unless that was your intention.
Heidi Lorene
Mar 21, 2016
I love picture frames like this. It is great to see such an easy and well written instructions on how to make them. I do have a question I have hearx
lveleva
Jun 26, 2012
Hi, I really LOVE your tutorial and I want to ask for permission to link to it in my blog :) Thank you in advance and keep up with the good work :)))
Report Inappropriate Comment
Are you sure you would like to report this comment? It will be flagged for our moderators to take action.
Thank you for taking the time to improve the content on our site.