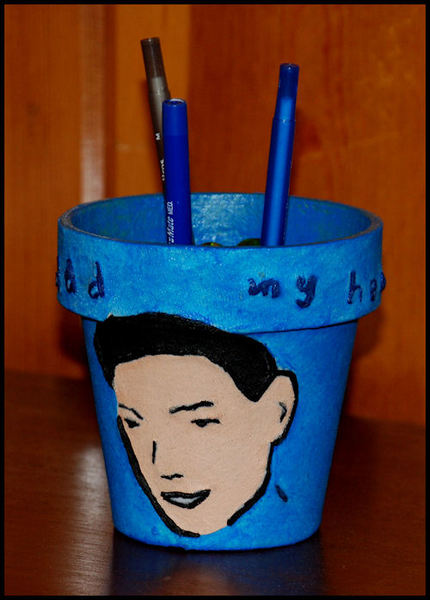
How To Create an Embroidered Flower Pot
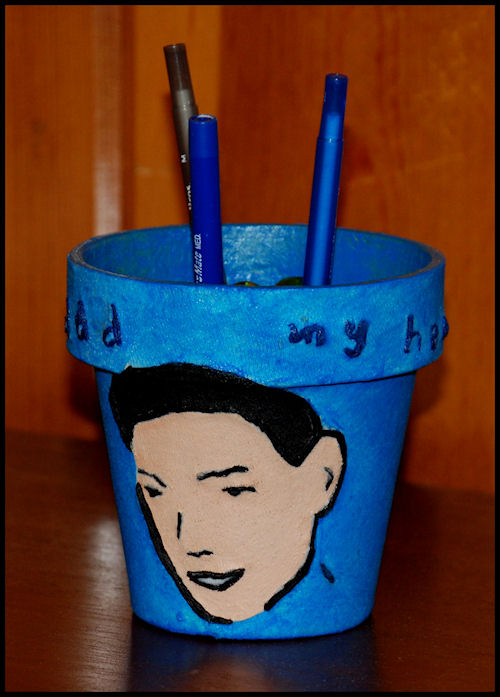
Create an embroidered flower pot of your dad's head in just one afternoon with this project from Alyice Edrich of The Dabbling Mum. Give on Father's Day, a birthday or just any time you want to show your appreciation for Dad.
Materials:
- 1 - Skein of black cotton craft thread
- 1 - Old T-shirt
- 1 - Paper Mache Flower Pot
- 1 - Black marker
- 1 - Acrylic Paint: black, blue, and flesh
- 1 - Mod Podge
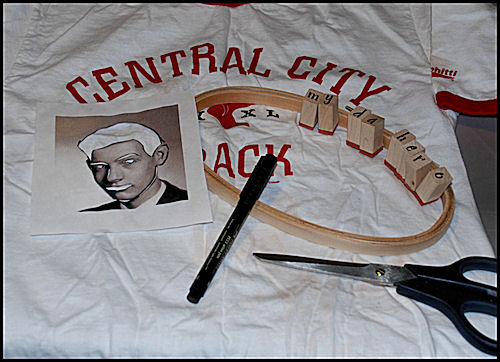
- 1 - black and white photocopy of dad's head
Tools:
- 8 - Alphabet Stamps (Letters: M, Y, D, A, H, E, R, O)
- 1 - 5.5 x 9 Oval Wood Embroidery Hoop
- 1 - Hand quilting Needle
- 1 - Scissors
- 1 - Thin tipped paint brush
- 1 - Large-tipped paint brush
- 1 - Craf Knife
- 1 -Self Healing Mat
- 1 - Safety Pin
Instructions:
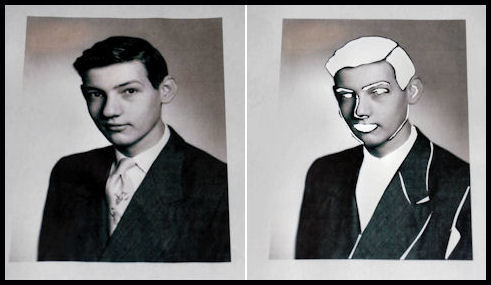
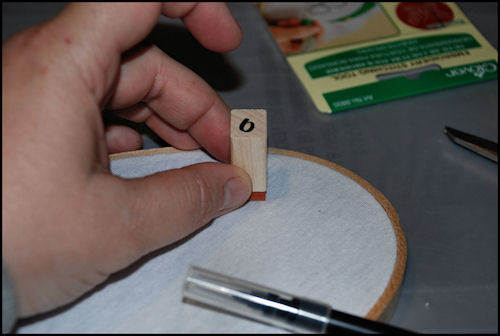
- Create a template of dad's face. Grab photocopy of dad's head. Use a pen to trace the dark areas of the head, focusing on the main features: hair, eyes, side of the nose, lips, and if the ear shows, the ear. Don't worry about being too exact, or cutting out every little detail.
- Place image on a self-healing craft mat. Carefully, and slowly, use a craft knife to cut out the traced (or dark) areas.
- Grab an old t-shirt and wrap the embroidery hoop around the t-shirt.
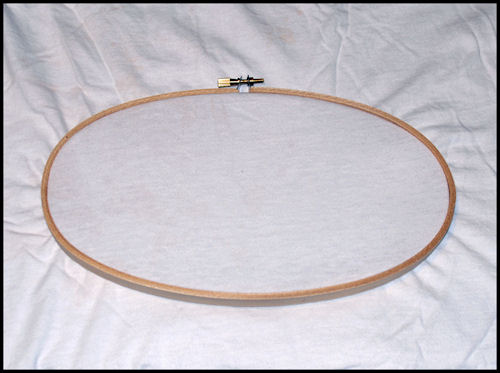
- Tight the clasp on the embroidery hoop.
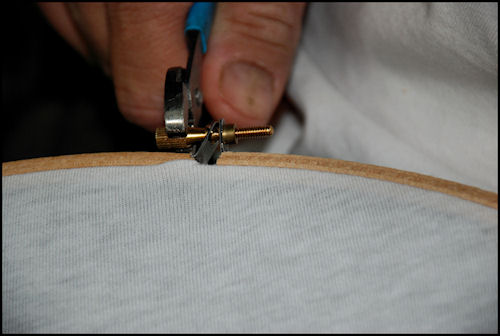
- Pull the t-shirt through the hoop until it no longer gives any leeway.
- Cut excess t-shirt material.

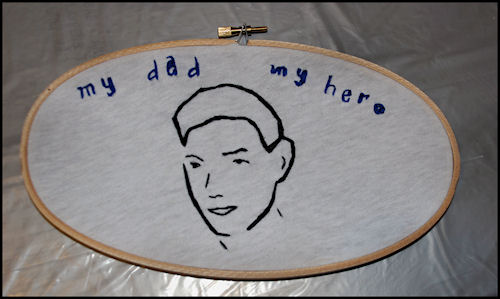
- Stamp the words, "My Dad, My Hero" along the top of the t-shirt material.
- Trace the template you created of dad onto the t-shirt material.

- Use the black craft thread and hand quilting needle to embroider the outline of dad's head as well as the text. Be careful here. You do not want to use long stitches as they will loosen when you remove the embroidery hoop and make an ugly mess. Stick to short stitches.
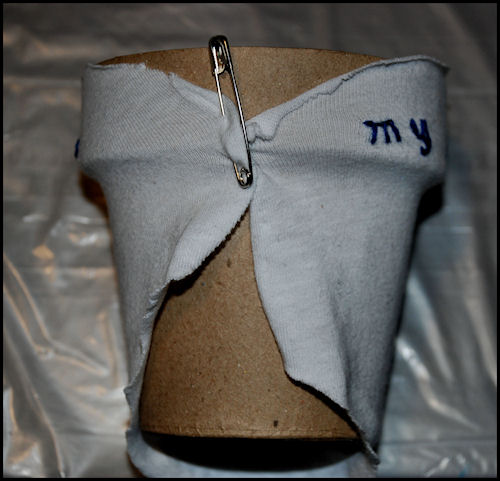
- Remove the embroidered image from the hoop and wrap it around the paper mache flower pot using a single safety pin.
- Use Mod Podge to adhere the embroidered image/fabric onto the paper mache pot. Let dry. (You will need to pull the material as you apply the Mod Podge and don't be afraid to really rub the glue into the material so that it gets onto the paper mache flower pot underneath the material. Pulling will cause excess material to appear at the bottom, top, and back of the pot. Just trim that material off with a pair of scissors when the Mod Podge dries.)
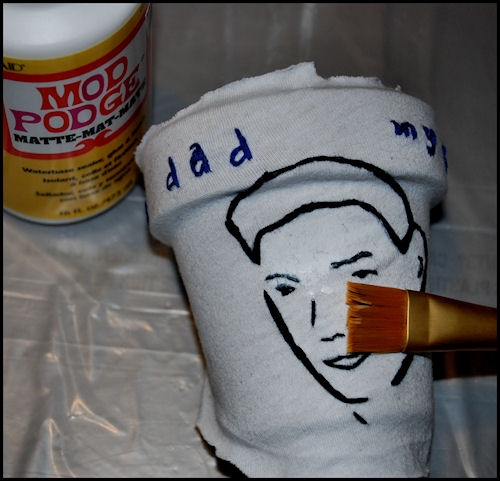
- Apply a second coat of Mod Podge and let dry.

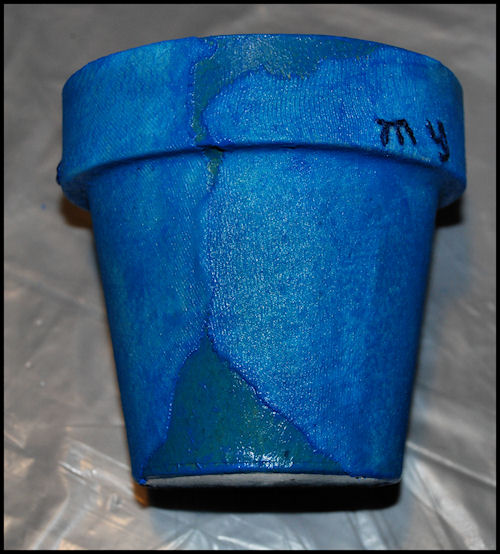
- Paint the inside of the flower pot blue.
- Paint the face.
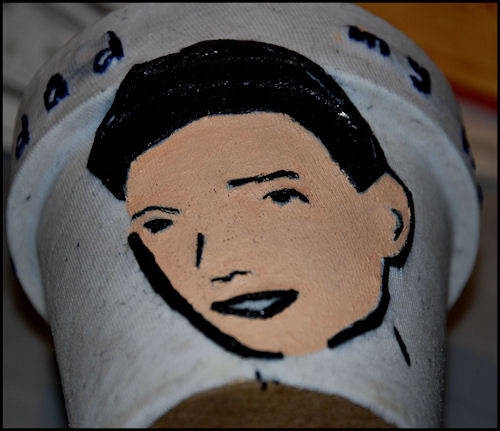
- Paint the outside of the flower pot. Start with the blue, then paint the embroidered thread with black paint. Let dry.
- Because of the shape of the hoop, there will be a gap on the back of the flower pot. That's okay. We want that gap. If you apply the blue paint correctly, the edges will appear darker than the rest of the surface, thus causing a "cracked" or "ancient ruins" look.
- Apply a final coat of Mod Podge to the outer and inner surface of the pot. Let dry.
Congratulations! You've just created an embroidered flower pot. Now fill it up.
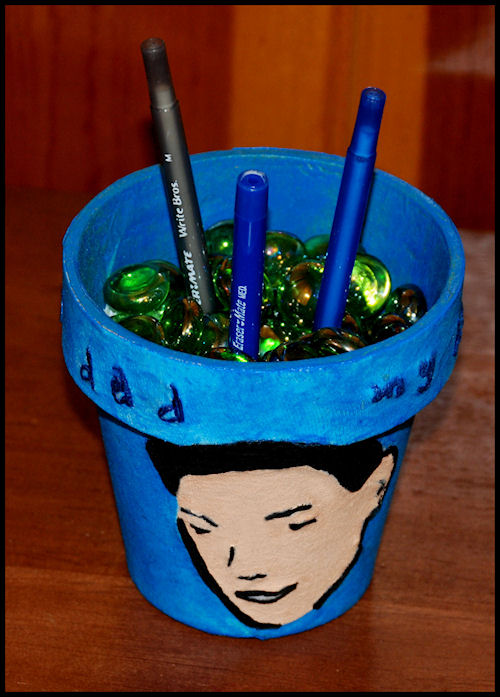
If your dad likes flowers, line the inside with a large baggie, fill with dirt, and add a flower. If your dad has an office, place shredded paper in the bottom of the flower pot, top it with glass marbles or stones, then add a few of his favorite pens. Or, you can just fill it up with treats like individually wrapped hard candies.
FTC Disclosure:
Embroidery Hoop (Item 39106), Craft Thread (Item 1170-93, and Paper Mache Flower Pot (Item 2839-04) was provided, free of charge, by Consumer Crafts.
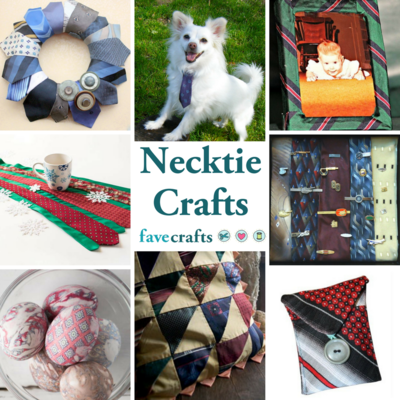
Read Next16 Necktie Crafts Ideas