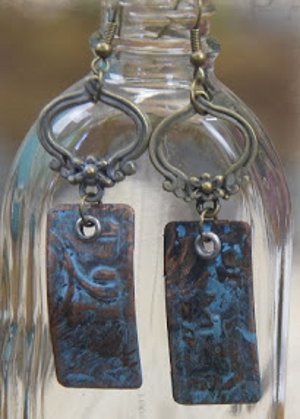
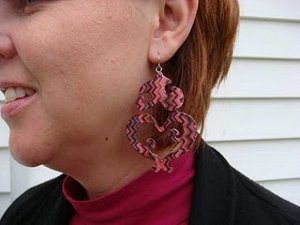
Old World Copper Earrings
Learn how to create these beautiful Old World Copper Earrings with the help of a Spellbinders embossing folder. These earrings have vintage charm but could easily be worn with modern attire. Use unique jewelry techniques to obtain the beautiful blue hue on these earrings and then assemble them with just a few simple jewelry findings. Great for giving as a gift or keeping for yourself, these Old World Copper Earrings make a lovely accessory no matter what time of year.

Materials:
- MMM-001 Spellbinders® Artisan X-plorer™ Machine
- MMM-202 Spellbinders® Artisan X-plorer™ Raspberry Spacer Plate
- MM1-003 Spellbinders® Media Mixáge™ Copper Sheet
- MD1-003 Spellbinders® Media Mixáge™ Rectangles One
- ES-005 Spellbinders® M-bossabilities™ Enchanted Embossing Folder
- Hole punch
- Eyelets
- Jewelry findings (jump rings, links and earring wires)
- Scissors
- Wire cutters
- Pliers
- Hammer
- Bench block or other hard surface
- Nail file
- Patina solution (optional)
Video:
Notes:
- How to Patina: Use in a well ventilated area according to the precautions on the ammonia packaging. Prepare patina solution using 1 part water to 2 part ammonia. Add kosher salt to mix. Lay metal onto a rising form to lift above the solution. Cover tightly. The fumes from the ammonia will create a blue patina. Check back often. Remove and rinse when desired effect is achieved. Blot dry.
Instructions:
Project Dimensions: Varies depending on how you assemble them. Approximately 1” to 2”
- Place copper sheet inside M-bossabilities folder. Sandwich between base plate and raspberry plate. Pass through the Artisan X-plorer™ machine.
- Add to patina solution if desired – see above recipe.
- Cut two rectangles from copper using the #2 rectangle (with #1 being the smallest) in the Rectangles One template collection .
- Remove from template and file edges smooth.
- Punch a hole in the center top of rectangle.
- Insert eyelet and hammer to secure. Repeat the previous 2 steps for remaining rectangle.
- Open jump ring and insert through eyelet on rectangle. Attach link and close shut.
- Attach earring wire to link with jump ring.
- Slightly bend the rectangle backwards to give it a natural looking arch.
Read Next23 DIY Earring Designs