Sari Christmas Tree Skirt
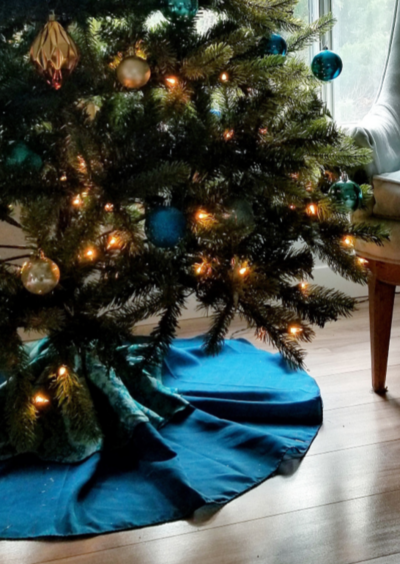
Don't miss the chance of giving your tree a one-of-a-kind touch this holiday season. With this pattern you can learn to sew, a simple yet beautiful sari skirt for your Christmas tree. The two-tone look of the skirt gives it a modern edge, while maintaining a classic appeal. You can match the colors to your favorite style, and make your skirt truly unique for the special season!
Project TypeMake a Project
Time to CompleteIn an evening
Sewn byMachine

Materials List
- 2 pieces of sari silk scraps
- 2 pieces of silk ribbon, 48”/1.3 m long each
- Scissors or rotary cutter
- Temporary marking tool
- Sewing Machine and Thread
Instructions
-
Prepare fabric scraps by washing as per the recommendation on the DGY website. Any raw fabric edges will fray, so it is a good idea to finish raw edges prior to washing. You can use a zigzag stitch, narrow hem, or serger/over-locker. You will want to finish any short side edges that may be raw, depending on the types of scraps you received in the pack, as well as the inner curved edges to prevent fraying.
-
Measure 1/2 width of the piece you will use as the base layer and cut the top layer piece to this width. Tip: Mark out the distance from the hem at multiple points around the curve and then connect those points to cut a smooth curve.
-
Line up the top and base layer, matching the inner curved edges. Trim any excess length of the top layer, and hem the raw short edge.
-
With the WRONG side of base layer against the RIGHT side of the top layer, sew together along the inner curved edge at a 3/8” (1 cm) seam allowance. Turn right side out and press seam open.
-
With wrong side of the top layer against right side of base layer (both layers appear right side up) sew a seam at 1” (2.5cm) seam allowance from the inner curved edge.
-
Feed one piece of ribbon through the channel created in step 5. Tack with a few stitches at the center to keep the ribbon in place. Tip: use a safety pin to easily bring through the ribbon.
-
Cut the second piece of ribbon into 4 equal pieces. To create the fasteners, stitch a ribbon on each side of the short edge of the base layer. Place 1 pair at hem, and 1 pair in the middle where both layers meet. There are now 3 sets of ties to fasten the skirt.
-
Be creative! You can add embellishments, trim, or even more layers, to enhance this statement-making decoration.
Your Recently Viewed Projects

Thanks for your comment. Don't forget to share!
Report Inappropriate Comment
Are you sure you would like to report this comment? It will be flagged for our moderators to take action.
Thank you for taking the time to improve the content on our site.