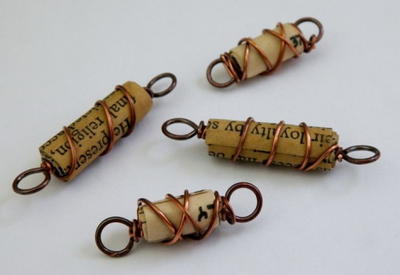
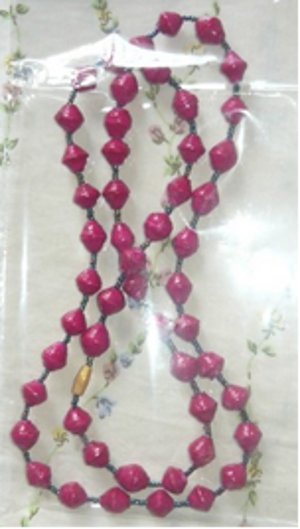
Beautiful Paper Beads
These Beautiful Paper Beads are a great way to use up old magazines. With this easy to follow tutorial, making paper beads is a piece of cake! Use them on a necklace, earrings, or bracelets.

Materials:
- A colorful magazine paper
- Glue
- Gauze wire or any strong string
- Tooth pick
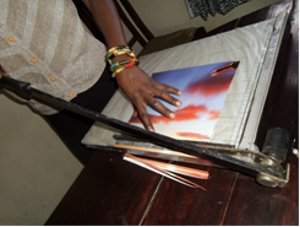
- Paper cutter or scissors
- Varnish (nail or wood varnish)
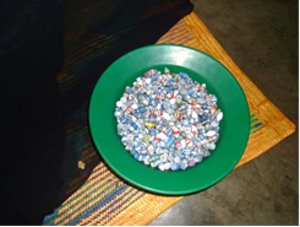
- Colorful small plastic beads
- Stoppers
Instructions:
- Tear out a colorful page from an old magazine.
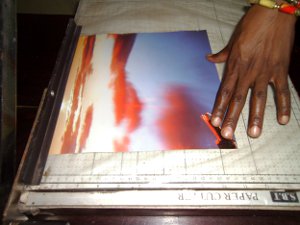
- Cut a long triangle.
- Flip the triangle so the wrong side is facing up.
- Roll up the triangle starting with the larger part,make sure the whole is big enough to fit your string. Put glue on about one inch at the small end.
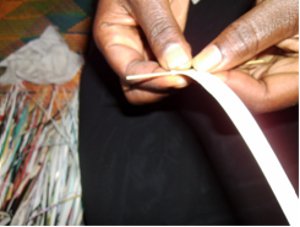
- Repeat until you accumulate the number of paper beads you would like.
- Now take your string and cut it in the size you want.
- Knot a clasp at the end of your string.
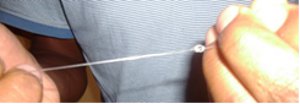
- Thread your beads onto your necklace, leaving three inches at the end.
- Add clasp at the end.

- At this stage, with your beads stringed, you prepare them for varnishing.
- Pour some varnish into a container and hold your stringed beads from the tip of the string as you mix them into the varnish.
- Then hang them on a wire or rope for an hour. Repeat the process at least 5 times so that the whole bead Is covered in varnish. Because varnish will make them stick together,its important to always keep them from clasping together as they are drying.
- When you are sure they are dry,unstring them.
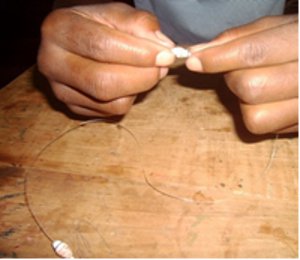
- Armed with a fresh string and stoppers (these are for joining the two strings), tie a knot in the string and ensure that it is firm. Do this at the other end too.
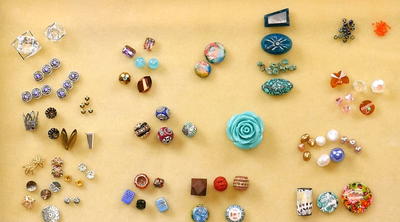
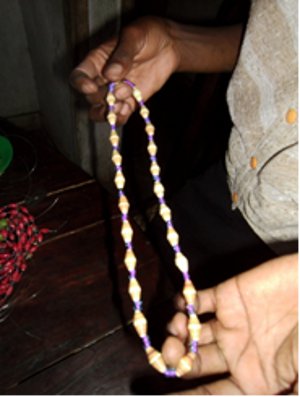
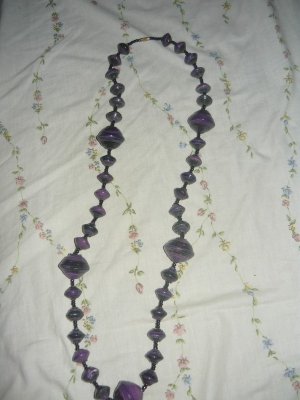
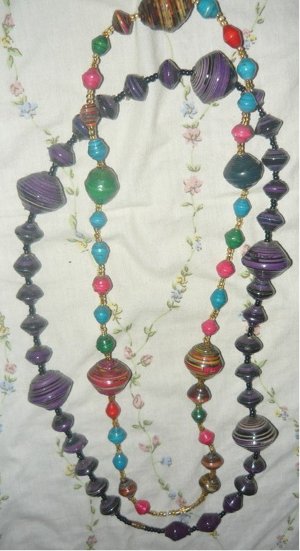
- You can make many different designs using colored paper. Each bead is beautiful and unique,all these lead to very attractive jewelery!
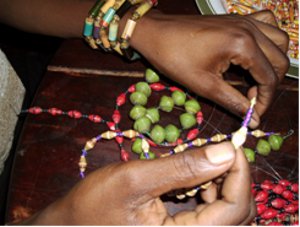
- You can use small plastic beads in between the paper beads to give them a unique look!
Read Next101+ Free Beading Patterns


Thanks for your comment. Don't forget to share!
rosepedal25 463679 9
May 30, 2014
this is amazing going to do this love your cutter where did you find it thank you so verty much
Maggie66
Sep 11, 2013
I am wanting to know the pattern or deminsions of the triangle you cut. How do you get the shape of the bead to look like a toy top? Meaning so wide at the equator and narrow at the poles? They are so unique compared to the other paper beads that I have made. Please share the deminsions. Thank you Blessings... ..
jale1957 5805643
Aug 12, 2013
My mom made tons of these years ago and strung them using some extra beads and "pearls" every once in a while. She made probably 40 or so of these strings (used fishing line), about 4 feet long, and then hung them from a dowel in a door way for a beaded curtain. It was beautiful!!! And my cat loved playing with the ends.
djr121682 8255532
Jun 06, 2013
Oh!!! Now I see the triangle!!! Wow! So sorry for not looking closer before making my comment!
djr121682 8255532
Jun 06, 2013
I like this process of making beads...making them from old magazines as I have lots of magazines and can't seem to part with them. The directions say to cut triangles but I see it as strips...long narrow rectangles. all in all ...the beads are beautiful, :-)
KarenLane 2045508
May 28, 2013
The directions are good, as far as the process, but there are some glaring spelling and grammatical errors in it! I once had a beadmaker that worked great for rolling the beads; unfortunately, it is no longer made and worked so much better than rolling them on a toothpick or even on a "modern" bead roller.
ruth50313 7451070
May 23, 2013
I think that you mean to use 'varnish' not 'vanish' for this craft idea. I don't think that you are trying to make this project disappear.
bajamo 4120160
Apr 01, 2013
I can't wait to try this! Thanks very much for posting! I just reposted this to my Pinterest site! WOOT!
susanchesley 73334 68
Mar 28, 2013
i love these beads. I'd like to create a bunch of long strands to make a beaded curtain.
La Flor de SS
Nov 18, 2012
These beads are beautiful, and I am very anxious to try these. Are there any instruction to make round beads?
regnidemom 4320400
May 31, 2012
Beautiful Beads! Thank you very much for taking the time to put together this tutorial. I will be using it soon.
mitch6135 6025154
May 10, 2012
These are beautiful beads, a work of art. Inexpensive yet creative, inspirational for those who want to invest time. Why cant people just attempt to be creative - if it doesn't work, then come back and ask questions. Don't be critics before you've had a go - it's impolite and not supportive of the creator.
djlhugs 9066523
May 09, 2012
There seems to be a few steps missing after the glueing... can anyone help, can't wait to do this with the kids I sit for?
mwylie1 0520869
May 09, 2012
I love the craft ideas that I get from this site and as a rule, they are very explicit. What does bother me are the people who have nothing to do but complain about silly little things that have no bearing on the craft itself. Is it really important because someone forgot to put an R into varnish? If you don't understand the instructions, just ask nicely and I am sure someone will explain it to you.
kk22crafts
May 09, 2012
These are very nice beads. I can't wait to try them. Actually, I didn't even notice varnish w/o the "r". I read it as varnish. Our minds do that, you know. Some do. Anyway, did I miss something? I did not see where this tutorial comes from. I'm impressed with it, though. I hope to make some for the October Festival here. Have a blessed day!
smadigan 7444188
May 08, 2012
Well lets see maybe because they came from an undeveloped country of complete poverty most likely written by children...that would much rather be in america....making thoughtless comments by crafters that do this for fun instead of work. You could try it yourself like I did and have been making them already. Your crafters and artists. Figure it out.
melworks 7200395
May 08, 2012
I think the instructions call for VARNISH, not "vanish". LOL. Someone needs to proofread this.
hrbeck98 8817827
May 08, 2012
These instructions are completely useless. How did you get from a large triangle to a skinny strip of paper, as shown? It would be nice if you could redo this with step-by-step illustrated instructions.
Tx Mom of 6
May 08, 2012
The large triangle is the skinny strip of paper. Cut the paper into large (meaning long) skinny (meaning not wide) triangles (meaning wider at one end tapering to a point at the other end). I think that it is completely understandable. I wonder how you critics would do in their situation. I know I would be whining and crying, but they are not....so I think we should be grateful for the instructions that we did get, suck it up and figure it out for ourselves instead of complaining.
Report Inappropriate Comment
Are you sure you would like to report this comment? It will be flagged for our moderators to take action.
Thank you for taking the time to improve the content on our site.