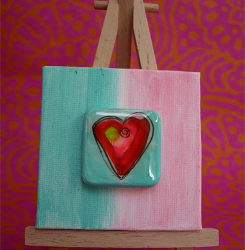
Wax Resist Canvas
Wall decor crafts have never looked this good! Use Cool2Cast to create your own Wax Resist Canvas. This cool craft from Tiffany Windsor can be hung on your wall all year and is so easy to make. Use crayons and acrylic paint to add color to your canvas.

Materials:
- Aleene’s Original Tacky Glue
- Cool2Cast Fibre Plaster
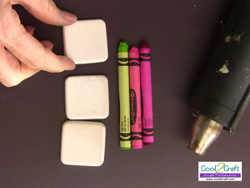
- Mold (I used the Wilton mini brownie bites mold)
- Crayons (colors of your choice)
- Heat gun
- Acrylic paint (colors of your choice to complement your crayon colors)
- Wet wipes
- Art canvas (3″ x 3″ mini canvas)
- Sakura 3D Crystal Lacquer
Instructions:
- Pour the Cool2Cast pieces according to package directions (or purchase pre-poured from the Marketplace at Cool2Craft) and let them dry overnight. Gather your materials and place on heat proof surface. I use a large floor tile.
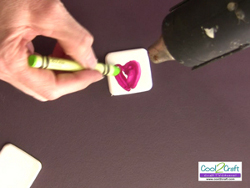
- There are several different ways to apply wax. First, if you have not used a heat gun before, I suggest that you just heat up the Cool2Cast piece until it is warm enough for the wax to melt when applied to the surface. When the wax no longer flows, heat up the surface again and continue to apply the wax.If you are experienced with a heat gun, you can point the heat gun to the surface of the Cool2Cast while moving the crayon around the surface. BUT, only attempt this method if you are experienced with a heat gun because it can get REALLY hot – BURNING hot – if you direct it at your hand rather than the Cool2Cast.
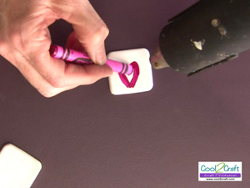
- When desired, change colors to apply more wax to surface of Cool2Cast. Let cool before moving to next step.
- I like to use a wet wipe to apply my acrylic paint to the surface of the Cool2Cast piece. Just dip the wet wipe into the paint and rub onto sides and top.
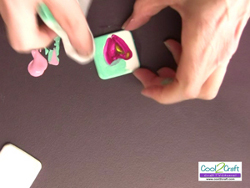
- If desired, apply several different colors of acrylic paint to surface of Cool2Cast. Set aside to dry.
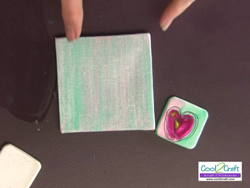
- To color the canvas, you can use the same wet wipe to apply acrylic paint. Add more colors if desired. Let dry.
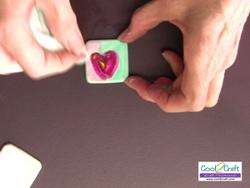
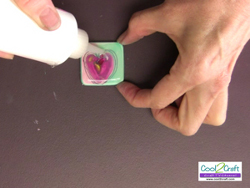
- To apply a glossy coat to the top of my wax resist piece, draw a line of 3D around outside top edge and then fill in until entire top surface is covered. NOTE: Do not touch the tip of the 3D bottle to the surface of the Cool2Cast – keep it raised slightly above the surface. When the 3D is completely dry, it will be clear (this usually takes overnight.) Sometimes it takes two coats to get a smooth surface over the wax resist.
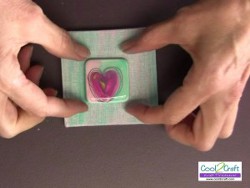
- Position Cool2Cast piece on canvas and glue in place with Aleene’s Original Tacky Glue.
For a comprehensive video tutorial of this project, check out How to Make a Wax Resist Design on Cool2Cast.
Read NextSoda Can Hydrangea DIY Wall Art