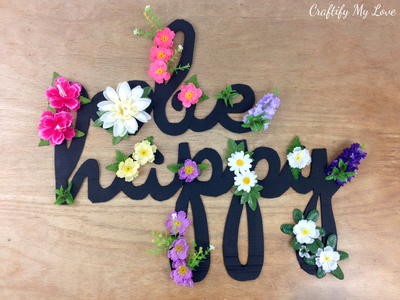
Be Happy Cardboard Sign DIY
Make artificial flower wall decor with a charming sentiment!

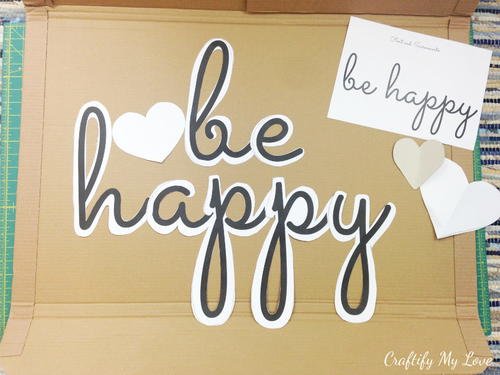
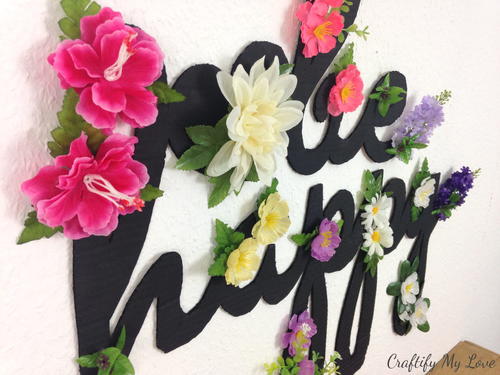
Create the most darling wall art with this Be Happy sign tutorial! If you're looking to add more DIY wall art in your home, this sign is a wonderful option. Celebrate life with the simple sentiment to be happy! Decorate your cursive sign with silk flowers of your choice. You can get all sorts of beautiful silk flowers at the dollar store for next to nothing! When your sign is ready, it will be easy to hang because it's lightweight and made of cardboard. This would be a darling decoration for a craft room, bedroom, or living room. It would even be a great option for a dorm room or small apartment! Choose your favorite flowers and make this sign today with the helpful video tutorial included in this post.
Check out the video tutorial, or scroll further to see the written tutorial with photos.
Time to CompleteIn an evening

Materials List
- Cardboard
- “be happy” Template (you can download it for free here)
- Chalk Paint
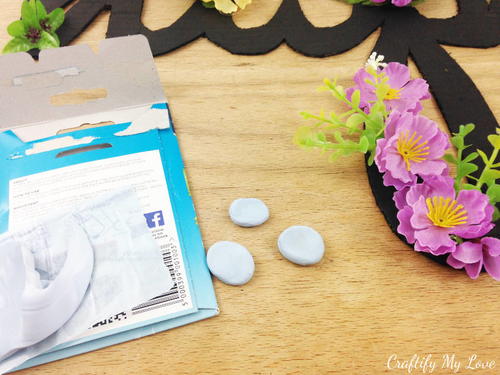
- Reusable Adhesive (I used BluTack)
- Various Silk Flowers (I bought mine cheap in the dollar store)
- Scissors
- Pencil
- Sharp Cutting Knife
- Pliers
- Paint Brush
- Hot Glue Gun + Glue Sticks
How to make a floral cardboard cut-out sign
-
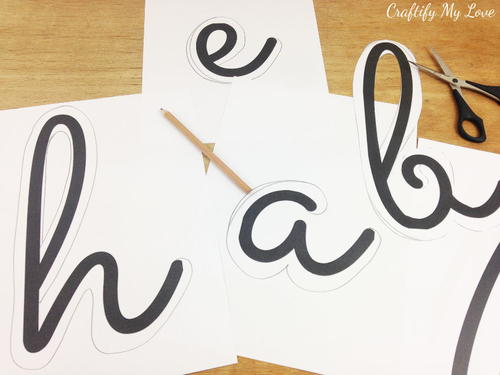
Print every letter for your „be happy“ sign + the heart shape on a single sheet of paper. I recommend you scale one tall letter (e. g. the h) so it fills your sheet of paper from top to bottom. Apply the same percentage of scaling to all the other letters.
-
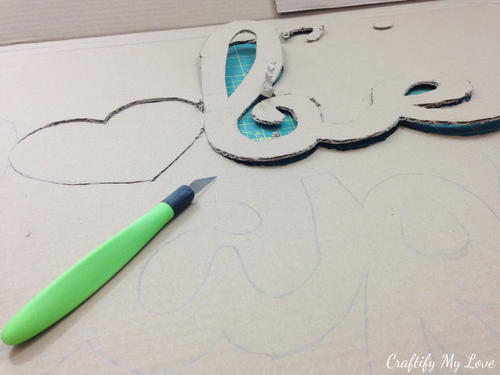
Make the letters even thicker by tracing them with a pencil. Add about half an inch all around.
-
Cut out the letter templates and the heart.
-
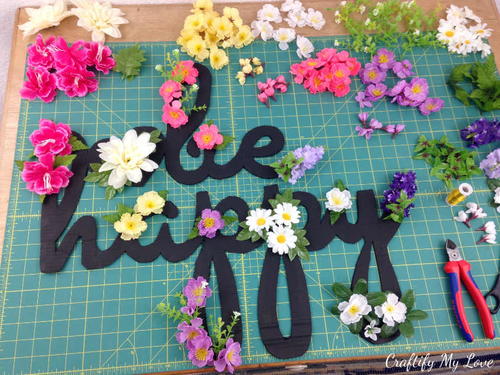
Lay your cut-outs on your piece of cardboard and arrange them to your liking. The heart will be the connection between the two words.
-
Trace the shape of your template on your cardboard.
-
Cut along the outlines of your „be happy“ sign with a sharp knife. Please pay attention to not hurt yourself.
-
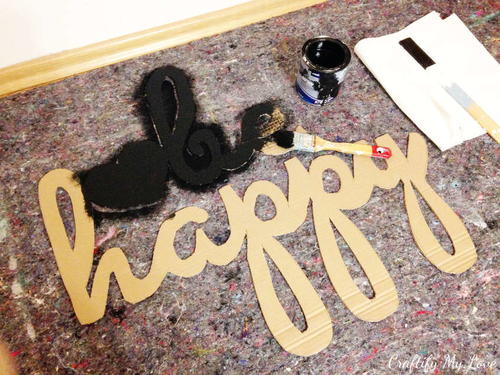
Now it’s the time to paint your sign with a colour of your choice. Make sure it is contrasting with your silk flowers, though, for that WOW effect.
-
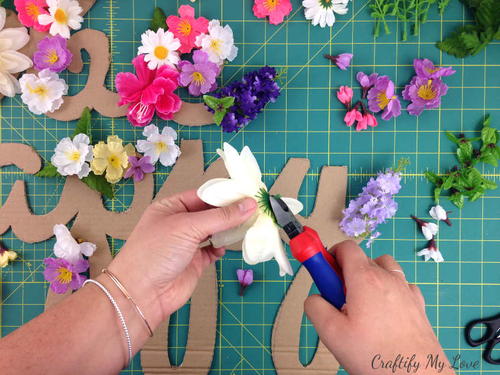
While the paint is drying you can start disassembling your silk flowers. Sometimes you can simply pluck the flowers and leaves from the stems. If need be, use pliers to clip them off.
-
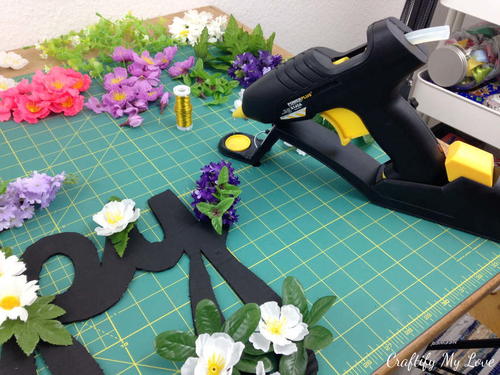
Mix and match different blossoms and leaves and create your very unique flower design. Once you’ve made up your mind about the silk flower’s placement, go find your hot glue gun.
-
I recommend you pick up one flower element at a time and glue it to the sign. This way you won’t forget where to stick the flower to.
-
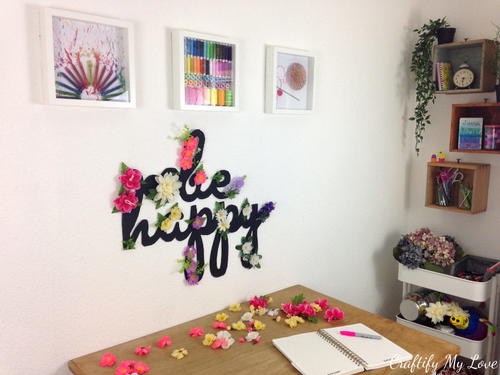
Have you decided where your new „be happy“ sign will live from now on? If so, hang it to the wall using reusable adhesive. The sign is so leight-weight, that this is a totally sufficient way to do so.
-
Now step back and admire your work. I hope this little project will make you smile whenever you walk past it.
Find more of Habiba's projects at CraftifyMyLove.com.
What sentiment or quote would you like to hang on your wall?
Read NextBold and Bright Framed Cross