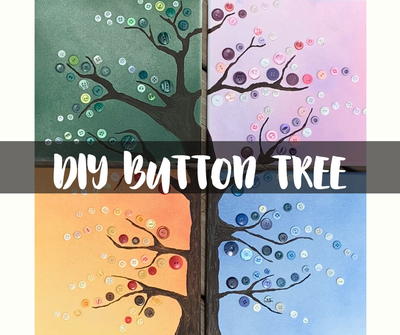
Four Season Button Tree Art

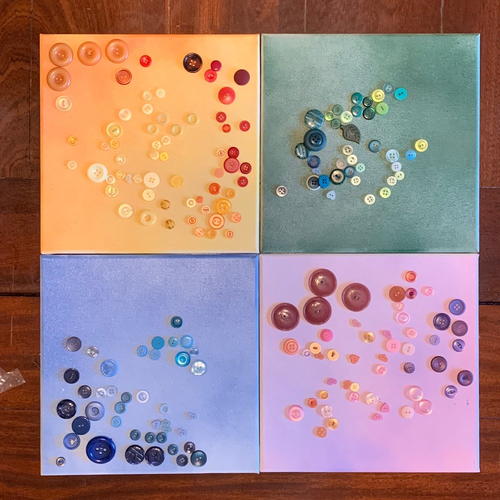
This button tree art project is way too pretty to pass up. Gather your loved ones, because this is a great group craft! Each panel represents a different season, and the colors are chosen appropriately. You'll follow a tree template or freehand it to create the central motif. Arrange your buttons by color. This is the fun part! Have ladies over for a craft night or get the kids involved with placing the buttons. The completed work is a beautiful piece of wall art for your home.
Estimated CostUnder $10
Time to CompleteIn an evening
Main MaterialRecycled Materials

Project TypeMake a Project
Materials List
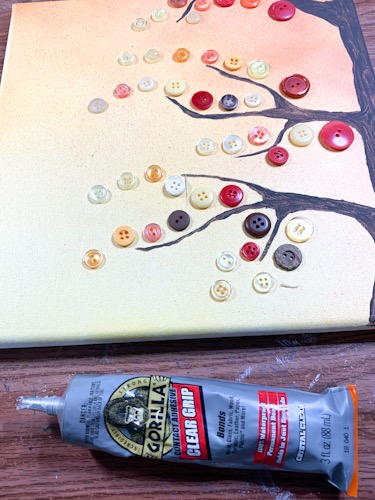
- Buttons (old or new)
- 4 Stretched Canvases of any size - mine were 10 inch squares
- Spray paint - I used light and dark green, yellow, orange, light and dark blue, purple and pink all in a semi gloss sheen
- Cricut or Silhouette machine (not needed if you can draw a tree)
- Contact paper (or Transfer Tape or Press 'N Seal)
- Brown acrylic paint
- Thin paint brush
- Gorilla glue or hot glue
Instructions for the Four Season Button Tree:
-
Unwrap canvas from plastic.
-
Lay out on a drop cloth or do your painting outside in the grass.
-
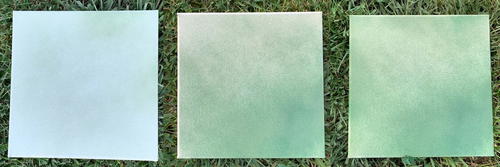
Paint the canvases with a light coat of spray paint in each of your "light" colors. You will end up with 1 light blue, 1 yellow, 1 pink, and 1 light green canvas. Allow to dry.
-
Spray each canvas very lightly with the appropriate darker colors. (Light Blue + Dark Blue, Yellow + Orange, Pink + Purple, and Light Green + Dark Green. Do another light coat of the darker color over one half of the canvas and then another coat on one corner (on the darker half), so you end up with one corner that has 3 coats of the darker color paint. Of course you can paint it more, but this is a good starting technique. Allow to dry.
-
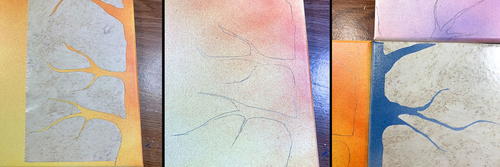
Use a tree SVG to create this image, or freehand draw it. You can use the SVG to cut out a template using card stock or contact paper or just as a basic guide for drawing your tree.
*Note: You can get the free SVG used in this project from her daytodayadventures.com when you sign up for her newsletter -
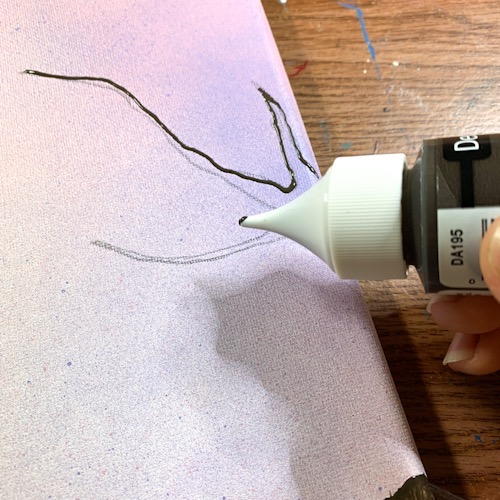
Use transfer tape (contact paper or Press'n Seal) to "pickup" your contact paper template and place it on the canvas. Press it to the canvas & remove the transfer material you've chosen. Be patient with this step—it can be tricky. If you use card stock just lay it across your canvases and hold it down with your hand. Then draw your tree on with a pencil.
-
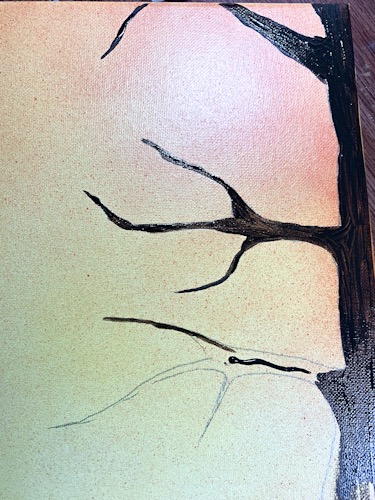
Use your brown paint to fill in the tree. Use a tiny brush or these handy screw on tips for your paint bottle (I got them at Michaels). It doesn't take much paint at all! Allow the tree to completely dry.
-
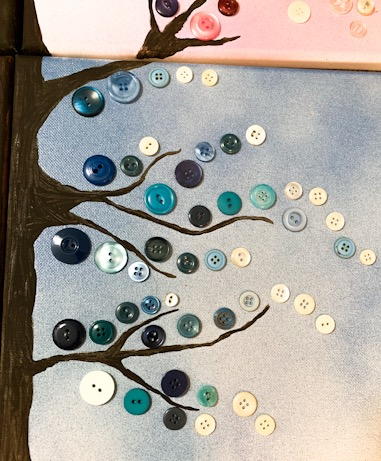
Sort your buttons into colors for each season. Also sort out smaller white buttons.
-
After the canvases are dry, lay the buttons on the canvases to see what colors look good with the seasonal colors that you painted.
-
Begin to arrange the buttons where you like them. Repeat as many times as you need. I added small white buttons to the ends of the colored areas too!
-
Use glue to attach the buttons to the canvases and allow to completely dry.
-
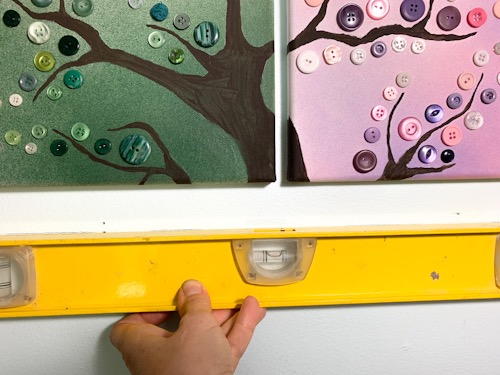
I found hanging the canvases was the trickiest part! Use a level and mark two spots on the wall for each canvas. Two nails keep the canvas level.
Why You'll Love This Recycled Craft
1. Creativity: The Four Season Button Tree Art project allows you to unleash your creative side by choosing colors and arranging buttons to create a beautiful piece of art. Whether you follow a template or freehand the tree motif, you have the freedom to customize the project to suit your style and preferences.
2. Bonding Time: This craft project is perfect for group activities, making it an excellent opportunity for quality bonding time with friends and family. Invite your loved ones over for a craft night or involve the kids in the process of placing buttons. It's a fun and engaging way to spend time together while creating a meaningful piece of art.
3. Home Decor: The completed Four Season Button Tree Art makes for a stunning piece of wall art that can add a touch of charm and creativity to your home decor. With each panel representing a different season and colors chosen appropriately, this project is a beautiful way to showcase your love for crafting and add a personal touch to your living space. Plus, it's a unique and handmade decor piece that is sure to be a conversation starter.