Butterfly DIY Wall Decor
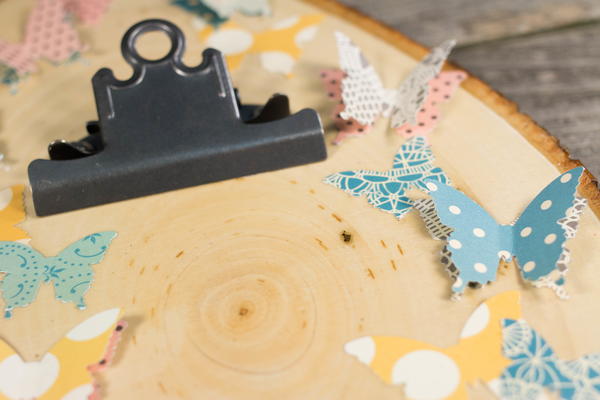
Add some DIY home décor fit for fairies to your space when you learn how to combine paper craft ideas and wood craft projects to create this unique piece of wall décor. The Butterfly DIY Wall Décor projects combines butterfly shapes and a homemade wood clipboard to make a useful organizer and stunning conversation piece. Hang this cutie by the door to store reminders or use it as a frame for one of your family photos. No matter where you hang this rustic wall décor, it is sure to add that whimsical woodland touch you didn’t even know you needed.
Materials List
- Butterfly punches
- Coordinating patterned paper
- Wood blank from Walnut Hollow
- Foam brush
- Clipboard clip (Tim Holtz)
- Upholstery nails
- Hammer
- Collage pauge
Make the Butterfly DIY Wall Decor
-
Punch out variety of butterflies in different sizes from different papers.
-
Decoupage papers onto the board around the edges.
-
Bend some in the middle, only adding decoupage to center and add it to the top of another butterfly for dimension.
-
Once dry, add in clipboard clip, securing with upholstery nails.
-
Add a favorite photo or note and hang it on the wall – add a hanger, ribbon, etc… to hang the way you want.
Read NextBeachy Pom Pom Wall Hanging


Thanks for your comment. Don't forget to share!
flowergirl
Jul 01, 2018
Looking for something seasonal and new for your wall, then try this summer ready craft. It's pretty easy and thrifty to try out. If you have a bunch of crafting paper or scrapbooking paper you can use it to make the butterflies. It's a simple ten minutes craft and your wall is summer ready.
Report Inappropriate Comment
Are you sure you would like to report this comment? It will be flagged for our moderators to take action.
Thank you for taking the time to improve the content on our site.