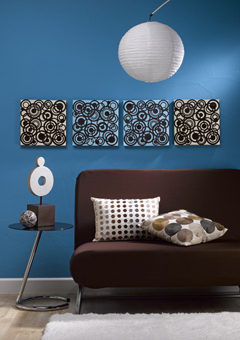
Blue and Brown Circles Wall Art
Create yourself some fabulous wall art to display throughout your home. Using scrapbook paper, acrylics and ribbon you can make your own DIY home decor. Find this project and many more low-cost decorating ideas in the great decor in a flash without a lot of cash eBook from Dow.
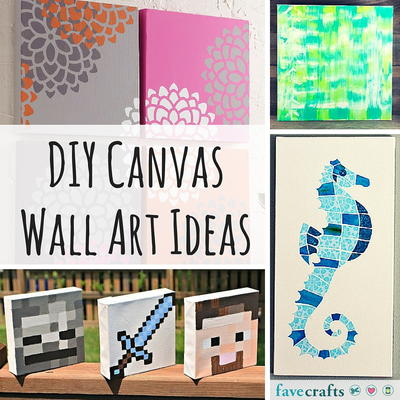
For more great wall decorating designs, check out 19 Cool Wall Art and Decor Ideas.

Materials:
- STYROFOAM™ Brand Foam:
- Sheets, two 36" x 12" x 1" (one sheet yields 3 squares); or four 12" x 12" x 1" squares
- Decorative ribbon, such as grosgrain or velvet, 1" x 1-1/2 yds. per square
- Scrapbook paper: 12" x 12", two blue, two cream
- Circles sheer sheet, four**
- Acrylic craft paint, brown
- Paintbrush
- Carpenter's level
- Low-temp glue gun and glue sticks
- Serrated knife
- Candle stub or paraffin
- Pencil
- Ruler
- Dental floss (optional)
- Scissors
- Putty knife, 1"
- Liquid paper glue or stick-flat paste
- Sawtooth hangers and nails, four, or poster putty
**Circles sheer sheet found on Mayaroad.com
Instructions:
- Paint Circles sheer sheet brown; let dry.
- If using 12" x 12" x 1" squares, skip to Step 3. Wax serrated knife with candle stub or paraffin. Measure and cut each foam sheet into three 12" squares. Or, use dental floss: stand the sheet on its edge, and hold a 20" length of dental floss along the scored line, positioning one hand at the bottom of the board and the other at the top; draw the dental floss down through the foam sheet along the scored line.
- Use putty knife to spread thin, even coat of glue on foam square. Center one sheet of paper on pasted foam; smooth paper with fingers. Repeat to cover all foam squares. Let dry. (Hint: Papers might appear wavy at first, and will smooth out as the glue dries.)
- Using glue gun, glue Circles sheer sheet onto paper-covered squares; let dry.
- Beginning and ending at one lower corner, use glue gun to secure ribbon around edges of each foam square; trim excess, allowing a bit of overlap.
- Use level and poster adhesive to secure squares to wall as shown. Or, glue sawtooth picture hanger to back. For additional hold, insert and glue two straight pins through holes in sawtooth picture hanger.