
This project was submitted by one of our readers, just like you.
Twine Wrapped Tin Can And Top Diy
"It's fun to recycle ordinary household items like tin cans that you've rescued from trash, especially in these trying times! I created this twine wrapped tin can and top especially for the "Entry for Stay Home and Craft Challenge." I love collecting tin cans and finding new ways to re-use them! It's unbelievable all the things you can make using cans. Some very useful and decorative like this wrapped can with a top! Perfect to hold,store or hide craft supplies - or whatever you want! And the best part, you probably have everything you need to make one! "
Primary TechniqueGreen Crafting

Materials List
- Tin can
- Cotton twine (asst. colors)
- Tacky glue
- Styrofoam ball
- Plastic Clingwrap
- Scissors/pencil/tape measure
- Round wood ball/super glue
- Clear plastic sheet/flower pattern
Instructions
-
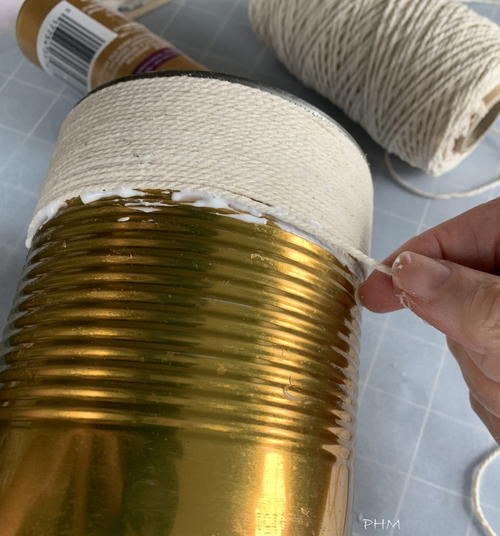
Start with a clean can free of dirt and grime. Make sure there are no sharp edges!
-
Smear on a generous amount of tacky glue just below the top edge and begin wrapping twine tightly around the can.
-
Push the twine rows close together and straight. Apply additional glue as you wrap until reaching the bottom. Cut off excess twine making sure the end is secure with glue.
-
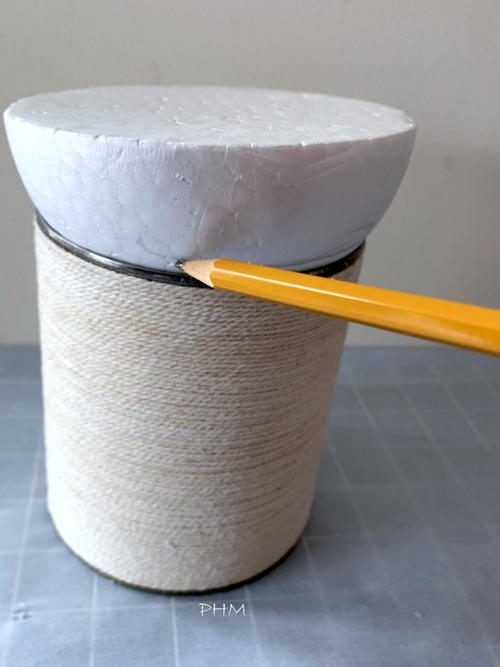
For the top: Measure across can opening and take a styrofoam ball (I had a half 4"ball) that fits just inside the top. Make sure it sits straight and level. Then draw a pencil line around ball where top of can meets.
-
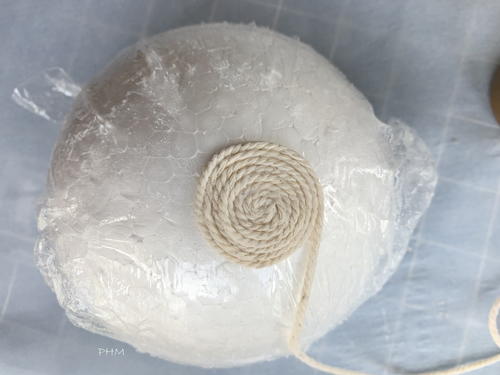
Wrap the ball in plastic wrap, securing it at bottom and then place a dollop of tacky glue on the center top. Place end of twine in glue and begin wrapping tightly around styrofoam.
-
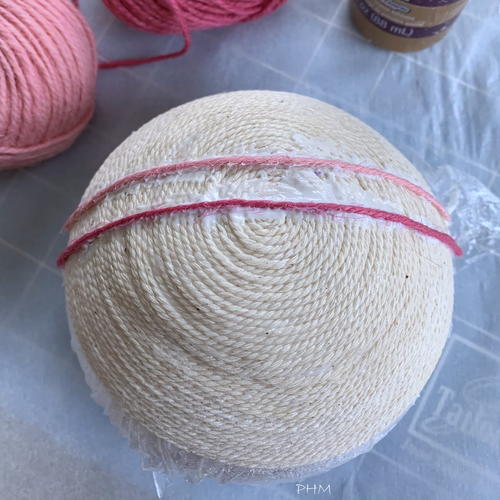
Continue wrapping twine around the styrofoam, adding glue to twine as you wrap. Be sure to keep the rows straight and together until reaching the pencil line. Cut off excess twine and secure with additional glue. Let dry.
-
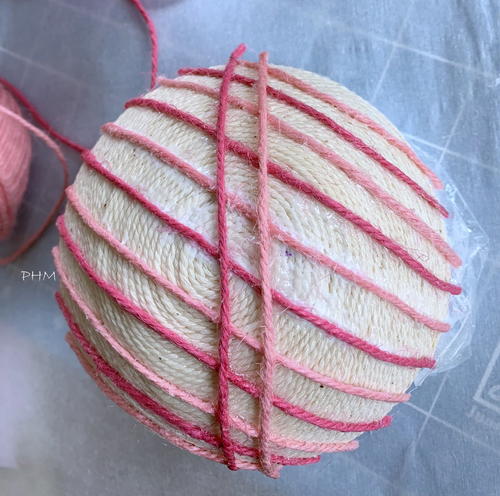
For a decorative look on top, cut lengths of colorful twine, measuring across top, end to end. Slather a line of glue across top and place twine on the glue, smoothing it down for a good connection.
-
Continue adding glue and pieces of twine along the top, evenly spaced until the area is covered in twine lines.
-
Next, add glue across the twine in a slanted pattern starting at the center top. Place pieces of twine down and across the first lines until the top is covered in a criss-cross design. Let dry.
-
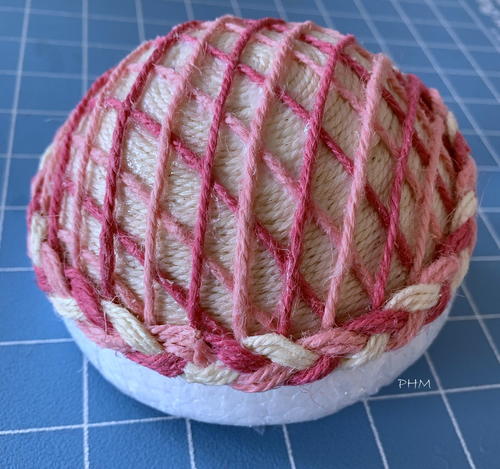
Then, measure around the base of the top and can, adding a few extra inches for overlap to braid the twine. For the braid, cut off three strands of three different colors of twine to braid.
-
Once braided, saturate the twine with tacky glue where it starts and ends around the top base and can bottom so the braid won't unravel when cut. Let dry. Glue on the braid at the base of top and also on the base of the can. Then loosen the plastic wrap from the styrofoam and remove the top. Then cut off excess twine strings around the base.
-
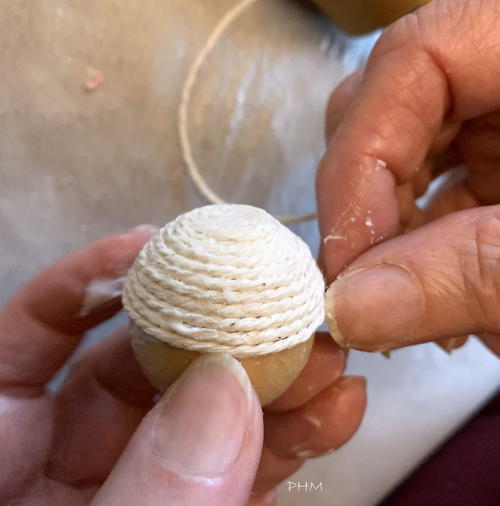
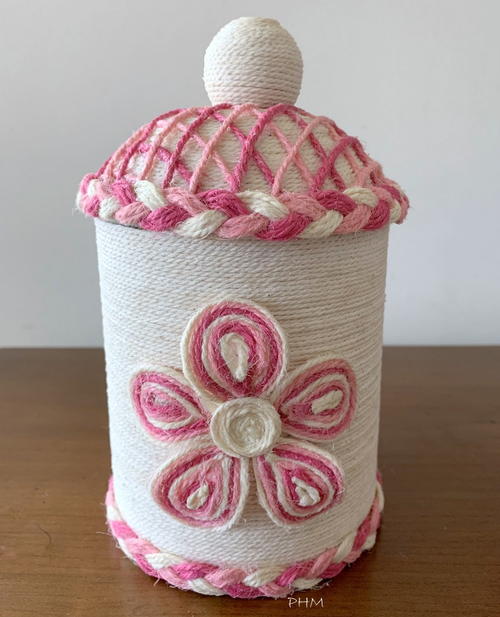
Wrap a wood ball with twine starting in the center the same way as the top and let dry. Glue wrapped ball in the middle of top with super glue.
-
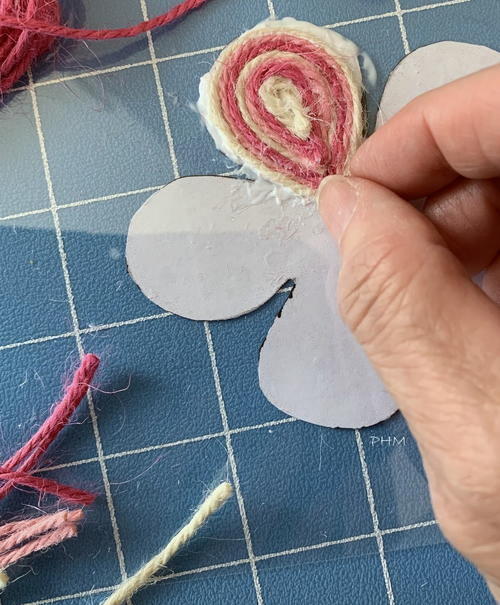
To add a decorative twine flower to the front of the can, take a simple flower paper pattern and place under a clear plastic sheet. Add a generous amount of glue around the petal shape (on plastic) and cut strips of twine to wrap around the petals in the glue. Alternate twine colors and glue together around the petal until filled in. Repeat for each petal and let dry.
-
Remove petals from plastic and glue together on the front of the can in a flower design. Twirl an eight inch strip of twine in a circle and secure with glue. Place in center of petals on top of a dab of glue and let dry.
-
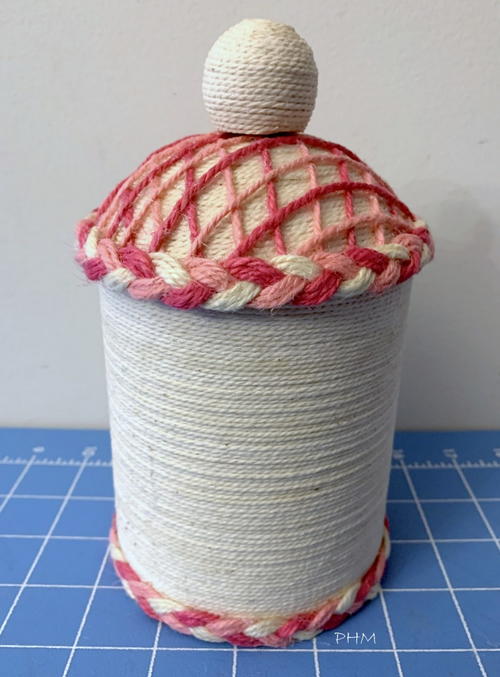
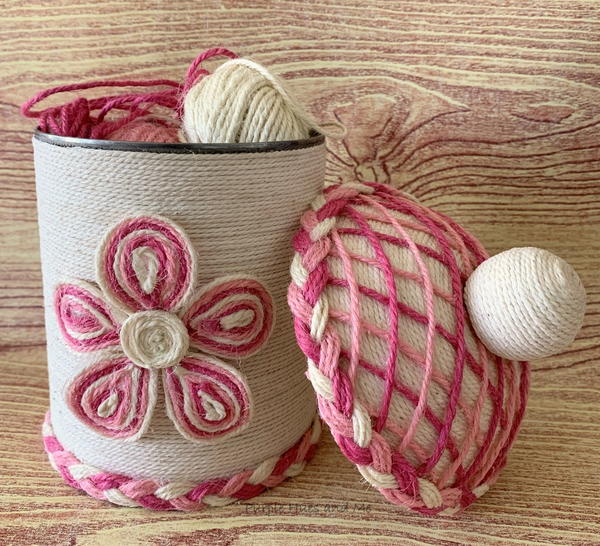
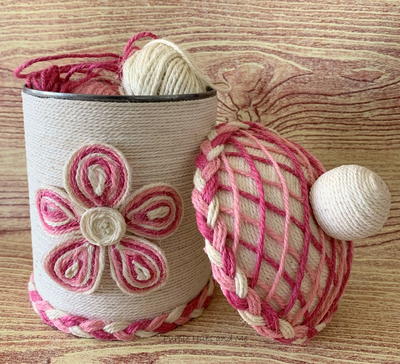
Ta da, it's done! A super decorative storage solution made with things you have on hand!


![Gratitude Letter [free printable]](http://irepo.primecp.com/2020/04/444332/gratitude-letter-01_Large400_ID-3654510.jpg?v=3654510)