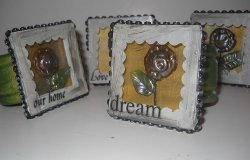
Clay Floral Napkin Rings
Tired of boring napkin rings? Can't find what you're looking for in a store? Make Clay Floral Napkin Rings from Melony Bradley instead! This molding clay craft is creative, pretty and perfect for spring! Make these for your next dinner party.
Materials:
- Wood napkin ring
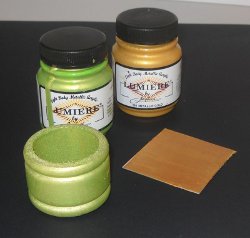
- Jacquard's Lumiere paint
- 2" wood square
- Jacquard's Cernit clay
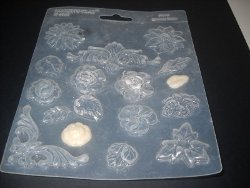
- Clay push mold
- Aleene's Original Tacky Glue
- Small wire scrap
- Elmer's Foam Core Board
- Glass slides
- X-acto knife
- Scalloped edged scissors
- Self adhesive scrapbooking tape
- Silver Pearl Ex
Instructions:
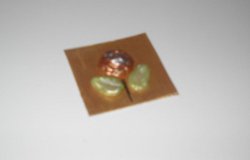
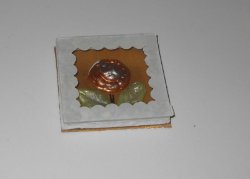
- I painted a wood napkin ring with Jacquard's Lumiere paint in Citrine Green. I painted a 2" wood square Metallic Gold. Both of these wood products can be purchased at most craft stores in the wood working and turnings section.
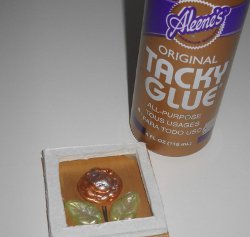
- Next, condition some of Jacquard's Cernit clay in porcelain white. Pinch off a dime sized piece and press into a clay push mold, like the one used here from Makins Clay. Pinch off a pea sized piece of clay and press into a leaf shaped mold.Repeat to make a second leaf.
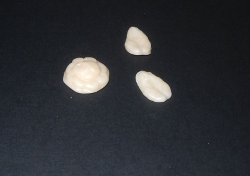
- Now bake these pieces according the directions on the package. Remove from the oven and allow them to cool a little.
- I chose to paint my leaves Citrine Green and my flower Metallic Bronze Lumiere paints. I used Aleene's Original Tacky Glue to glue them to the painted wood square, along with a small wire scrap which serves as a stem. This will be the frame backing.
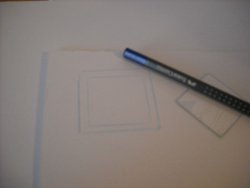
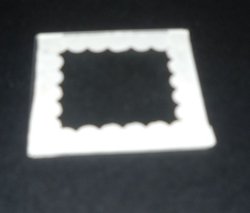
- To create the shadow box frame, trace a 2" glass slide onto a piece of Elmer's Foam Core Board. Center a 1 1/2" glass slide (or a piece of card stock cut to those measurements) in the center of the 2" square.
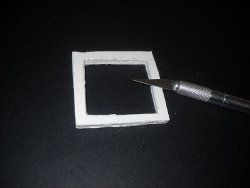
- Use an X-acto knife to carefully cut around the traced lines. Try to stay on the line as much as possible and make several passes through the foam core instead of trying to cut it all the way through in one pass. If you get uneven edges, use a nail file to sand even.
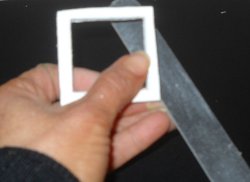
- Using scalloped edged scissors, cut an 8" long piece of self-adhesive scrapbooking tape. It does not matter which print or color you use as long as it has a white backing since this is the part that will show through the window.
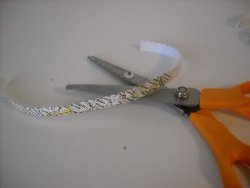
- Cut the 8" strip into four 2" pieces and peel off the backing. Place the pieces, overlapping if needed, onto the frame.
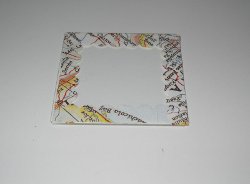
- Now when you flip it over, you have the side that the fancy clay floral will be peeking through.
- Using the tacky glue, glue the foam core frame to the wood square.
- Next, glue the glass slide, sticker side down, to the foam core by placing a little tacky glue to the sides of the foam core.
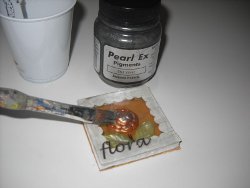
- Now finish your fancy clay floral napkin ring by dry brushing the glass slide with Silver Pearl Ex (mixed with varnish in a 1:1 ratio) and add a little rub on to the bottom.
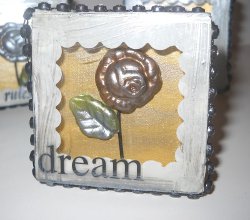
- Glue your napkin ring to the back of the shadow box to finish! I glued a small strip of rhinestone trim to the sides of the shadow box to hide any rough edges.
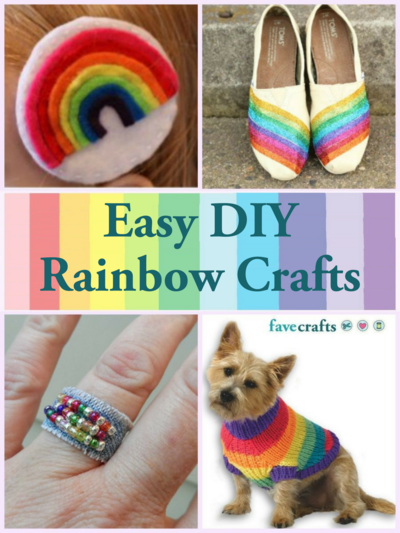
Read Next21 DIY Rainbow Crafts