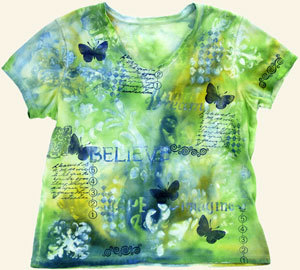
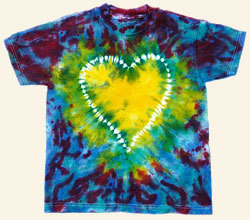
Tie Dye Heart Pattern
Peace, love and tie dye. Bring back the spirit of the 1960s with this stitched tie dye heart pattern t-shirt from Jacquard Products. With an embroidery heart and bright colors, this shirt is sure to attract positive attention. This craft will teach you how to tie dye hearts, and all the tie dye instruction to create more colorful clothing.

Materials:
- Jacquard Procion MX dyes—Golden Yellow, Magenta, Bright Blue
- 100% cotton T-shirt (pre-washed)
- kite string
- Soda Ash
- measuring cups and spoons (use for dyeing only)
- Three squirt bottles
- paper towels
- rubber gloves
- dust mask
- plastic bags (I like gallon sized zip-locks)
Steps:
- Prepare your work area by spreading plastic sheeting over your work table and secure it with some tape.
- Soda Ash Soak. Dissolve 1 cup of soda ash in 1 gallon of water. The soda ash dissolves easiest in hot water, allow the water to cool before soaking the shirt(s). Soak the shirt(s) for at least 20 minutes. (You can leave them in for longer—overnight won’t hurt anything). Remove shirt(s) and wring out. Save the soda ash solution, it can be used again, even after a month or more (actually it will keep indefinitely. You would probably get tired of storing it—the stuff just doesn’t go bad).
Stitching: - There are a couple of different ways to approach this design. I will go over them both. One method is to place a damp shirt flat on the table, front side up. Align seams at sides and shoulders, smooth out wrinkles and use an auto-fade pen to draw a heart. Here’s an opportunity to be creative! You could center the heart on the front of the shirt (as I have done in this example), but what about putting it off to one side or just on one sleeve? You could even draw a row of little hearts around the neckline or hem.
- After you have drawn the heart, baste along the line with kite string. I like to start at the top center of the heart and baste down to one point, then baste the other side with a separate piece of string. Stitching through both layers of the shirt will create the image on the front AND back of the shirt. You could stitch through a single layer, which would create the image only on the side you stitched.
- Remove the needle and pull strings at top and bottom of heart to gather.
- Keep pulling as tight as possible, pulling the center of the heart up as you go.
- Wrap the ends once or twice around the lines of stitching (now gathered up tightly) and tie.
- The second method is different only at the very beginning--fold the shirt in half, smooth out wrinkles, align seams at sides and shoulders. Using an auto-fade pen, draw one half of the heart on the center fold of the shirt, baste (through all four layers) and tie as above. This method will create a heart that is symmetrical rather than free form.
Dyeing:
- Safety. Any powdered dye can cause a reaction if inhaled. Take the following precautions:
- Wear a mask
- Work in a well-ventilated but draft free area without fans or AC running.
- Wear rubber gloves and old clothes
- Measuring and mixing containers should be used for dyeing only. Do not use for food afterwards.
- Dye Recipe
- One cup water
- Two teaspoons dye (double this amount for darker colors-especially black)
- I like to mix the dyes in a measuring cup. Place the powdered dye in the bottom and add a bit of water to make a paste. Add a drop or two of Synthrapol,if desired, to help disperse the dye (don’t be concerned if you haven’t any Synthrapol—it’s completely optional). Gradually add more water until the entire cup has been used. Pour into a squirt bottle. I like to label the bottle, many colors look similar in solution. Note: Hard water will affect the quality of color you can achieve. For brightest results, use distilled water.
- Applying the dye. Be generous with your dye application to get rich, blended colors. Keep paper towels handy to mop up extra dye as you go, otherwise you could end up with color combinations you don’t want on your shirt! Apply a generous amount of Golden Yellow in the center of the heart design, including the stitched area. Apply Bright Blue at the stitching line, this will blend with the Golden Yellow to create the green around the heart. Squirt Magenta in a random pattern on the other areas of the shirt, front and back then fill in any un-dyed area with Bright Blue. Squeeze the outside areas of the shirt (not the stitched heart portion) to blend the colors a bit more. Place the dyed shirt in a zip-lock bag and let sit for 24-48 hours in a warm place (but not in direct sunlight).
- Rinse and launder. After 24-48 hours, remove shirt from the zip-lock bag and rinse in cool water. Carefully cut the strings and continue rinsing, gradually increasing the temperature of the water until it is hot. When the water is almost clear you can stop rinsing. Wash the shirt with liquid detergent in a washing machine set for hot wash/cold rinse. Hang or machine dry.
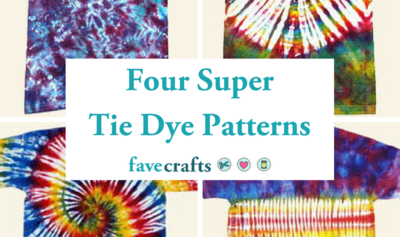
Read NextFour Super Tie Dye Patterns
Your Recently Viewed Projects
Thanks for your comment. Don't forget to share!
Report Inappropriate Comment
Are you sure you would like to report this comment? It will be flagged for our moderators to take action.
Thank you for taking the time to improve the content on our site.