Dog Lady Tee Shirt
There's no better bond than a lady and her dog, and with this Dog Lady Tee Shirt, you can show off your best friend in style! Created with a simple stencil design, this tee shirt craft is a great way to show your love for your pup. You could also create this design on a tote bag or the back of a jacket.
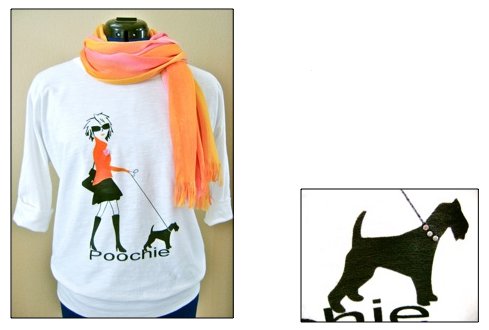
Materials:
- Aztek airbrush
- Orange paint
- Black paint
- Craft knife
- Painters tape
- Decorative silver bead
- 4 rhinestones
- Card stock
- Repositionable stencil spray
- Fine black permanent marker
- Pink permanent marker
- Small square of netting
- Thread
- Scissors
- White shirt
- Printer
- Stencil 1
- Stencil 2
Instructions:
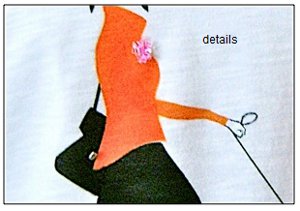
The elements that are created with the black marker are the nose, the hand, the leash, and leash loop.
-
Print out both stencils on card stock. The total height of the stencil is 11” so it cannot be printed out on one page. One stencil will be used for the head, upper body, arm, and lettering. The other stencil includes the skirt, legs, boots, purse and dog.
-
Find the center of the shirt and use an iron to mark it with a light crease. This will guide you in positioning the image.
-
Cut out the shapes on the stencils with a craft knife and save all the cut pieces. Do not cut out the purse portion of stencil #1. It is there as a placement guide only. Spray the back of the stencils and pieces with repositionable adhesive spray.
-
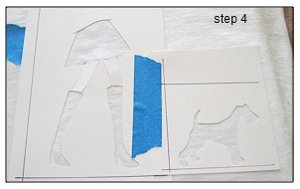
Position the bottom portion of the stencil on the shirt. Attach the cut out leg pieces between the boots and skirt to mask it from paint.
-
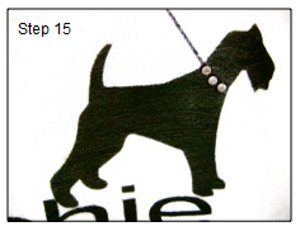
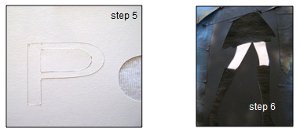
Position the lettering so that it’s just touching the bottom of the boots and the back foot of the dog. See the finished shirt image for placement. Be sure to replace the cutouts for the “p”, “o”, and “e”. Spray the open areas black.
-
To create the outlines for the legs, remove the leg cut out pieces.
-
Reposition the pieces with a narrow space between the long edges of the cut out and the long edges of the stencil. Spray with black paint. Repeat that for the other three lines that will define the legs.
-
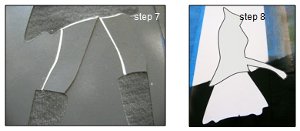
Attach stencil #1 to the shirt. Cut out the skirt shape from stencil #2 or use a new one cut from card stock and sprayed with adhesive. Place the piece over the painted skirt. Cover the hand with masking tape. Spray the open areas with orange paint.
-
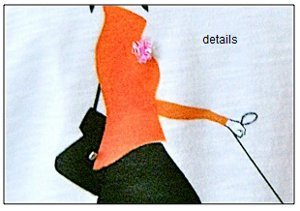
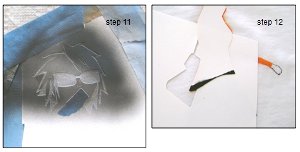
To draw the hand, remove the tape. With a fine black permanent marker, place dots following the shape of the hand portion of the stencil. When the stencil is removed, draw the outline of the hand following the dots.
-
Cover the head leaving only the lips exposed. Paint them orange.
-
Uncover the hair and glasses and cover the lips with tape. Paint the hair and glasses black.
-
Position the purse stencil on the shirt. Mask the painted jacket with the cutout. Spray the purse black.
-
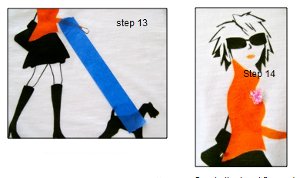
To draw a straight line for the leash, place a piece of tape from the hand to the dog. Align a ruler on the edge and draw the leash with a black marker. Add a little loop above the hand for the end of the leash.Create the lapel flower, by cutting a half-inch square of netting. Dab it lightly with a pink marker to give it color. Tie the center of the fabric with a piece of thread and knot it to create a sort of bow. The threads will help you to handle the flower.
-
Use Fabri-Tac glue to attach the flower onto the jacket. When it is dry, trim the flower to the appropriate size with scissors and cut off the threads. Attach a rhinestone on the woman’s ring finger and little metal bead to act as a clasp on the purse with Dazzle-Tac glue.
-
Glue rhinestones at the dog’s neck to create a collar.
