Simple Crossbody DIY Water Bottle Sling Tutorial

Create a gorgeous DIY water bottle sling using leftover materials! This is a great project for using up fat quarters or even fabric scraps. If you're tired of holding your water bottle while hiking, go hands free with this project. This is a simple sewing tutorial that is such a practical solution for a common problem. Select your favorite adorable fabric to make a water bottle sling that is uniquely you. This is also a wonderful gift idea for that nature-loving friend! The cute tie is a wonderful finishing touch.
From the Designer: "This is an easy and practical way to keep your water bottle close at hand (but not IN hand) while getting a little exercise. It’s also a great project for fat quarters, or even leftover scraps of fabric, as the pieces are fairly small."
Be sure to ENTER TO WIN the Monaluna Fat Quarter in Saturday Print to use for making this project! Leave a comment on this page and you will receive a bonus entry. Plus, don't miss the grand prize giveaway including one of each prize featured in the 12 Days of Christmas in July!
Project TypeMake a Project
Time to CompleteIn an evening
Sewn byMachine

Materials List
- 1/3 yard sturdy fabric for bottom, base and strap. I used hemp muslin for this, but you can also use poplin or quilting cotton with stabilizer, canvas, denim, or you can reinforce by using 2 layers of fabric.
- 1 10x13” piece of printed fabric for top (poplin, quilting cotton or canvas works well)
- 1 small scrap of interfacing or stabilizer (can also be an extra scrap of fabric)
- 1 long ribbon, cord or scrap of fabric to make the tie, 24”+
- Eyelets of grommets (or you can sew buttonholes)
Instructions
Cut Pieces
Bottom: cut 1 4” circle
Base: cut 1 5x13” rectangle
Top: cut 1 10x13” rectangle
Strap: cut 1 5x34” rectangle (Note: this size worked for me as a comfortable cross-body length. However, because the strap won’t be adjustable, you can use a measuring tape or measure a string to 34” and make sure this size works for you. If not, adjust accordingly.
Procedure
-
Sew the strap: with right sides facing, sew the long edge of the strap with a 1/2 ” seam allowance to form a long tube. Turn and press. If you’re not familiar with tube-turning, a chopstick or other turning tool can help with this.
-
Join base to top: with right sides facing, sew your base fabric to your top fabric along the 13-inch edge. Open and press the seam down toward the base. Then, on the right side of the fabric, top stitch 1/8” from the seam on the base side, securing the seam allowance in the stitching. This will strengthen the seam and keep the seam allowance pinned in place.
-
Create fold lines for later step: at the top edge, fold the edge ¼” to wrong side and press, and then 1 additional inch and press, creating a channel. Do not sew yet (this will make it easier when you get to that step).
-
Create the tube: with right sides facing, sew the side edges with a ½” seam allowance to form a long tube. Press seam open.
-
Sew the tube to the bottom circle (including one end of the strap in the seam): with wrong sides of the side tube out, slip one end of the strap inside the tube and center it over the side seam at the lower edge, matching raw edges. Then, sandwich the strap between the lower edge of the side tube and an edge of the bottom circle and pin in place. Continue matching the lower edge of the side tube to the edge of the circular base with right sides facing and pin all the way around. Stitch with a ½” seam allowance.
-
Insert grommets, eyelets or buttonholes: using water-soluble ink or chalk, mark the center front by flattening tube and marking opposite center back. Apply fusible interfacing or stabilizer to the center front, just under the second fold line. This is where you will insert 2 parallel grommets or eyelets, or sew 2 small buttonholes to accommodate the tie.
-
Sew the channel (including the top edge of the strap): once your grommets are inserted just below the second fold line, with wrong side of the sling out, fold the top to the wrong side along the ¼” line, then again along the second fold to form the channel. Pin in place. Being careful not to twist strap, pull the loose edge up and slip it underneath the lower edge of the channel, centered over the side seam of the tube, and pin in place. Stitch close to the lower edge of the channel, making sure to catch the strap in the seam. Turn the sling right side out and topstitch the upper edge of the channel over the strap to hold in place.
-
Make the tie (optional): If you are not using pre-made ribbon or cord, cut a long, 1-inch wide strip of fabric that coordinates with your print. Mine was about 36 inches, but it should be at lease 24 inches. Fold each long edge ¼” to wrong side, so that edges meet at the center. Press. Fold the strip in half the long way, so the edges are encased and the strip is now about ¼” wide. Stitch close to the open edge. This will be your tie.
-
Using a small safety pin, thread the ribbon/cord/tie through one grommet, around the channel, and out the other grommet. Tie knots at each end of the tie.
-
Fill up your water bottle, sling it on your back and get out there!
Contest Rules:
- There is a maximum of one extra entry per person. The extra entry will be based upon a comment left on this post. Duplicate comments are not tallied.
- The winner will be selected at random from the comments on this page and the entries on the contest page.
- The winner will be contacted on the morning of August 1st, 2019.
- Email Address provided in their account (please do NOT leave your email address in the comments--you already provided it when you created your account)
- You have until July 31st, 2019 at 11:59pm EST to leave your comment on this post. Comments posted after that will not be counted.
- Contest open to anyone 18+ in US and/or Canada. Excludes Quebec and Puerto Rico.
What objects or scenes would you like depicted in fabric form?
Answer below to receive an extra entry to the contest!
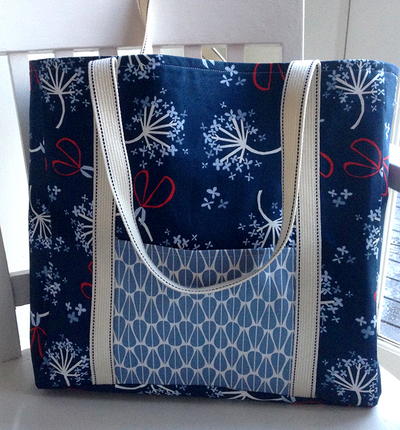
Read NextSimple Life Tote Bag Tutorial


Thanks for your comment. Don't forget to share!
Report Inappropriate Comment
Are you sure you would like to report this comment? It will be flagged for our moderators to take action.
Thank you for taking the time to improve the content on our site.